FUNCTION (continued)
Photo Input Function
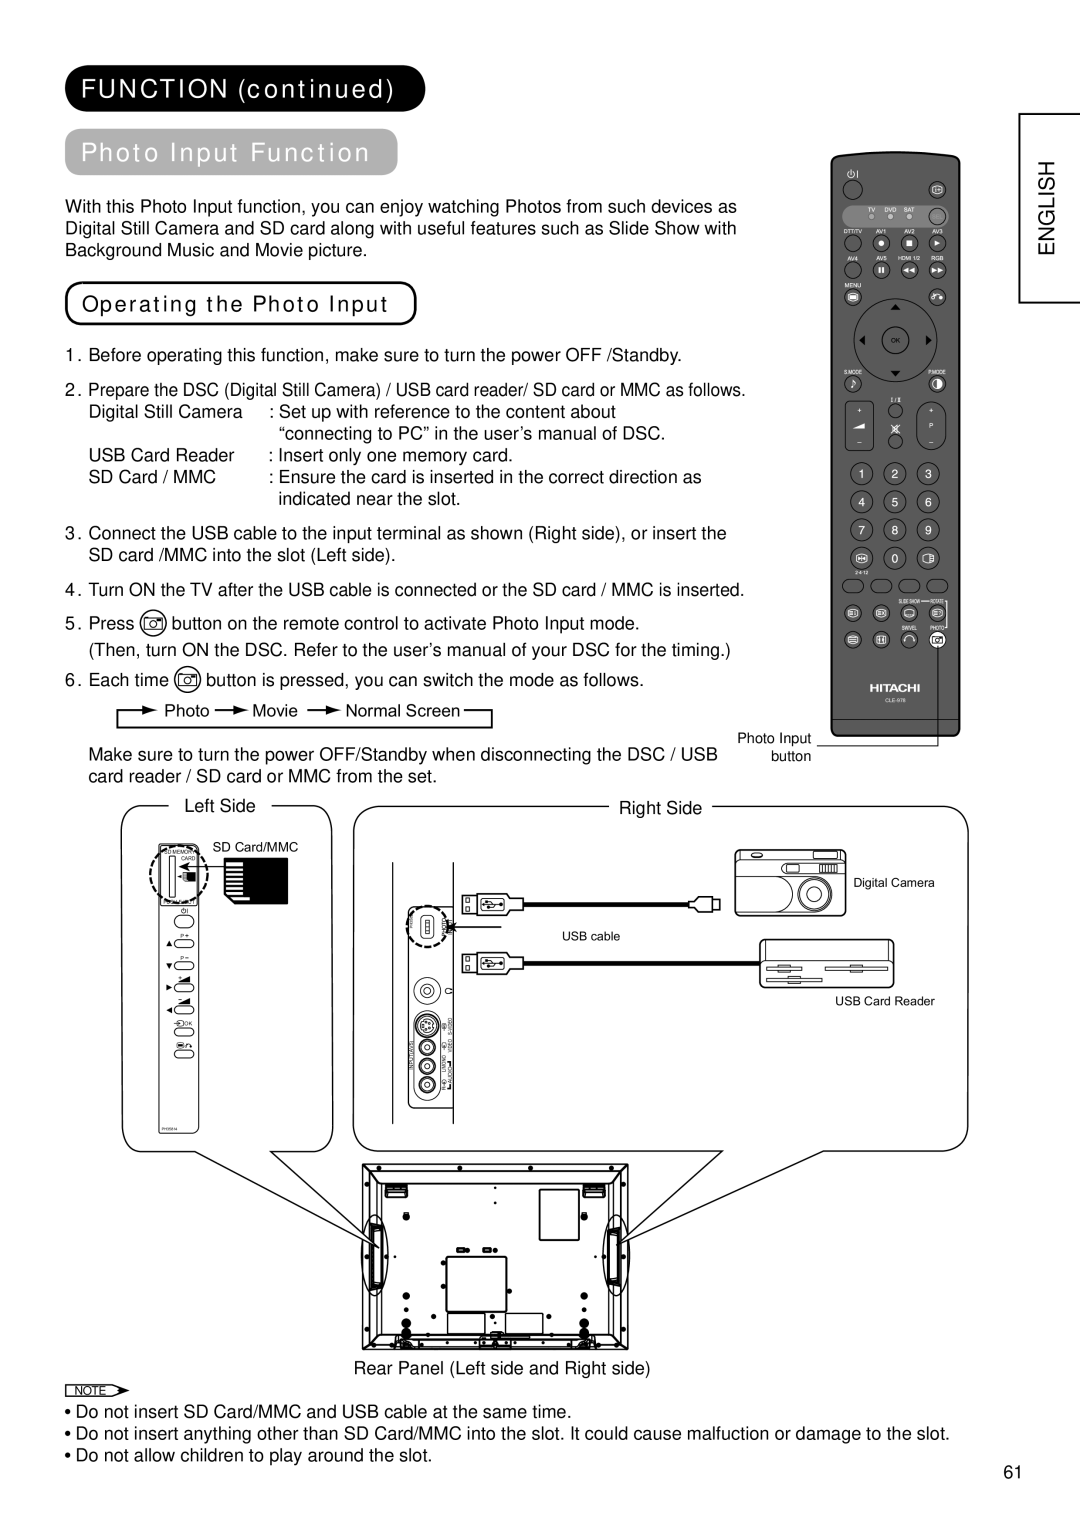
With this Photo Input function, you can enjoy watching Photos from such devices as Digital Still Camera and SD card along with useful features such as Slide Show with Background Music and Movie picture.
Operating the Photo Input
1. | Before operating this function, make sure to turn the power OFF /Standby. | ||
2. | Prepare the DSC (Digital Still Camera) / USB card reader/ SD card or MMC as follows. | ||
| Digital Still Camera | : Set up with reference to the content about | |
|
|
| “connecting to PC” in the user’s manual of DSC. |
| USB Card Reader | : Insert only one memory card. | |
| SD Card / MMC | : Ensure the card is inserted in the correct direction as | |
|
|
| indicated near the slot. |
3. | Connect the USB cable to the input terminal as shown (Right side), or insert the | ||
| SD card /MMC into the slot (Left side). | ||
4. | Turn ON the TV after the USB cable is connected or the SD card / MMC is inserted. | ||
5. | Press | button on the remote control to activate Photo Input mode. | |
(Then, turn ON the DSC. Refer to the user’s manual of your DSC for the timing.)
6.Each time ![]() button is pressed, you can switch the mode as follows.
button is pressed, you can switch the mode as follows.
![]() Photo
Photo ![]() Movie
Movie ![]() Normal Screen
Normal Screen
Photo Input
Make sure to turn the power OFF/Standby when disconnecting the DSC / USB button card reader / SD card or MMC from the set.
ENGLISH
Left Side
SD MEMORY | SD Card/MMC |
CARD |
|
P![]()
P
![]() OK
OK
Right Side
Digital Camera
PH35826
USB cable
USB Card Reader
|
| |
INPUT(AV5) | L/MONO | AUDIO VIDEO |
| R |
|
PH35814
Rear Panel (Left side and Right side)
NOTE
![]() Do not insert SD Card/MMC and USB cable at the same time.
Do not insert SD Card/MMC and USB cable at the same time.
![]() Do not insert anything other than SD Card/MMC into the slot. It could cause malfuction or damage to the slot.
Do not insert anything other than SD Card/MMC into the slot. It could cause malfuction or damage to the slot. ![]() Do not allow children to play around the slot.
Do not allow children to play around the slot.
61
