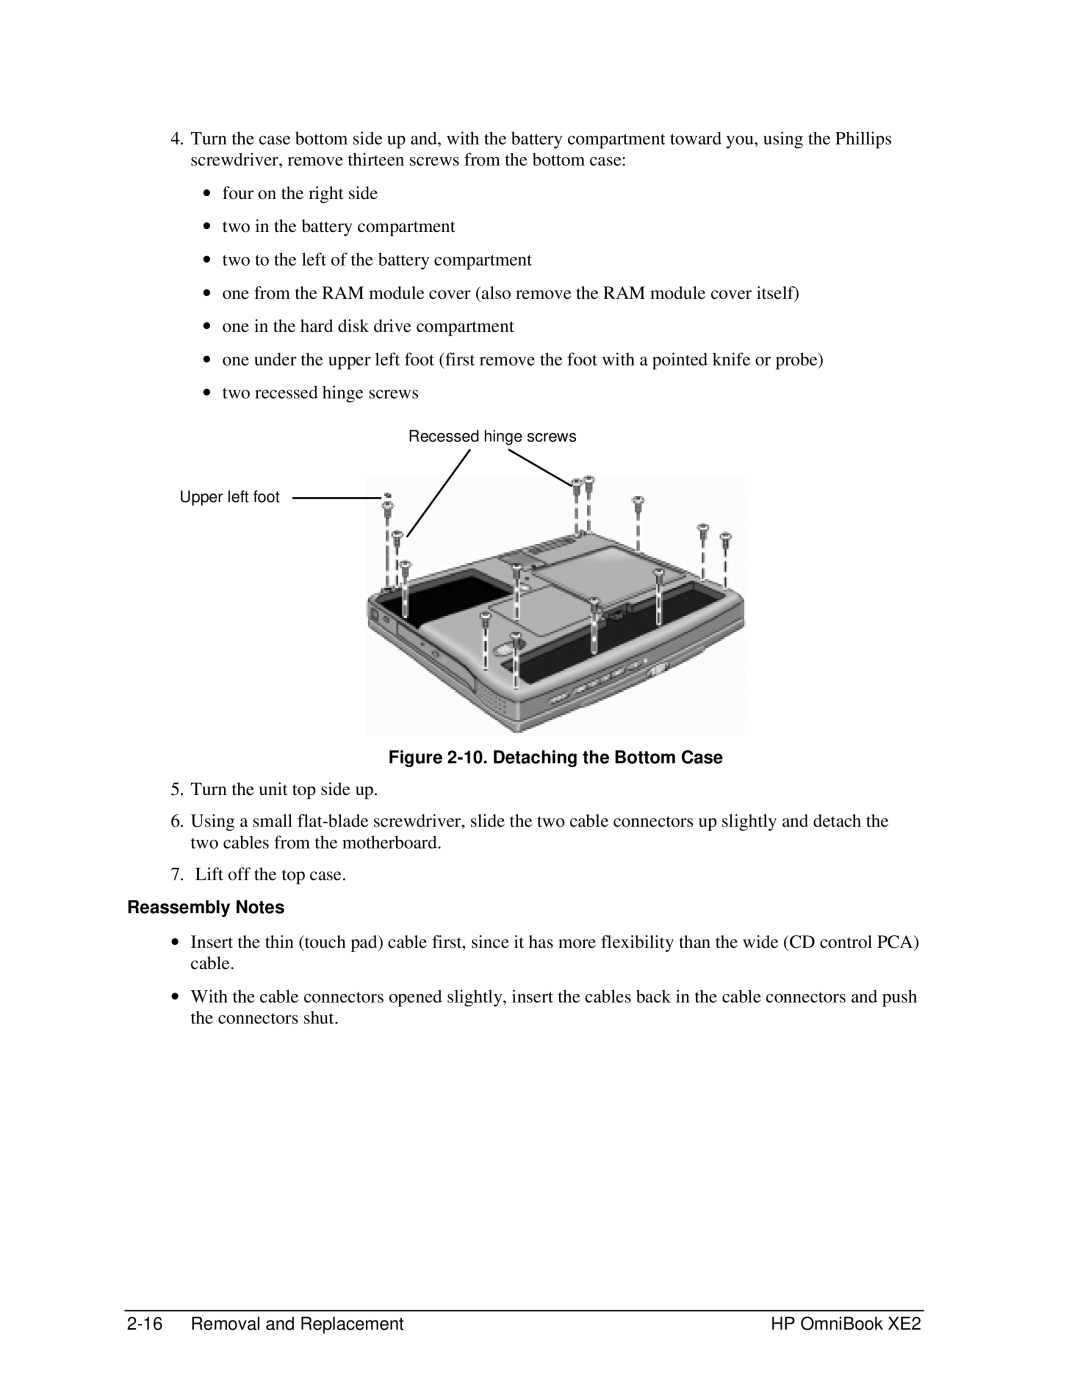
4.Turn the case bottom side up and, with the battery compartment toward you, using the Phillips screwdriver, remove thirteen screws from the bottom case:
∙four on the right side
∙two in the battery compartment
∙two to the left of the battery compartment
∙one from the RAM module cover (also remove the RAM module cover itself)
∙one in the hard disk drive compartment
∙one under the upper left foot (first remove the foot with a pointed knife or probe)
∙two recessed hinge screws
Recessed hinge screws
Upper left foot
Figure 2-10. Detaching the Bottom Case
5.Turn the unit top side up.
6.Using a small
7.Lift off the top case.
Reassembly Notes
∙Insert the thin (touch pad) cable first, since it has more flexibility than the wide (CD control PCA) cable.
∙With the cable connectors opened slightly, insert the cables back in the cable connectors and push the connectors shut.
HP OmniBook XE2 |