BIOS Setup Utility
The BIOS Setup utility provides access to basic configuration settings. It is independent of the operating system.
Running the BIOS Setup Utility
1.Close all applications, then shut down Windows and reboot the OmniBook. If necessary, you can press CTRL+ALT+DEL to reboot.
2.During reboot, press F2 to start the BIOS Setup utility.
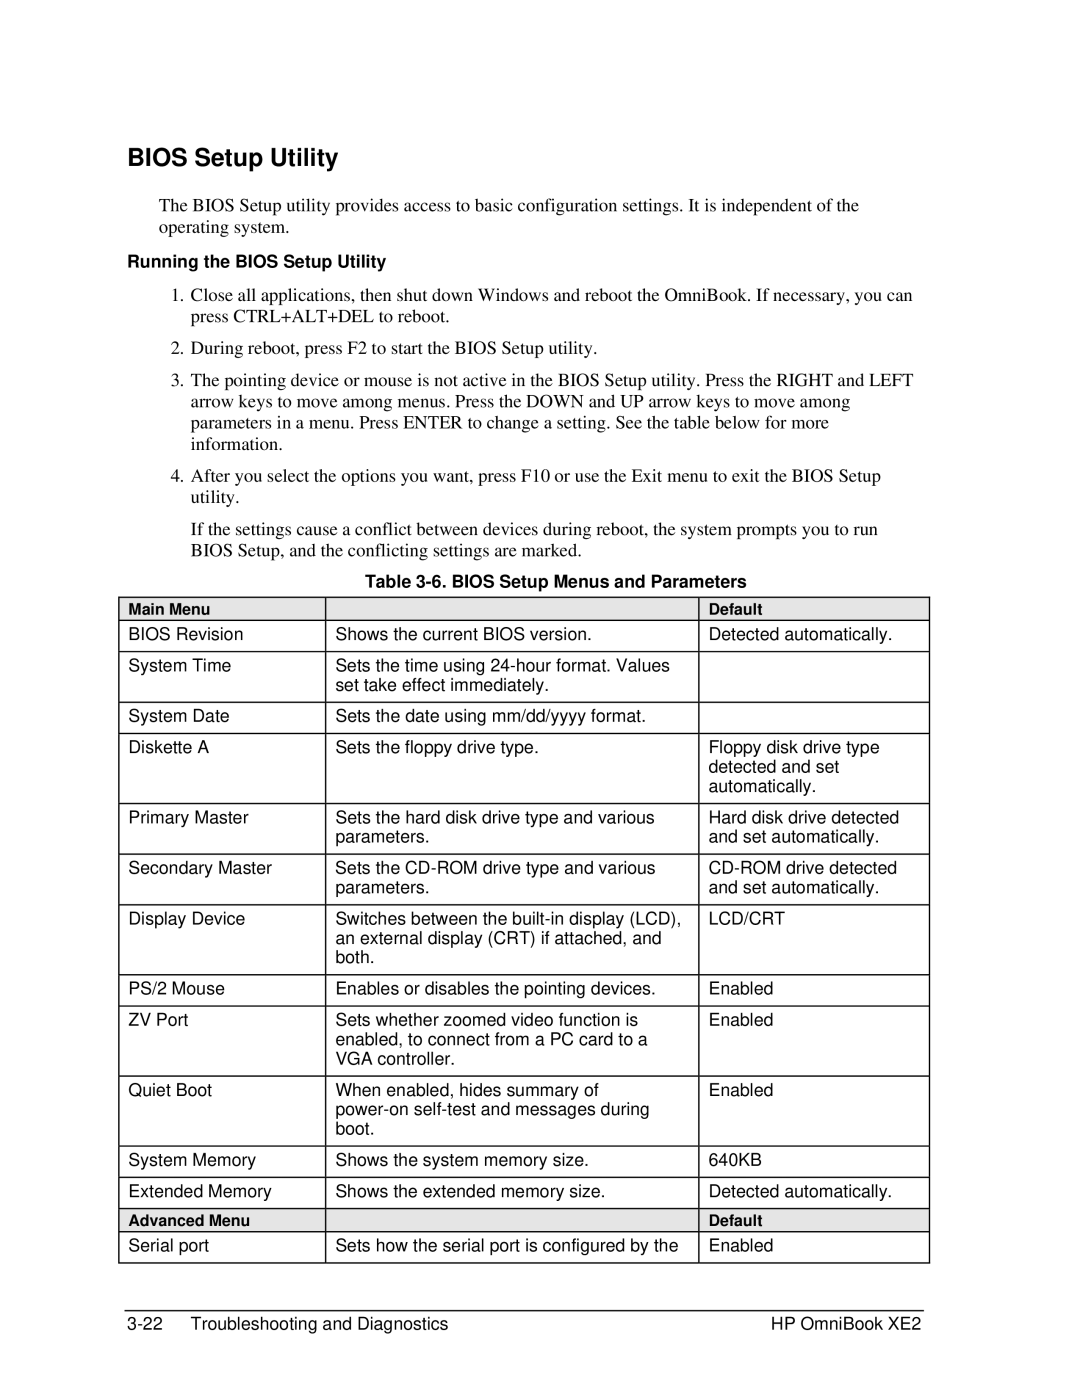
3.The pointing device or mouse is not active in the BIOS Setup utility. Press the RIGHT and LEFT arrow keys to move among menus. Press the DOWN and UP arrow keys to move among parameters in a menu. Press ENTER to change a setting. See the table below for more information.
4.After you select the options you want, press F10 or use the Exit menu to exit the BIOS Setup utility.
If the settings cause a conflict between devices during reboot, the system prompts you to run BIOS Setup, and the conflicting settings are marked.
Main Menu
BIOS Revision
System Time
Table 3-6. BIOS Setup Menus and Parameters
| Default |
Shows the current BIOS version. | Detected automatically. |
|
|
Sets the time using |
|
set take effect immediately. |
|
|
|
System Date
Diskette A
Sets the date using mm/dd/yyyy format.
Sets the floppy drive type.
Floppy disk drive type detected and set automatically.
Primary Master
Secondary Master
Display Device
PS/2 Mouse
ZV Port
Quiet Boot
Sets the hard disk drive type and various parameters.
Sets the
Switches between the
Enables or disables the pointing devices.
Sets whether zoomed video function is enabled, to connect from a PC card to a VGA controller.
When enabled, hides summary of
Hard disk drive detected and set automatically.
LCD/CRT
Enabled
Enabled
Enabled
System Memory
Extended Memory
Advanced Menu
Serial port
Shows the system memory size.
Shows the extended memory size.
Sets how the serial port is configured by the
640KB
Detected automatically.
Default
Enabled
HP OmniBook XE2 |