Removal and replacement procedures
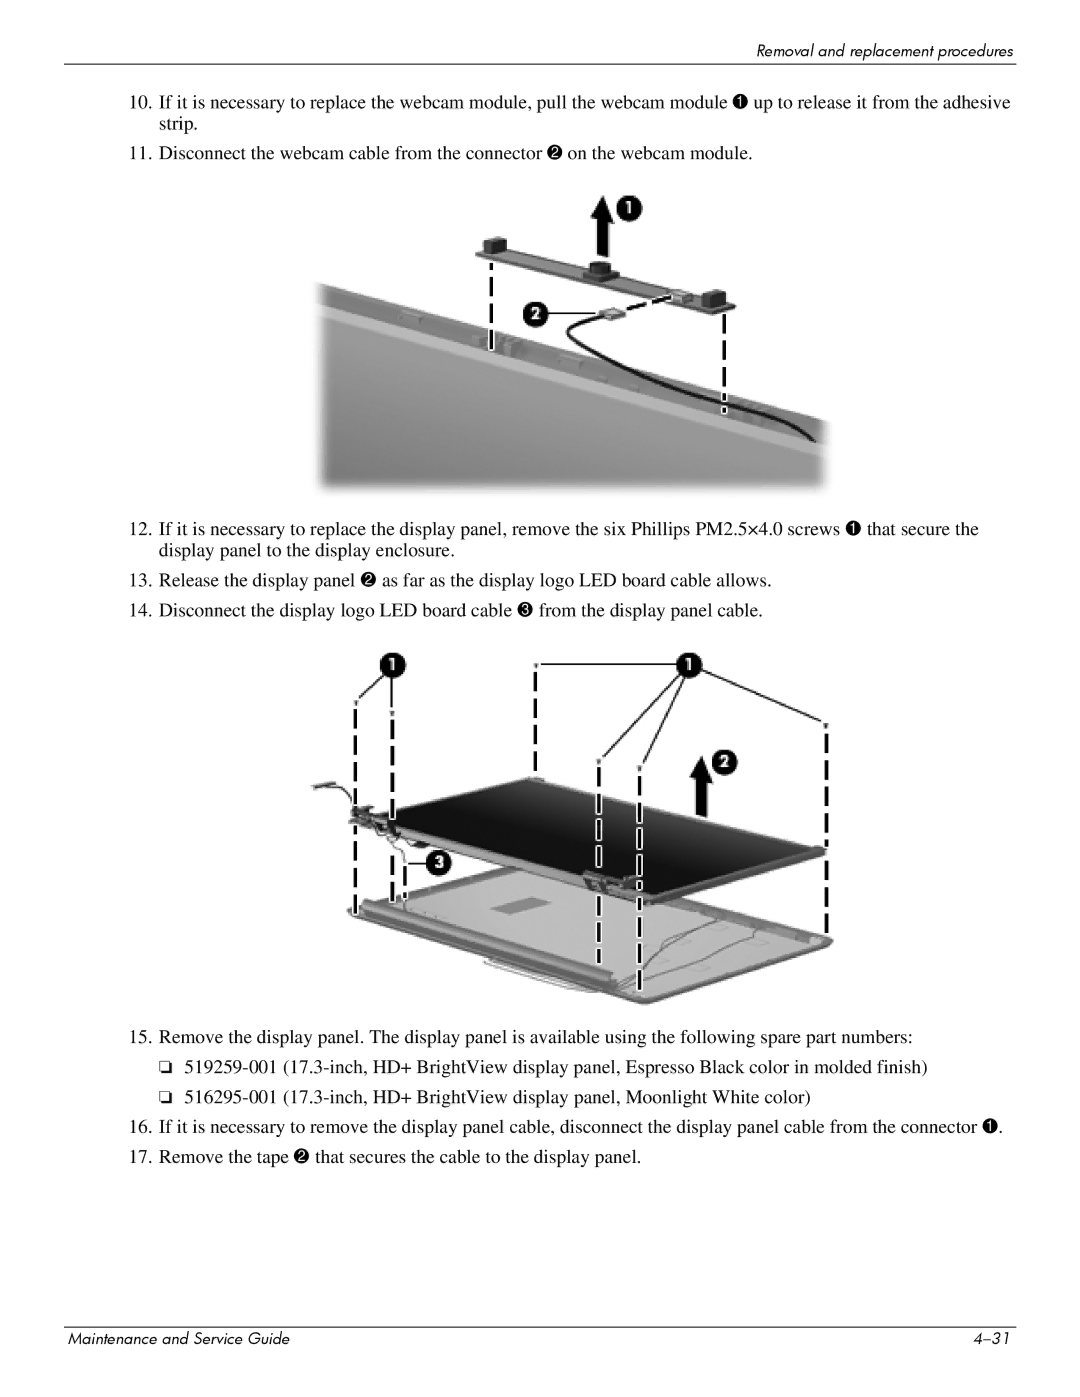
10.If it is necessary to replace the webcam module, pull the webcam module 1 up to release it from the adhesive strip.
11.Disconnect the webcam cable from the connector 2 on the webcam module.
12.If it is necessary to replace the display panel, remove the six Phillips PM2.5×4.0 screws 1 that secure the display panel to the display enclosure.
13.Release the display panel 2 as far as the display logo LED board cable allows.
14.Disconnect the display logo LED board cable 3 from the display panel cable.
15.Remove the display panel. The display panel is available using the following spare part numbers:
❏
❏
16.If it is necessary to remove the display panel cable, disconnect the display panel cable from the connector 1.
17.Remove the tape 2 that secures the cable to the display panel.
Maintenance and Service Guide |