Model 743 Owner’s Guide
Page
Contents
Contents
Typical Installation in a VME Card Cage
Connecting Cables
Solving Problems
Powering On and Off
Boot Console Interface
Viii
Figures
Tables
Preface
Audience
Safety and Regulatory Statements
Safety
Regulatory Statements
Australia EMC Standards
Electrostatic Discharge ESD Precautions
Vcci Class a ITE
Release Documents
Related Manuals
To order manuals, please contact your local sales office
Revision History
First printing
Documentation Conventions
Sample user input
Questions, Suggestions, or Problems
Safety Symbols and Conventions
Following conventions are used throughout this manual
Declaration of Conformity
Preface-10
Model 743 Board Computer Overview
Model 743 Board Computer Overview
Product Description
Product Description
Product Description
Installation Overview
Installation Notes
Supported Products
Accessory Cards
HP A4268A FWD Scsi
Typical External Devices
Cables
Keyboard and Mouse
Shows the environmental requirements for the Model
Environmental Requirements
Environmental Requirements
Model 743 VME Board Computer Temperatures
Operating System Overview
HP-UX
Manuals for System Information
HP-UX
Online Sources of Information HP-UX and HP-RT
HP VUE
Online Sources of Information HP-UX and HP-RT
Installing HP-UX and HP-RT
Audio
Accessories Installation
Pcmcia
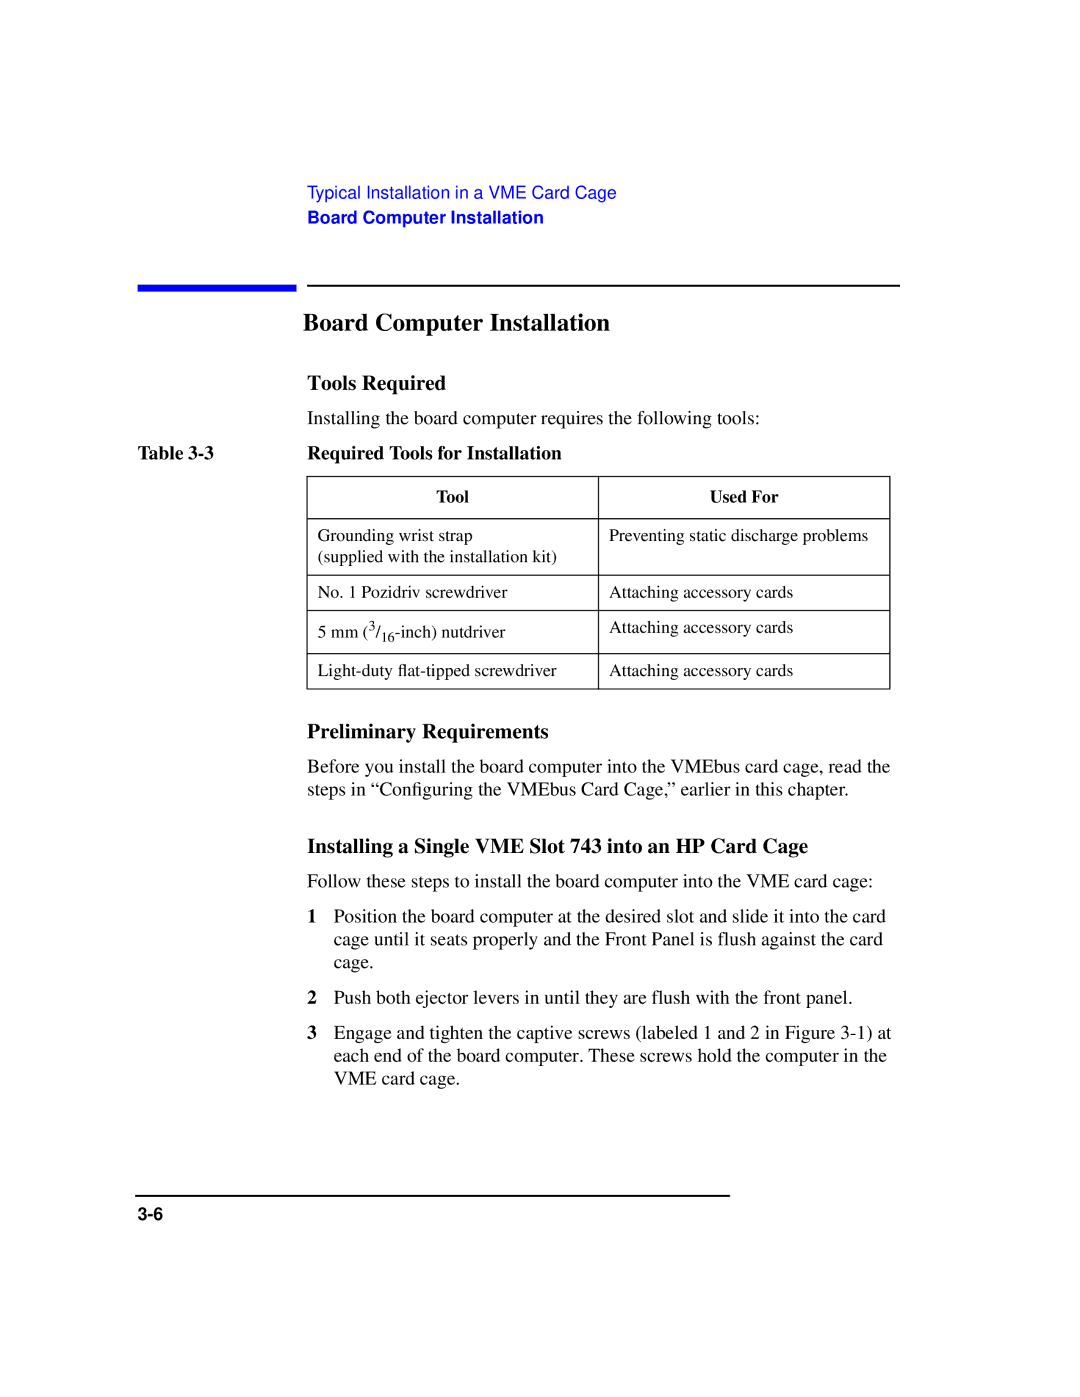
Tools Required for Installation
Tools Required and Preliminary Procedures
Preliminary Procedures
Safety Precautions
Memory
RAM Card Installation
Preliminary Requirements
Installing RAM Cards
GSC Expansion Kit Installation
GSC Expansion Kit
Installing the GSC Expansion Kit
Adding the Front Panel Screws
GSC Mezzanine Card Installation
Installing GSC Mezzanine Cards
GSC Mezzanine Cards
Installing an Hcrx Graphics Board
Hcrx Graphics Board Installation
Installing an Hcrx Graphics Board
PMC Bridge Adapter and Expansion Adapter Installation
PMC Bridge Adapter and Expansion Adapter
Installing a PMC Card onto the Bridge Adapter
Keying pin. See Figure
Removing Bridge Adapter Screws and EMI Gasket
Installing the Expansion Adapter onto the Bridge Adapter
Installing the PMC Bridge Adapter onto the Board Computer
Board Computer
Removing Ejector Handle Labels
Installing Ejector Handle Sleeves
Installing the Springs and Labels
Installing the Board Computer with PMC into VMEbus Card Cage
PMC Bridge Adapter and Expansion Adapter
Pcmcia
Typical Installation in a VME Card Cage
Typical Installation in a VME Card Cage
Configuring the VME Card Cage
Determining the VMEbus Card Cage Configuration
Power Requirements
Each Model 743 Board Computer +5V dc +12V dc Amps
Keyboard and Mouse
Installing the board computer requires the following tools
Board Computer Installation
Installing a Single VME Slot 743 into an HP Card Cage
Required Tools for Installation
Installing a Dual-Slot Model
Non-HP Installation
HP Installation Other than Primary CPU
Removing a Model
Model 743 Removal
Model 743 removal requires the following tools
Connecting Cables
Connecting Cables
Shows the front panel connectors for the Model
Introduction
Configuration Requirements
Monitors
Connecting the Monitor
Multi-Display Systems
Red to R RED Green to G Green Blue to B Blue
Connecting a Terminal to the RS-232 Ports
Power Cord
Connecting a Terminal
Do not turn on your monitor at this time
Connecting Cables
Audio Connection
Audio Specifications
Audio Connector Audio Connector Pinouts
Signal
Video Connector
Video Connection
PS/2 Connector Pinouts
Shows the PS/2 connector pinouts
Keyboard and Mouse Connections
Shows the AUI LAN connector pinouts
Network Connection
AUI LAN Connector Pinouts
Printer Connections
Preparing for HP-UX Installation
Configuring HP-UX for a Printer
Printer Interface
Usr/sbin/sam Enter
Installation Procedure
Printer Cables
At the SAM opening screen, choose the following
Choose OK
Display opens for Add Local Printer/Plotter
Exit Enter
Testing the Printer Installation
HP Parallel
Cd Enter Lp .profile Enter
Shows the connector pinouts for the HP parallel connector
HP Parallel Connector Pinouts
RS-232-C Connector Pinouts
RS-232 Serial Connector
RS-232 Ports
Shows the Scsi connector pinouts
Scsi Connection
Scsi Connector Pinouts
Scsi Connection
Powering On and Off
Powering On and Off
Turning On the System
Setparms initial Enter
Reboot -h
Turning Off the System
Usr/bin/sam
Using SAM to Stop the HP-UX System
Using the Command Line
Choose Routine Tasks from the opening menu
Solving Problems
Solving Problems
Interpreting the LEDs
LED Indicators
Sysfail Power
Managing a Boot Failure
Printer Problems
Boot Console Interface
Boot Console Interface
Boot Console Handler
Special Tasks
Boot Console Information Display
LAN Scsi
System displays the following message
Using the Boot Console Handler Interface
Main Menu is the first menu in the menu hierarchy
Table A-1 Main Menu Options
Operation Description
Specifying a Boot Device
Pcmcia ATA BPN LAN Scsi FWSCSI1 FWSCSI2 FWSCSI3 BPR
Enter
List of devices similar to the following menu is displayed
Configuring the Console Path and Display Format
Setting the Display Format
Setting the Console Path
System displays the Path Configuration menu
Primary Path
Vesa
Booting and Resetting the Model
From the Main Menu, select Boot From a Device by typing
To boot from this device type
To enter the desired Scsi ID type
Resetting the System
Searching for Bootable Media
Effective ISL Mode
Selecting the Primary Path
Displaying and Setting Paths
Screen similar to the following appears
System displays the Primary Path information, as shown
Selecting the Alternate Path
System displays the Mode Configuration menu as shown
Reordering the Search Control List
Console Path Graphics
Displaying and Setting the Fastboot Mode
System displays the Mode Configuration menu, as shown
System displays the General Control menu, as shown
YES
Table A-2 Mode Configuration Control Flags
Control Setting Indications
Displaying and Setting the Secure Boot Mode
Enter
System displays the Control Flags menu
Displaying the LAN Station Address
System displays the Hardware Information menu, as shown
From the Hardware Information menu, select I/O Asic by en
System Configuration Menu
System Configuration Menu
Index
Index-2