Important:
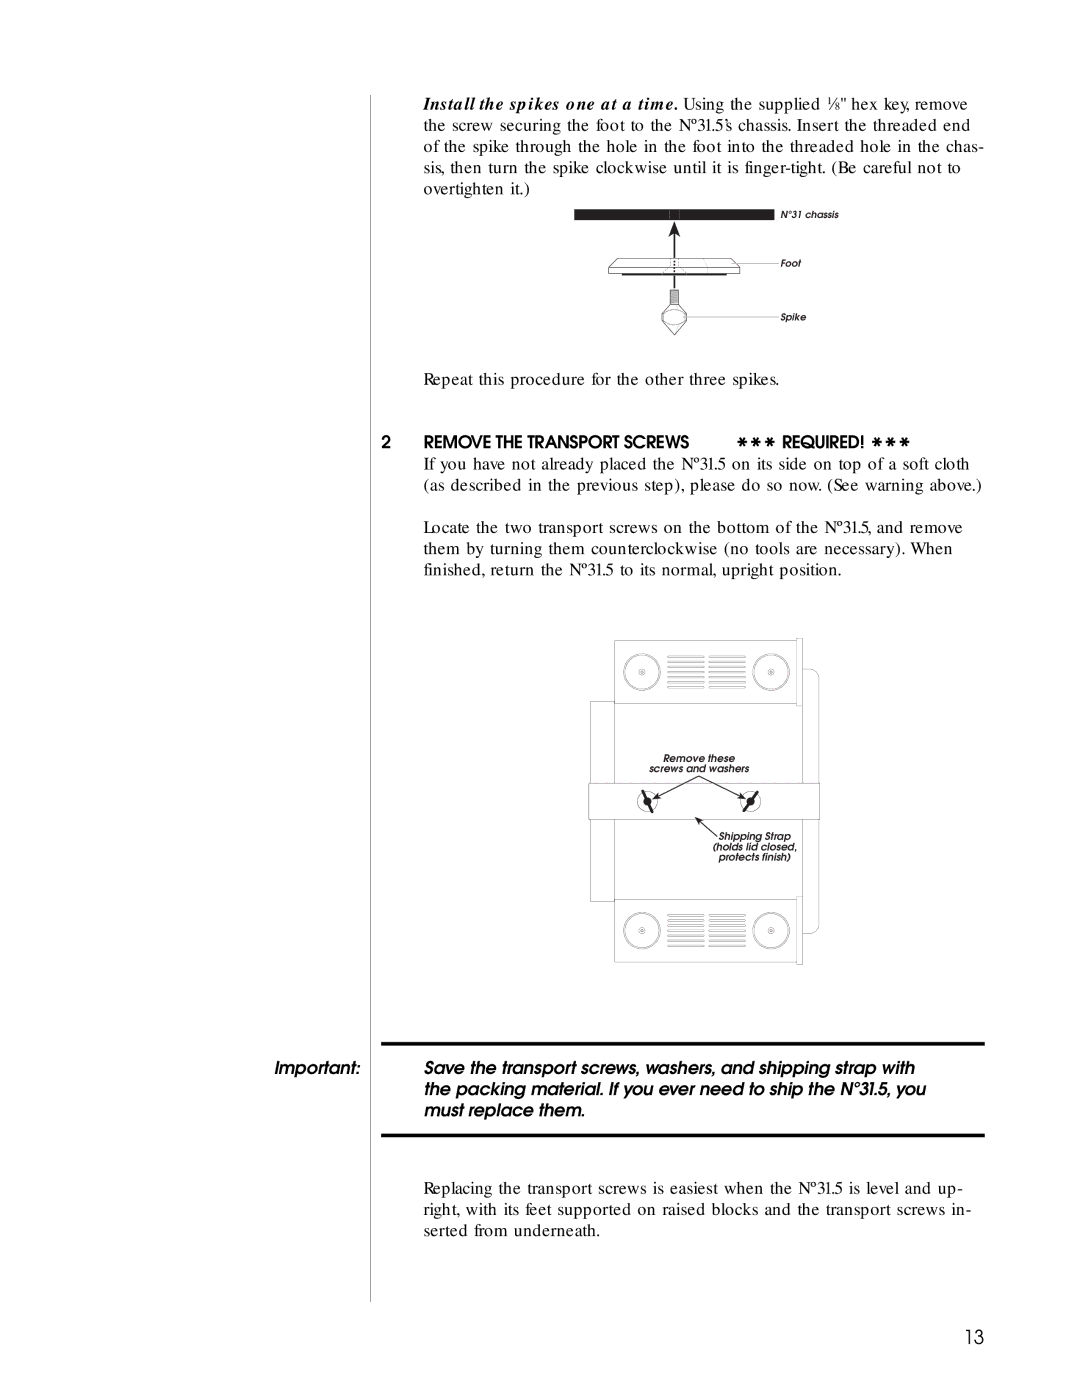
Install the spikes one at a time. Using the supplied 1⁄8" hex key, remove the screw securing the foot to the Nº31.5’s chassis. Insert the threaded end of the spike through the hole in the foot into the threaded hole in the chas- sis, then turn the spike clockwise until it is
Nº31 chassis
Foot
Spike
Repeat this procedure for the other three spikes.
2 REMOVE THE TRANSPORT SCREWS *** REQUIRED! ***
If you have not already placed the Nº31.5 on its side on top of a soft cloth (as described in the previous step), please do so now. (See warning above.)
Locate the two transport screws on the bottom of the Nº31.5, and remove them by turning them counterclockwise (no tools are necessary). When finished, return the Nº31.5 to its normal, upright position.
Remove these |
screws and washers |
Shipping Strap |
(holds lid closed, |
protects finish) |
Save the transport screws, washers, and shipping strap with the packing material. If you ever need to ship the Nº31.5, you must replace them.
Replacing the transport screws is easiest when the Nº31.5 is level and up- right, with its feet supported on raised blocks and the transport screws in- serted from underneath.
13
