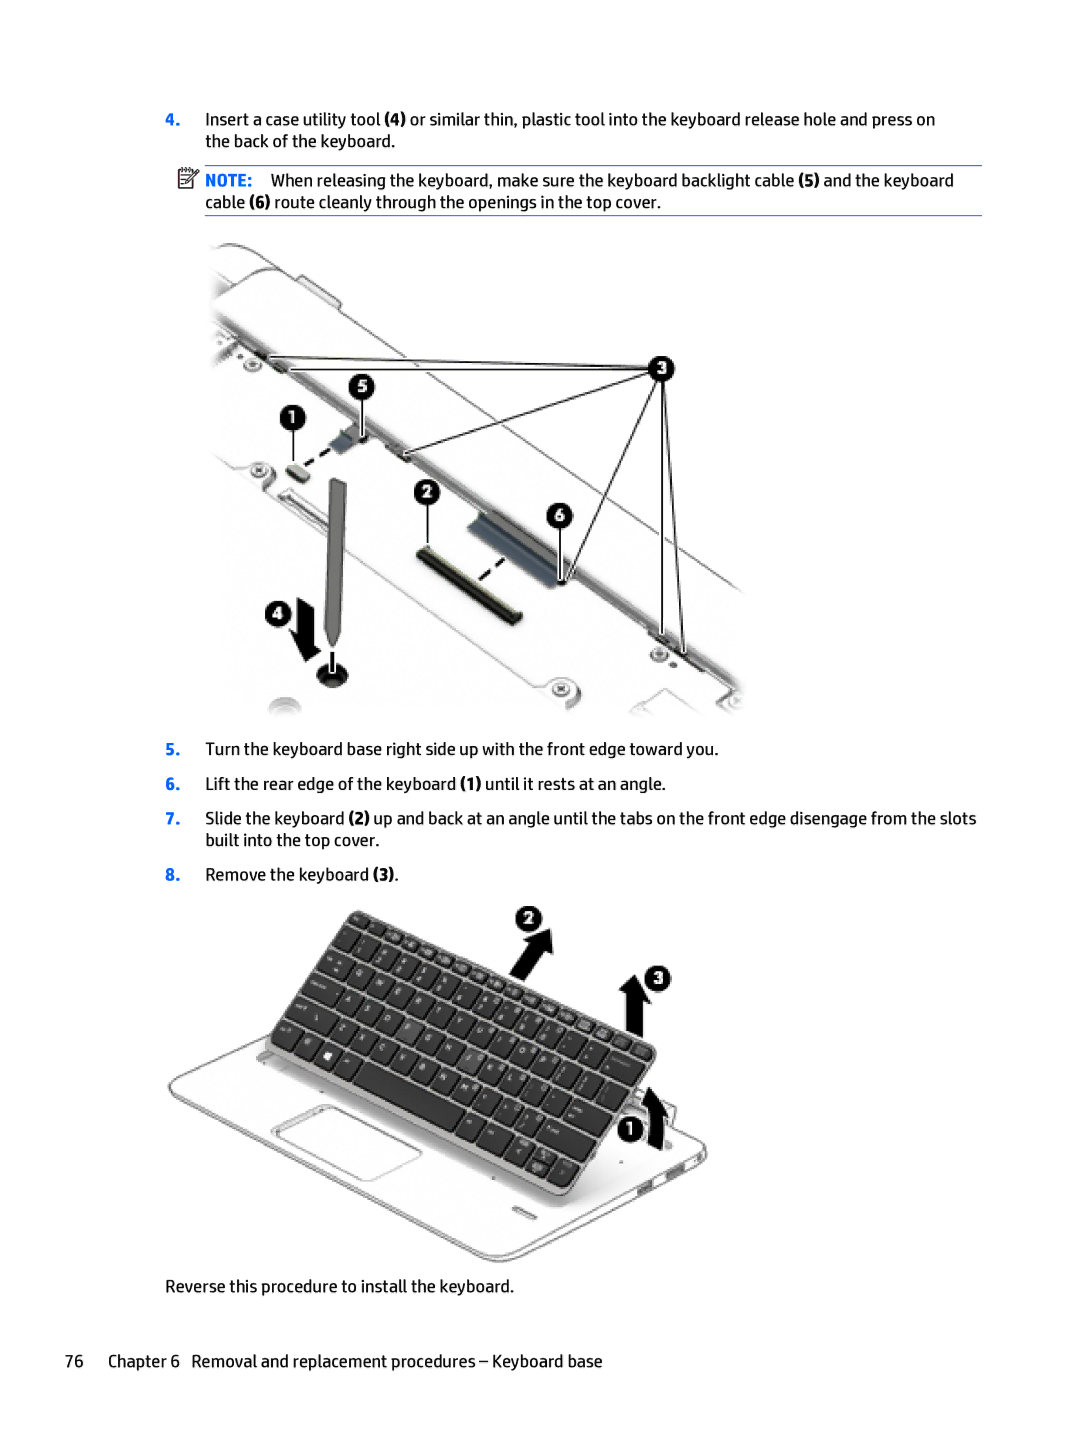
4.Insert a case utility tool (4) or similar thin, plastic tool into the keyboard release hole and press on the back of the keyboard.
![]() NOTE: When releasing the keyboard, make sure the keyboard backlight cable (5) and the keyboard cable (6) route cleanly through the openings in the top cover.
NOTE: When releasing the keyboard, make sure the keyboard backlight cable (5) and the keyboard cable (6) route cleanly through the openings in the top cover.
5.Turn the keyboard base right side up with the front edge toward you.
6.Lift the rear edge of the keyboard (1) until it rests at an angle.
7.Slide the keyboard (2) up and back at an angle until the tabs on the front edge disengage from the slots built into the top cover.
8.Remove the keyboard (3).
Reverse this procedure to install the keyboard.
76 Chapter 6 Removal and replacement procedures – Keyboard base
