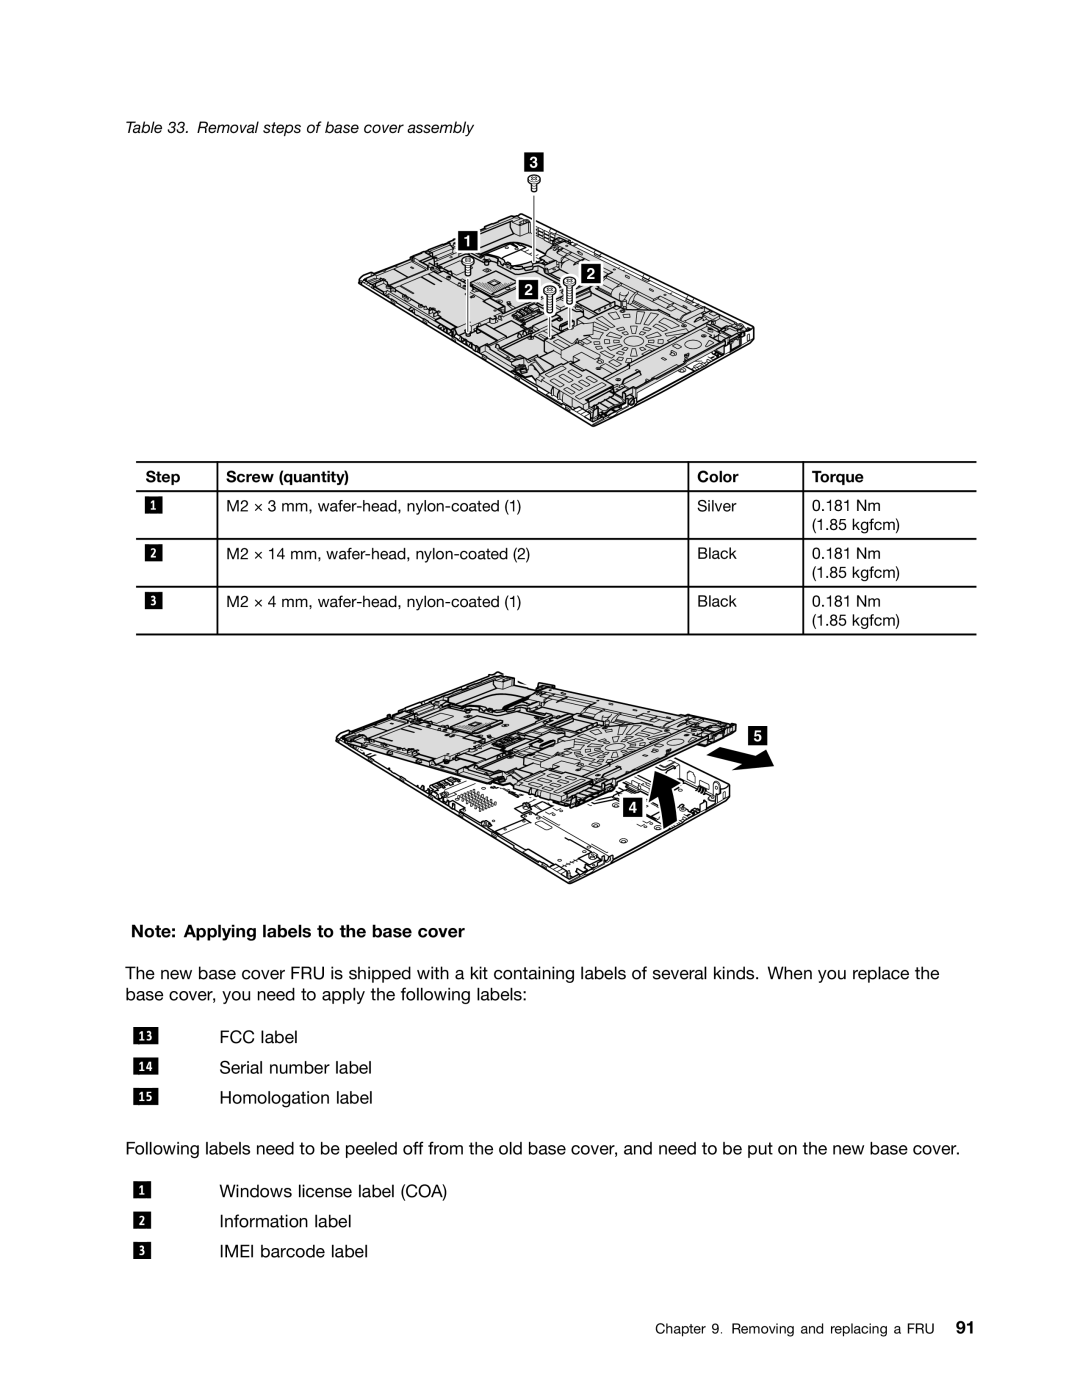
Table 33. Removal steps of base cover assembly
3
1![]()
![]()
2 |
2
| Step | Screw (quantity) | Color | Torque | ||
|
|
|
|
|
|
|
|
|
| M2 | × 3 mm, | Silver | 0.181 Nm |
| 1 |
| ||||
|
|
|
|
|
| (1.85 kgfcm) |
|
|
|
|
|
|
|
|
|
| M2 | × 14 mm, | Black | 0.181 Nm |
| 2 |
| ||||
|
|
|
|
|
| (1.85 kgfcm) |
|
|
|
|
|
|
|
|
|
| M2 | × 4 mm, | Black | 0.181 Nm |
| 3 |
| ||||
|
|
|
|
|
| (1.85 kgfcm) |
|
|
|
|
|
|
|
5
![]() 4
4![]()
![]()
![]()
![]()
![]()
![]()
![]()
![]()
![]()
Note: Applying labels to the base cover
The new base cover FRU is shipped with a kit containing labels of several kinds. When you replace the base cover, you need to apply the following labels:
13
14
15
FCC label
Serial number label
Homologation label
Following labels need to be peeled off from the old base cover, and need to be put on the new base cover.
1
2
3
Windows license label (COA)
Information label
IMEI barcode label