Connections (DTR-6.3/5.3)
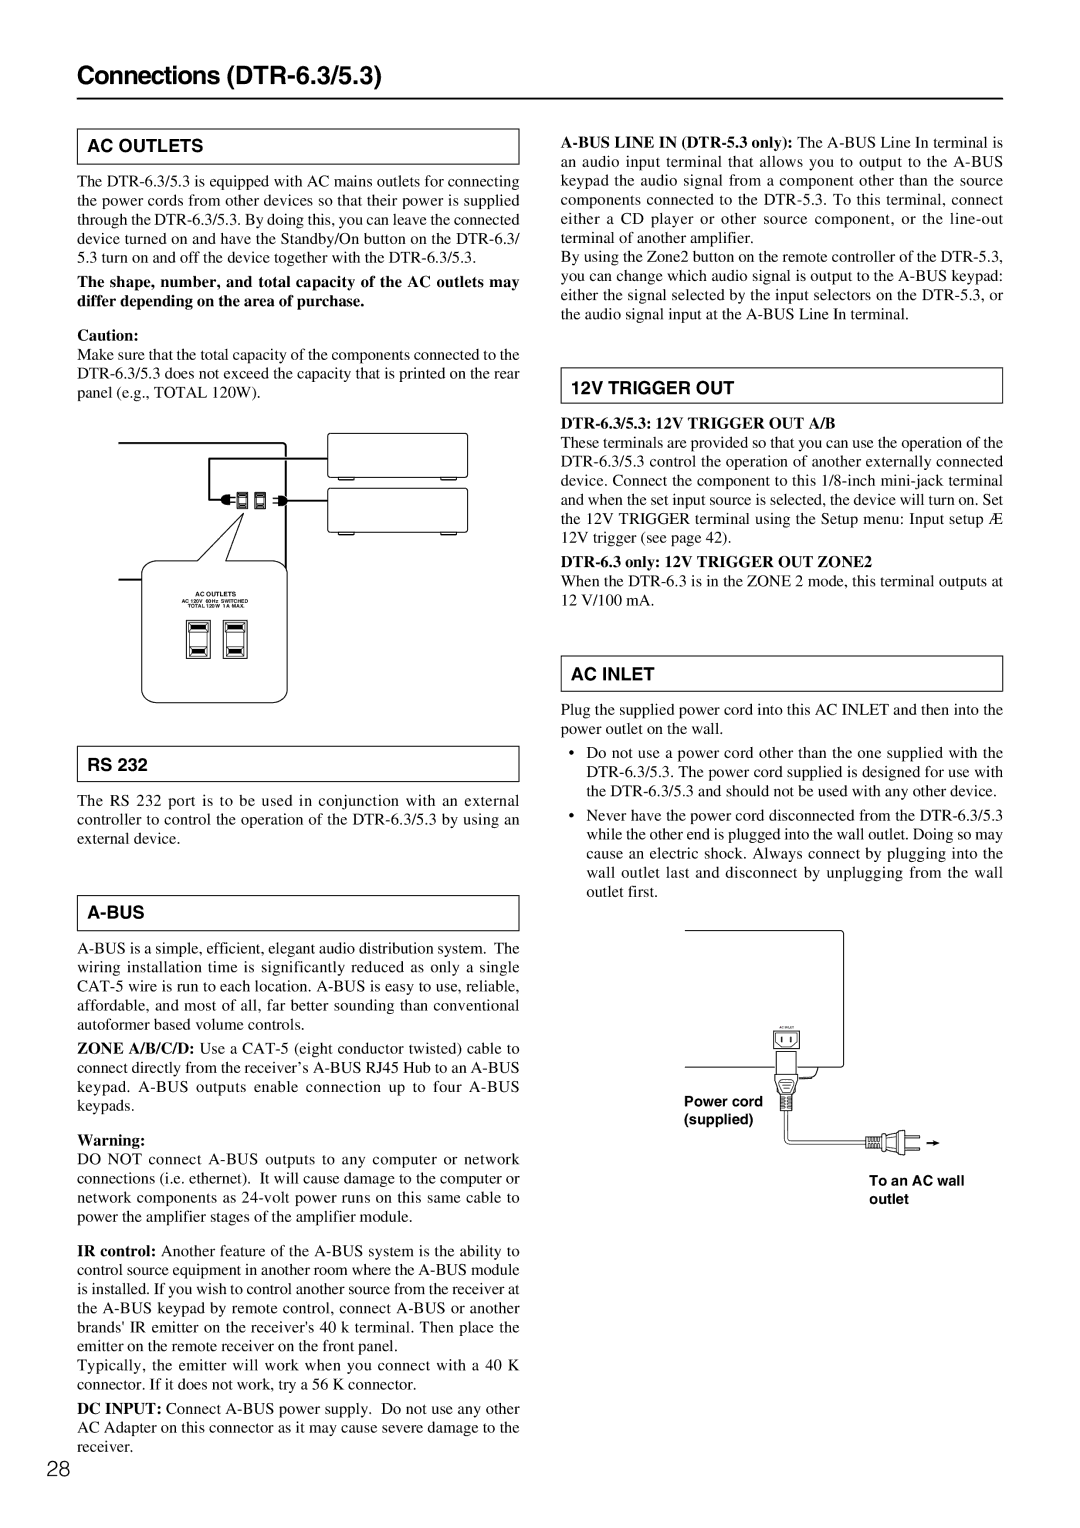
AC OUTLETS

The DTR-6.3/5.3 is equipped with AC mains outlets for connecting the power cords from other devices so that their power is supplied through the DTR-6.3/5.3. By doing this, you can leave the connected device turned on and have the Standby/On button on the DTR-6.3/ 5.3 turn on and off the device together with the DTR-6.3/5.3.

The shape, number, and total capacity of the AC outlets may differ depending on the area of purchase.

Caution:

Make sure that the total capacity of the components connected to the DTR-6.3/5.3 does not exceed the capacity that is printed on the rear panel (e.g., TOTAL 120W).

AC OUTLETS

AC 120V 60 Hz SWITCHED

TOTAL 120W 1 A MAX.

A-BUS LINE IN (DTR-5.3 only): The A-BUS Line In terminal is an audio input terminal that allows you to output to the A-BUS keypad the audio signal from a component other than the source components connected to the DTR-5.3. To this terminal, connect either a CD player or other source component, or the line-out terminal of another amplifier.

By using the Zone2 button on the remote controller of the DTR-5.3, you can change which audio signal is output to the A-BUS keypad: either the signal selected by the input selectors on the DTR-5.3, or the audio signal input at the A-BUS Line In terminal.

12V TRIGGER OUT

DTR-6.3/5.3: 12V TRIGGER OUT A/B

These terminals are provided so that you can use the operation of the DTR-6.3/5.3 control the operation of another externally connected device. Connect the component to this 1/8-inch mini-jack terminal and when the set input source is selected, the device will turn on. Set the 12V TRIGGER terminal using the Setup menu: Input setup Æ 12V trigger (see page 42).

DTR-6.3 only: 12V TRIGGER OUT ZONE2

When the DTR-6.3 is in the ZONE 2 mode, this terminal outputs at 12 V/100 mA.

RS 232

The RS 232 port is to be used in conjunction with an external controller to control the operation of the DTR-6.3/5.3 by using an external device.

A-BUS

A-BUS is a simple, efficient, elegant audio distribution system. The wiring installation time is significantly reduced as only a single CAT-5 wire is run to each location. A-BUS is easy to use, reliable, affordable, and most of all, far better sounding than conventional autoformer based volume controls.

ZONE A/B/C/D: Use a CAT-5 (eight conductor twisted) cable to connect directly from the receiver’s A-BUS RJ45 Hub to an A-BUS keypad. A-BUS outputs enable connection up to four A-BUS keypads.

Warning:

DO NOT connect A-BUS outputs to any computer or network connections (i.e. ethernet). It will cause damage to the computer or network components as 24-volt power runs on this same cable to power the amplifier stages of the amplifier module.

IR control: Another feature of the A-BUS system is the ability to control source equipment in another room where the A-BUS module is installed. If you wish to control another source from the receiver at the A-BUS keypad by remote control, connect A-BUS or another brands' IR emitter on the receiver's 40 k terminal. Then place the emitter on the remote receiver on the front panel.

Typically, the emitter will work when you connect with a 40 K connector. If it does not work, try a 56 K connector.

DC INPUT: Connect A-BUS power supply. Do not use any other AC Adapter on this connector as it may cause severe damage to the receiver.

AC INLET

Plug the supplied power cord into this AC INLET and then into the power outlet on the wall.

Do not use a power cord other than the one supplied with the DTR-6.3/5.3. The power cord supplied is designed for use with the DTR-6.3/5.3 and should not be used with any other device.

Never have the power cord disconnected from the DTR-6.3/5.3 while the other end is plugged into the wall outlet. Doing so may cause an electric shock. Always connect by plugging into the wall outlet last and disconnect by unplugging from the wall outlet first.

AC INLET

Power cord (supplied)

To an AC wall outlet

28

Page 28
Image 28
Integra DTR-5.3 Connections DTR-6.3/5.3, DTR-6.3/5.3 12V Trigger OUT A/B, DTR-6.3 only 12V Trigger OUT ZONE2