SECTION 9 | RECLINER |
REPLACING THE HEADREST PILLOW (FIGURE 2)
RECLINER
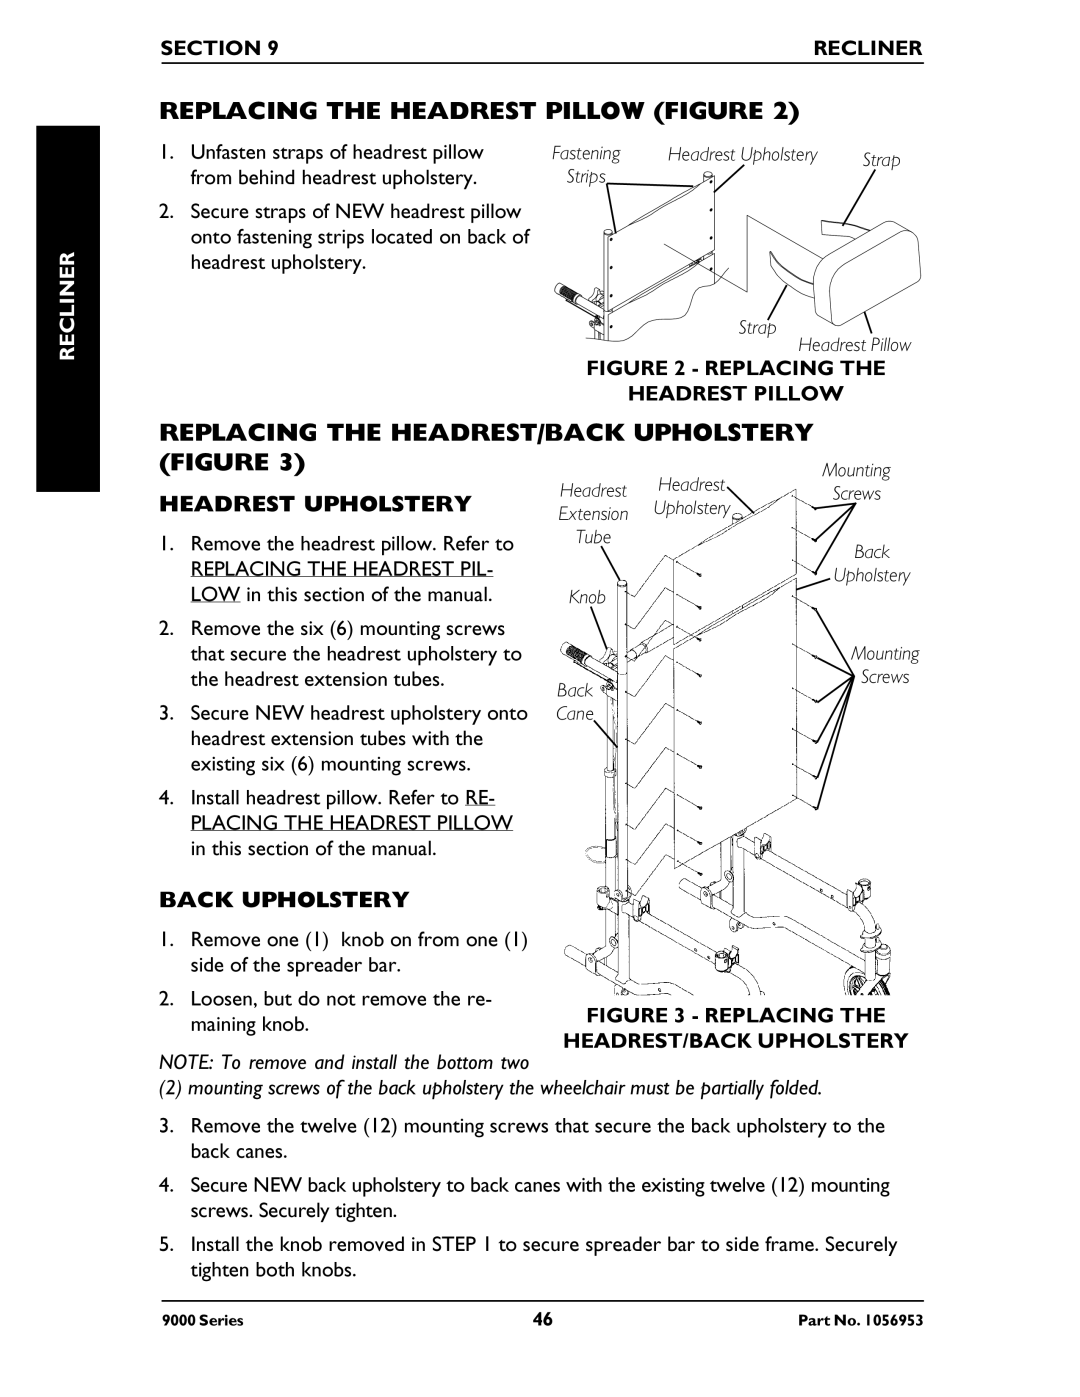
1.Unfasten straps of headrest pillow from behind headrest upholstery.
2.Secure straps of NEW headrest pillow onto fastening strips located on back of headrest upholstery.
Fastening Headrest Upholstery Strap Strips![]()
![]()
Strap
Headrest Pillow
FIGURE 2 - REPLACING THE
HEADREST PILLOW
REPLACING THE HEADREST/BACK UPHOLSTERY (FIGURE 3)
Mounting
HEADREST UPHOLSTERY
1.Remove the headrest pillow. Refer to
REPLACING THE HEADREST PIL- LOW in this section of the manual.
2.Remove the six (6) mounting screws that secure the headrest upholstery to the headrest extension tubes.
3.Secure NEW headrest upholstery onto headrest extension tubes with the existing six (6) mounting screws.
4.Install headrest pillow. Refer to RE-
PLACING THE HEADREST PILLOW in this section of the manual.
Headrest Headrest
Extension Upholstery
Tube
Knob
Back
Cane
Screws
Back
Upholstery
Mounting
Screws
BACK UPHOLSTERY
1.Remove one (1) knob on from one (1) side of the spreader bar.
2.Loosen, but do not remove the re- maining knob.
FIGURE 3 - REPLACING THE
HEADREST/BACK UPHOLSTERY
NOTE: To remove and install the bottom two
(2) mounting screws of the back upholstery the wheelchair must be partially folded.
3.Remove the twelve (12) mounting screws that secure the back upholstery to the back canes.
4.Secure NEW back upholstery to back canes with the existing twelve (12) mounting screws. Securely tighten.
5.Install the knob removed in STEP 1 to secure spreader bar to side frame. Securely tighten both knobs.
9000 Series | 46 | Part No. 1056953 |
