SECTION 5 | SEAT AND BACK | |
|
|
|
REPLACING THE BACK UPHOLSTERY
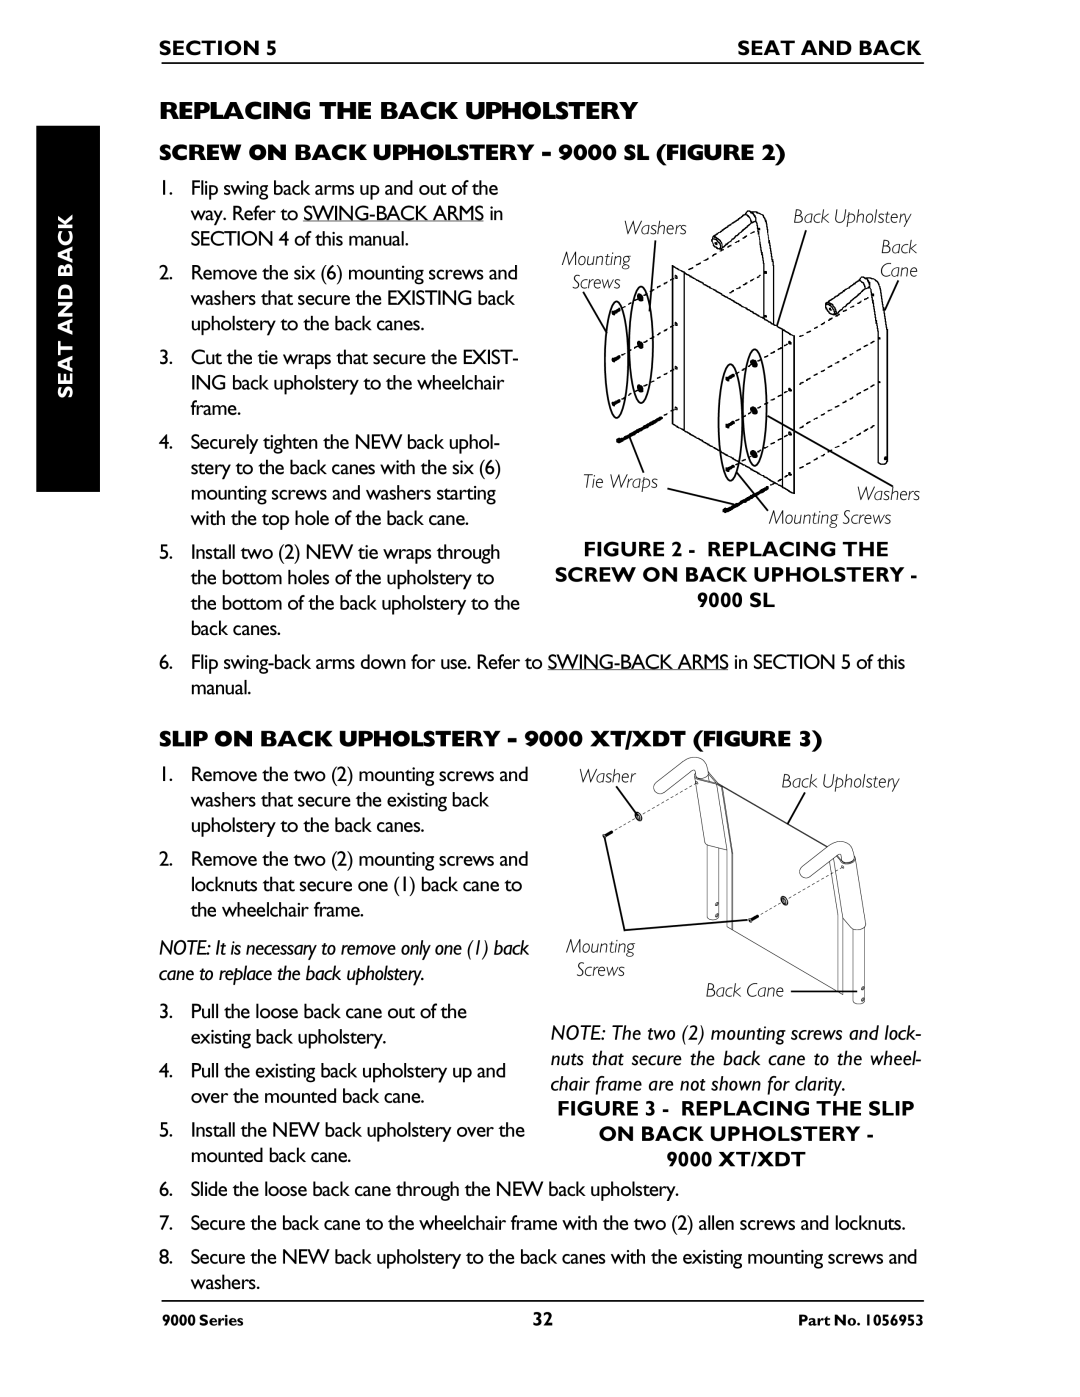
SCREW ON BACK UPHOLSTERY - 9000 SL (FIGURE 2)
SEAT BACKAND
1.Flip swing back arms up and out of the way. Refer to
2.Remove the six (6) mounting screws and washers that secure the EXISTING back upholstery to the back canes.
3.Cut the tie wraps that secure the EXIST- ING back upholstery to the wheelchair frame.
4.Securely tighten the NEW back uphol- stery to the back canes with the six (6) mounting screws and washers starting with the top hole of the back cane.
5.Install two (2) NEW tie wraps through the bottom holes of the upholstery to the bottom of the back upholstery to the back canes.
Washers | Back Upholstery | |
Back | ||
Mounting | ||
Cane | ||
Screws | ||
|
Tie Wraps | Washers |
| |
| Mounting Screws |
FIGURE 2 - REPLACING THE
SCREW ON BACK UPHOLSTERY -
9000 SL
6.Flip
SLIP ON BACK UPHOLSTERY - 9000 XT/XDT (FIGURE 3)
1.Remove the two (2) mounting screws and washers that secure the existing back upholstery to the back canes.
2.Remove the two (2) mounting screws and locknuts that secure one (1) back cane to the wheelchair frame.
NOTE: It is necessary to remove only one (1) back cane to replace the back upholstery.
3.Pull the loose back cane out of the existing back upholstery.
4.Pull the existing back upholstery up and over the mounted back cane.
5.Install the NEW back upholstery over the mounted back cane.
Washer | Back Upholstery |
Mounting
Screws
Back Cane
NOTE: The two (2) mounting screws and lock- nuts that secure the back cane to the wheel- chair frame are not shown for clarity.
FIGURE 3 - REPLACING THE SLIP
ON BACK UPHOLSTERY -
9000 XT/XDT
6.Slide the loose back cane through the NEW back upholstery.
7.Secure the back cane to the wheelchair frame with the two (2) allen screws and locknuts.
8.Secure the NEW back upholstery to the back canes with the existing mounting screws and washers.
9000 Series | 32 | Part No. 1056953 |
