PROCEDURE 5 | UPHOLSTERY/CAPTAIN'S SEAT/POSITIONING STRAP | |
|
|
|
U P H O L S T E R Y
C A P T A I N S
S E A T
P O S I T I O N I N G
S T R A P
REMOVING/INSTALLING CAPTAIN'S SEAT (FIGURE 3)
Removing
1.Turn the adjustment lock lever to release the joystick mounting tube from the armrest.
2.Remove the joystick from the wheelchair.
3.HIGH BACK CAPTAIN'S SEATS ONLY - Discon- nect the limit switch. Refer to DISCONNECTING/ CONNECTING LIMIT SWITCH in PROCEDURE 6 of this manual.
4.Remove the four (4) quick release pins that secure the Captain's Seat to the wheelchair frame.
5.Remove the Captain's Seat from the wheelchair.
Installing
1.Push the Captain's Seat down on the wheelchair frame at the position shown in FIGURE 3.
2.Line up the mounting holes in the Captain's Seat and the wheelchair frame.
WARNING
Make sure the Captain's Seat is secured to the wheelchair frame with the four (4) quick release pins BEFORE using the wheelchair, otherwise in- jury or damage can occur.
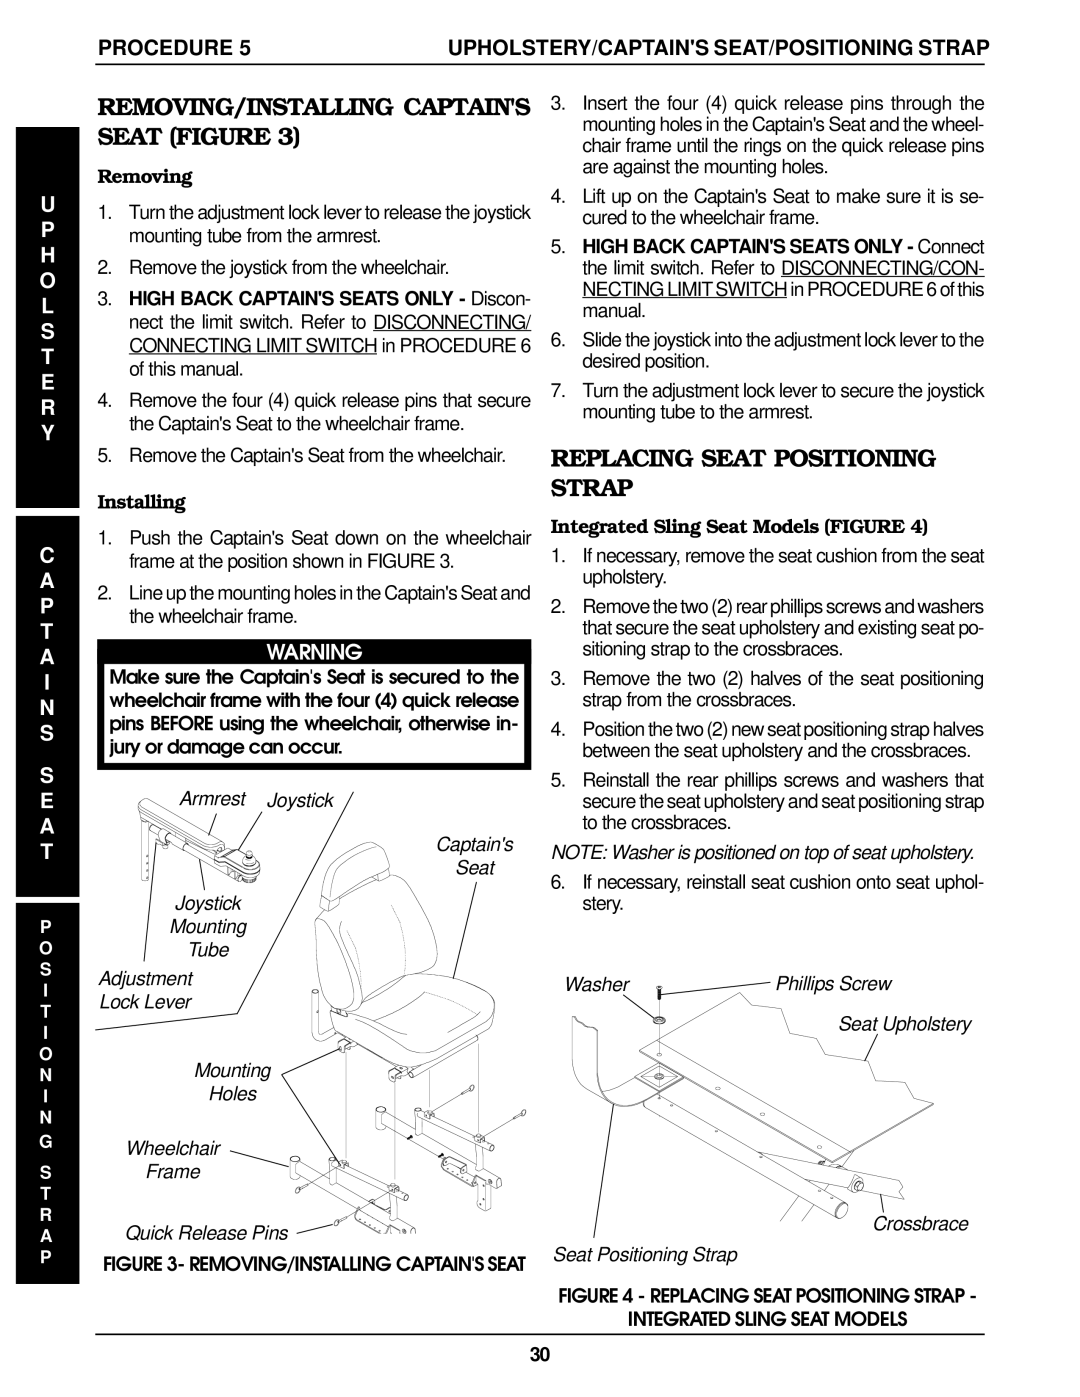
Armrest | Joystick |
| Captain's |
| Seat |
Joystick |
|
Mounting |
|
Tube |
|
Adjustment |
|
Lock Lever |
|
Mounting
Holes
Wheelchair
Frame
Quick Release Pins ![]()
FIGURE 3- REMOVING/INSTALLING CAPTAIN'S SEAT
3.Insert the four (4) quick release pins through the mounting holes in the Captain's Seat and the wheel- chair frame until the rings on the quick release pins are against the mounting holes.
4.Lift up on the Captain's Seat to make sure it is se- cured to the wheelchair frame.
5.HIGH BACK CAPTAIN'S SEATS ONLY - Connect the limit switch. Refer to DISCONNECTING/CON- NECTING LIMIT SWITCH in PROCEDURE 6 of this manual.
6.Slide the joystick into the adjustment lock lever to the desired position.
7.Turn the adjustment lock lever to secure the joystick mounting tube to the armrest.
REPLACING SEAT POSITIONING STRAP
Integrated Sling Seat Models (FIGURE 4)
1.If necessary, remove the seat cushion from the seat upholstery.
2.Remove the two (2) rear phillips screws and washers that secure the seat upholstery and existing seat po- sitioning strap to the crossbraces.
3.Remove the two (2) halves of the seat positioning strap from the crossbraces.
4.Position the two (2) new seat positioning strap halves between the seat upholstery and the crossbraces.
5.Reinstall the rear phillips screws and washers that secure the seat upholstery and seat positioning strap to the crossbraces.
NOTE: Washer is positioned on top of seat upholstery.
6.If necessary, reinstall seat cushion onto seat uphol- stery.
Washer | Phillips Screw |
Seat Upholstery
Crossbrace
Seat Positioning Strap
FIGURE 4 - REPLACING SEAT POSITIONING STRAP -
INTEGRATED SLING SEAT MODELS
30