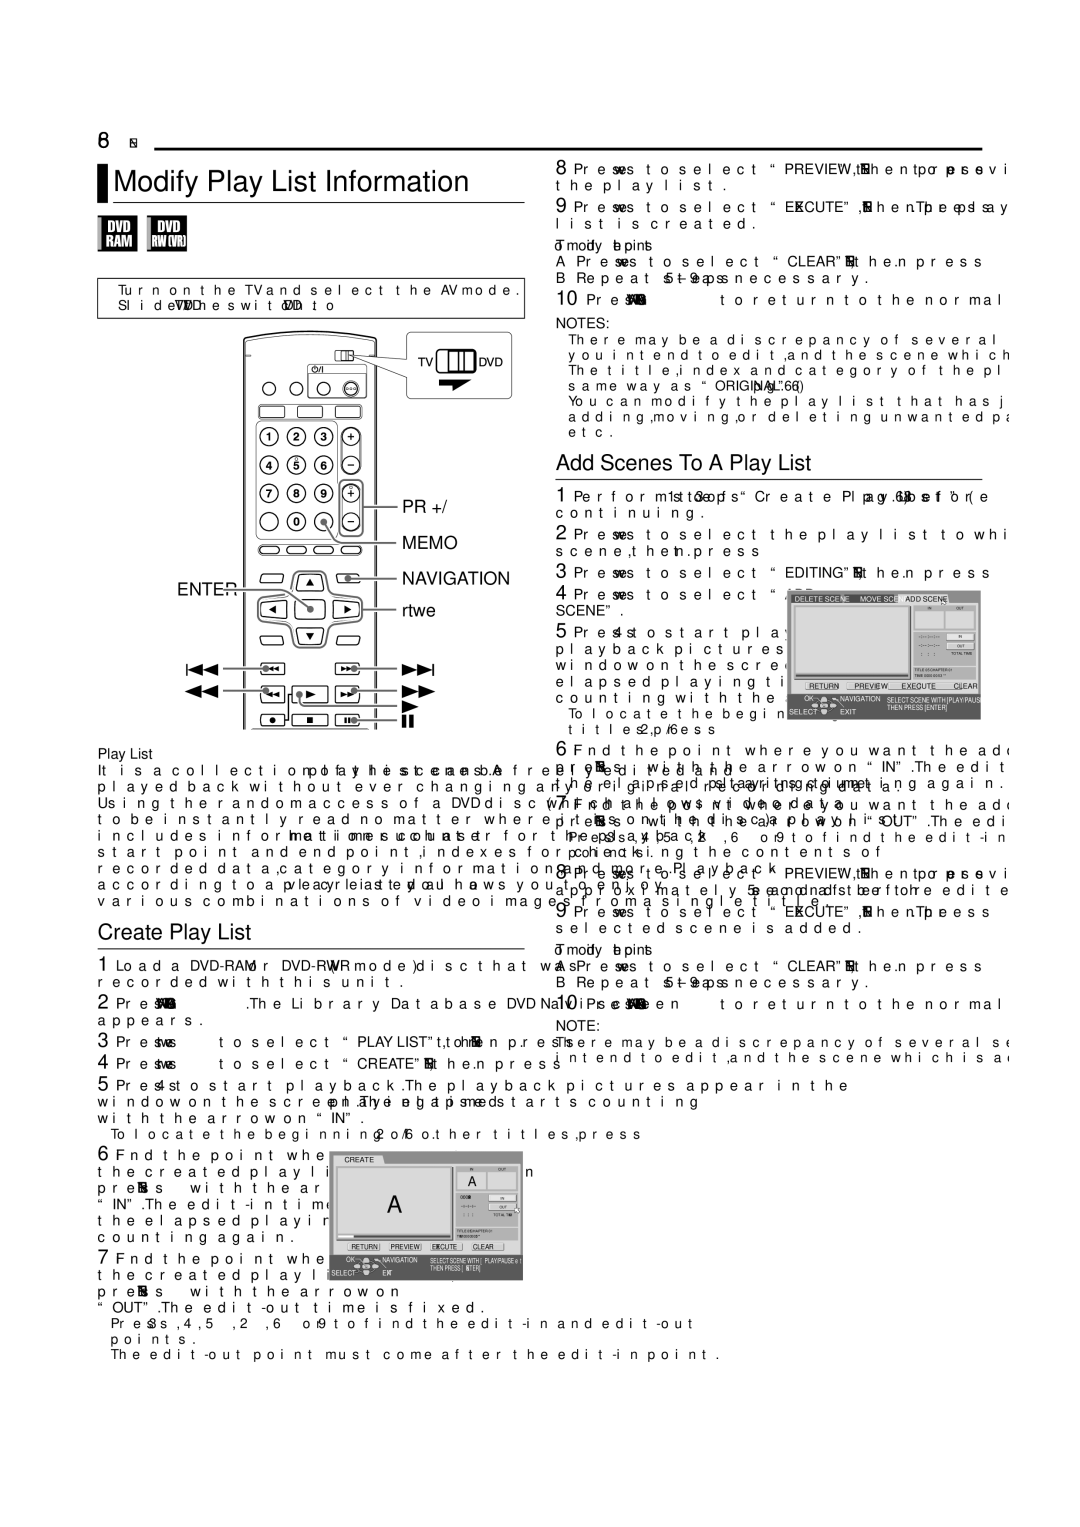
68 EN NAVIGATION (DVD DECK ONLY)

Modify Play List Information

8 Press w e to select “PREVIEW”, then press ENTER to preview

the play list.


9 Press w e to select “EXECUTE”, then press ENTER. The play


list is created.


To modify the points


A Press w e to select “CLEAR”, then press ENTER.

Turn on the TV and select the AV mode.

B Repeat steps 5 9 as necessary.

10 Press NAVIGATION to return to the normal screen.

Slide the TV/DVD switch to DVD.


NOTES:


There may be a discrepancy of several seconds between the scene


you intend to edit, and the scene which is actually edited.


The title, index and category of the play list can be modified in the


same way as “ORIGINAL”. ( pg. 66)


You can modify the play list that has just been created here by


adding, moving, or deleting unwanted parts to create a digest edition,


etc.


PR +/–


MEMO

ENTER

NAVIGATION


rtwe

Add Scenes To A Play List

1 Perform steps 1 to 3 of “Create Play List” ( pg. 68) before continuing.

2 Press w e to select the play list to which you wish to add a scene, then press t.

3 Press w e to select “EDITING”, then press ENTER.

4 Press w e to select “ADD

DELETE SCENE

MOVE SCENE ADD SCENE


SCENE”.


IN


OUT


5 Press 4to start playback. The


-:--:--:--

IN

playback pictures appear in the


-:--:--:--

OUT


: :

:

TOTAL TIME

window on the screen. The


TITLE 05 CHAPTER 01


elapsed playing time starts


TIME 0000:00:53 **


RETURN

PREVIEW

EXECUTE

CLEAR

counting with the arrow on “IN”.

OK

NAVIGATION

SELECT SCENE WITH [PLAY/PAUSE etc.]

To locate the beginning of other

SELECT

EXIT

THEN PRESS [ENTER]


titles, press 2/6.

Play List

It is a collection of the scenes. A play list can be freely edited and played back without ever changing any original recording data. Using the random access of a DVD disc (which allows video data to be instantly read no matter where it is on the disc), a play list includes information such as the timer counter for the playback start point and end point, indexes for checking the contents of recorded data, category information, and more. Playback according to a play list you have created allows you to enjoy various combinations of video images from a single title.

Create Play List

1Load a DVD-RAM or DVD-RW (VR mode) disc that was recorded with this unit.

2Press NAVIGATION. The Library Database DVD Navi screen appears.

3Press rt w e to select “PLAY LIST”, then press t or ENTER.

4Press rt w e to select “CREATE”, then press ENTER.

5Press 4 to start playback. The playback pictures appear in the window on the screen. The elapsed playing time starts counting with the arrow on “IN”.

To locate the beginning of other titles, press 2/6.

6 Find the point where you want the added scene to begin, then press ENTER with the arrow on “IN”. The edit-in time is fixed and the elapsed playing time starts counting again.

7 Find the point where you want the added scene to end, then press ENTER with the arrow on “OUT”. The edit-out time is fixed.

Press 3, 4, 5, 2, 6 or 9 to find the edit-in and edit-out points.

8 Press w e to select “PREVIEW”, then press ENTER to preview approximately 5 seconds before and after the edited scene.

9 Press w e to select “EXECUTE”, then press ENTER. The selected scene is added.

To modify the points

APress w e to select “CLEAR”, then press ENTER. B Repeat steps 5 9 as necessary.

10 Press NAVIGATION to return to the normal screen.

NOTE:

There may be a discrepancy of several seconds between the scene you intend to edit, and the scene which is actually edited.

6 Find the point where you want the created play list to begin, then press ENTER with the arrow on “IN”. The edit-in time is fixed and the elapsed playing time starts counting again.

7 Find the point where you want the created play list to end, then press ENTER with the arrow on “OUT”. The edit-out time is fixed.

CREATE


IN

OUT


A


A

0:00:29:24

IN


-:--:--:--

OUT


:

: :

TOTAL TIME


TITLE 05 CHAPTER 01


TIME 0000:00:53 **


RETURN

PREVIEW

EXECUTE

CLEAR

OK

NAVIGATION

SELECT SCENE WITH [PLAY/PAUSE etc.]

SELECT

EXIT

THEN PRESS [ENTER]


Press 3, 4, 5, 2, 6 or 9 to find the edit-in and edit-out points.

The edit-out point must come after the edit-in point.

Page 68
Image 68
JVC DR-MV5SE manual Modify Play List Information, Add Scenes To a Play List, Create Play List, Memo

DR-MV5SE specifications

The JVC DR-MV5SE is a versatile and innovative combination VCR/DVD recorder that caters to users looking to bridge traditional and modern media formats. Launched during a time when digital recording was gaining momentum, the DR-MV5SE offers a range of features that make it a valuable device for preserving and enjoying audiovisual content.

One of the primary features of the JVC DR-MV5SE is its ability to record directly from VHS tapes to DVD, providing a seamless way to convert old home videos into a more durable format. This process is not only efficient but also user-friendly, making it accessible for audiences of all ages. The device supports various recording modes, allowing users to choose between standard play, long play, and extra-long play, which adjusts the recording time according to their needs.

Equipped with a built-in digital tuner, the DR-MV5SE facilitates easy access to digital terrestrial TV broadcasts. This feature enables users to directly record their favorite shows and programs from the television, ensuring they never miss a moment. The device also includes a variety of connectivity options, such as HDMI output, composite video output, and S-Video output, which contribute to enhancing the overall playback quality. The availability of DVD-R, DVD-RW, and DVD+RW formats broadens the scope for recording and playback, as users can choose from rewritable options or more permanent solutions.

Technologically, JVC has integrated several enhancements into the DR-MV5SE, including the ability to edit recorded content. Users can easily trim unwanted segments, providing a polished final product. Additionally, the device features VCR Plus+ programming, simplifying the scheduling of recordings by allowing users to input a code associated with the desired program.

In terms of design, the JVC DR-MV5SE is compact and user-friendly, featuring an intuitive interface that makes navigation straightforward. This combination of functionality and simplicity ensures that both novice and experienced users can easily operate the device.

Overall, the JVC DR-MV5SE stands out as a practical solution for those wishing to preserve their cherished VHS memories and enjoy modern DVD playback. With an array of recording options, digital tuning capabilities, and editing features, it is an essential tool for multimedia enthusiasts looking to transition from analog to digital with ease. Whether for personal archives or simply enjoying favorite movies, the DR-MV5SE represents a reliable and effective choice in the realm of recording technology.