SETTING AND ADJUSTMENTS BEFORE SHOOTING
MEMO
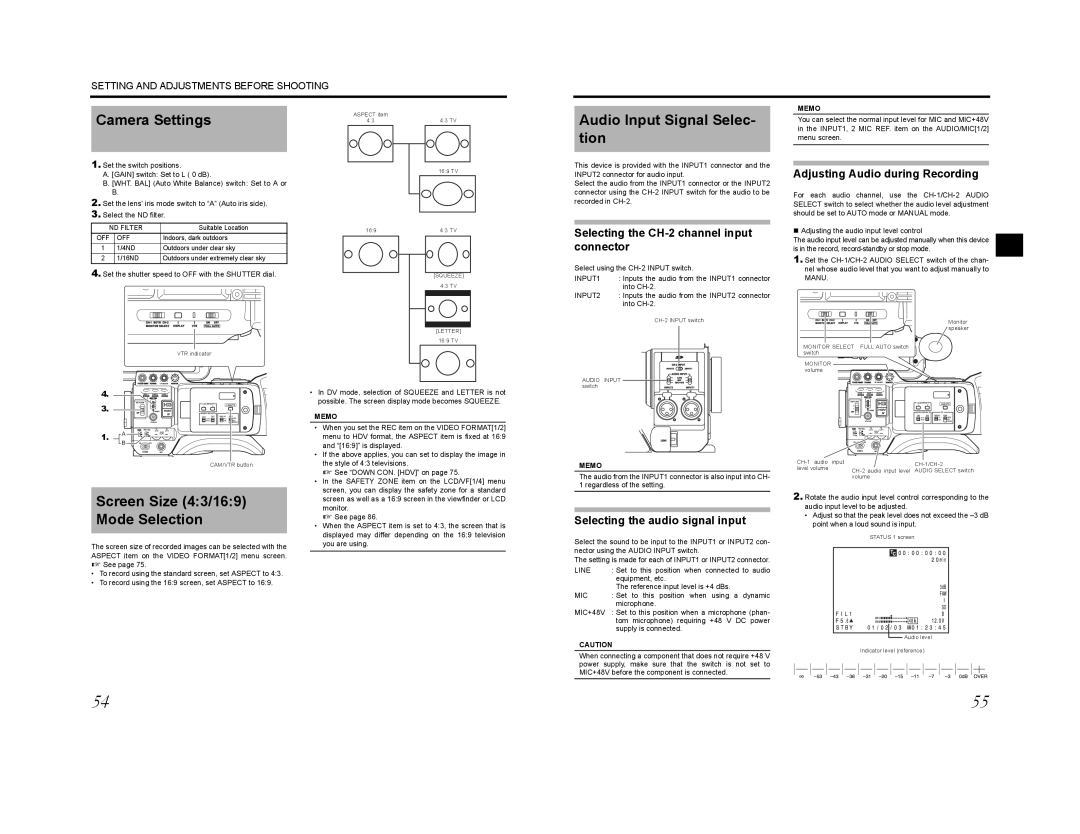
Camera Settings
1.Set the switch positions.
A.[GAIN] switch: Set to L ( 0 dB).
B.[WHT. BAL] (Auto White Balance) switch: Set to A or B.
2.Set the lens’ iris mode switch to “A” (Auto iris side).
3.Select the ND filter.
ASPECT item |
|
4:3 | 4:3 TV |
| 16:9 TV |
Audio Input Signal Selec- tion
This device is provided with the INPUT1 connector and the INPUT2 connector for audio input.
Select the audio from the INPUT1 connector or the INPUT2 connector using the
You can select the normal input level for MIC and MIC+48V in the INPUT1, 2 MIC REF. item on the AUDIO/MIC[1/2] menu screen.
Adjusting Audio during Recording
For each audio channel, use the
| ND FILTER | Suitable Location | |
OFF |
| OFF | Indoors, dark outdoors |
1 |
| 1/4ND | Outdoors under clear sky |
2 |
| 1/16ND | Outdoors under extremely clear sky |
4.Set the shutter speed to OFF with the SHUTTER dial.
VTR indicator
16:9 | 4:3 TV |
[SQUEEZE] 4:3 TV
[LETTER] 16:9 TV
Selecting the CH-2 channel input connector
Select using the
INPUT1 | : Inputs the audio from the INPUT1 connector |
| into |
INPUT2 | : Inputs the audio from the INPUT2 connector |
| into |
|
Adjusting the audio input level control
The audio input level can be adjusted manually when this device is in the record,
1.Set the
Monitor |
speaker |
MONITOR SELECT FULL AUTO switch |
switch |
MONITOR |
volume |
4.
3.
1.A B
VF BRIGHT
USER 1 | USER 2 | USER 3 |
ND FILTER
2
1
MENU
STATUS
POWERREC
LCD BRIGHT | CAM/VTR | |
- | + | |
AUDIO SELECT | TC | |
DISPLAY GENE. | ||
|
| TC |
|
| UB |
CAM/VTR button
•In DV mode, selection of SQUEEZE and LETTER is not possible. The screen display mode becomes SQUEEZE.
MEMO
• When you set the REC item on the VIDEO FORMAT[1/2] |
menu to HDV format, the ASPECT item is fixed at 16:9 |
and “[16:9]” is displayed. |
• If the above applies, you can set to display the image in |
the style of 4:3 televisions. |
X See “DOWN CON. [HDV]” on page 75. |
• In the SAFETY ZONE item on the LCD/VF[1/4] menu |
screen, you can display the safety zone for a standard |
AUDIO INPUT ![]()
![]()
![]() switch
switch![]()
![]()
![]()
![]()
![]()
![]()
MEMO
The audio from the INPUT1 connector is also input into CH- 1 regardless of the setting.
|
| VF BRIGHT |
|
|
USER 1 | USER 2 | USER 3 |
|
|
ND FILTER |
| LCD BRIGHT |
| |
|
| CAM/VTR | ||
2 |
| - | + |
|
1 |
|
|
|
|
| MENU |
|
|
|
|
| AUDIO SELECT | TC | |
|
| DISPLAY GENE. | ||
|
|
|
| TC |
|
|
|
| UB |
| STATUS |
|
|
|
POWER |
| REC |
|
|
| ||
level volume | AUDIO SELECT switch | |
| volume |
|
Screen Size (4:3/16:9) Mode Selection
The screen size of recorded images can be selected with the ASPECT item on the VIDEO FORMAT[1/2] menu screen. X See page 75.
•To record using the standard screen, set ASPECT to 4:3.
•To record using the 16:9 screen, set ASPECT to 16:9.
screen as well as a 16:9 screen in the viewfinder or LCD |
monitor. |
X See page 86. |
• When the ASPECT item is set to 4:3, the screen that is |
displayed may differ depending on the 16:9 television |
you are using. |
Selecting the audio signal input
Select the sound to be input to the INPUT1 or INPUT2 con- nector using the AUDIO INPUT switch.
The setting is made for each of INPUT1 or INPUT2 connector.
LINE | : Set to this position when connected to audio |
| equipment, etc. |
| The reference input level is +4 dBs. |
MIC | : Set to this position when using a dynamic |
| microphone. |
MIC+48V : Set to this position when a microphone (phan- tom microphone) requiring +48 V DC power supply is connected.
CAUTION
When connecting a component that does not require +48 V power supply, make sure that the switch is not set to MIC+48V before the component is connected.
2. Rotate the audio input level control corresponding to the |
audio input level to be adjusted. |
• Adjust so that the peak level does not exceed the |
point when a loud sound is input. |
STATUS 1 screen
![]() Audio level
Audio level
Indicator level (reference)
54 | 55 |