SETTING AND ADJUSTMENTS BEFORE SHOOTING
Setting the Video Format
Set the video format using the FRAME RATE item and the REC item on the VIDEO FORMAT menu screen.
4.Turn the SHUTTER dial, change the setting and push the SHUTTER dial.
•The setting stops flashing and is temporarily set.
•Move the cursor (K) to the EXECUTE item and EXE- CUTE flashes.
5.Push the SHUTTER dial.
•“REBOOT! SYSTEM CHANGE” is displayed on the screen and after a few seconds the system is reboo- ted.
Camera Settings
1. Set the switch positions.
A. [GAIN] switch: Set to L ( 0 dB).
B. [WHT. BAL] (Auto White Balance) switch: Set to A or B.
ASPECT item |
|
4:3 | 4:3 TV |
| 16:9 TV |
Setting the FRAME RATE Item
1.Press the STATUS button for at least 1 second.
• The TOP MENU screen is displayed.
SHUTTER dial
USER 1 | USER 2 | USER 3 |
SHUTTER
ND FILTER
2
1
MENU
STATUS
STATUS button
Setting the REC Item
Set the REC item using the same steps as for the FRAME RATE item.
MEMO
• | If you change the FRAME RATE item setting, the system |
| is rebooted. |
• | The synchronous video signal is momentarily disturbed |
2. Set the lens’ iris mode switch to “A” (Auto iris side).
3. Select the ND filter.
ND FILTER | Suitable Location | |
OFF | OFF | Indoors, dark outdoors |
1 | 1/4ND | Outdoors under clear sky |
2 | 1/16ND | Outdoors under extremely clear sky |
4. Set the shutter speed to OFF with the SHUTTER dial.
VTR indicator
16:9 | 4:3 TV |
[SQUEEZE]
4:3 TV
[LETTER] 16:9 TV
2.Turn the SHUTTER dial and bring the cursor (K) to the VIDEO FORMAT.. item and press the SHUTTER dial.
• The VIDEO FORMAT[1/2] menu screen is displayed.
when the REC item setting is switched. |
• We recommend the following settings for REC item (in |
HDV format). |
When recording images with a lot of motion: |
Set to HDV60p or HDV50p |
When recording images with little motion: |
Set to HDV30p or HDV25p |
4.
3.
1.A B
VF BRIGHT
USER 1 | USER 2 | USER 3 |
ND FILTER
2
1
MENU
STATUS
POWERREC
LCD BRIGHT | CAM/VTR | |
- | + | |
AUDIO SELECT | TC | |
DISPLAY GENE. | ||
|
| TC |
|
| UB |
CAM/VTR button
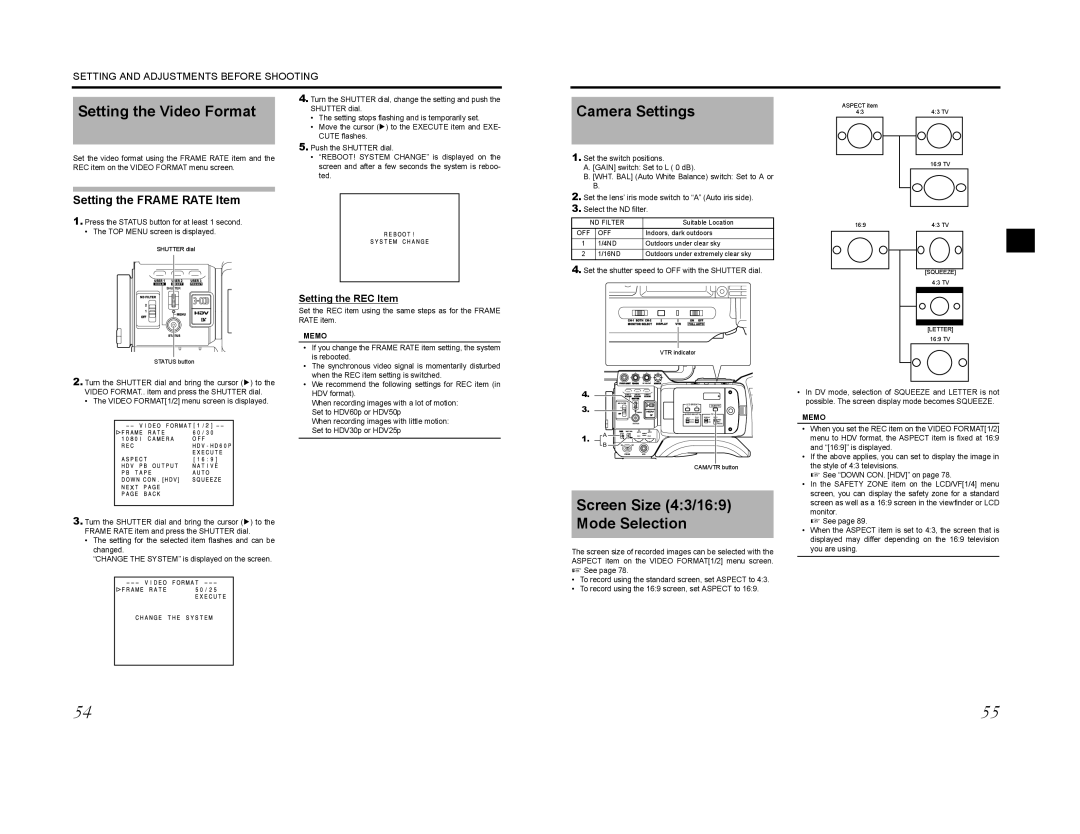
•In DV mode, selection of SQUEEZE and LETTER is not possible. The screen display mode becomes SQUEEZE.
MEMO
• When you set the REC item on the VIDEO FORMAT[1/2] |
menu to HDV format, the ASPECT item is fixed at 16:9 |
and “[16:9]” is displayed. |
• If the above applies, you can set to display the image in |
the style of 4:3 televisions. |
X See “DOWN CON. [HDV]” on page 78. |
• In the SAFETY ZONE item on the LCD/VF[1/4] menu |
screen, you can display the safety zone for a standard |
3.Turn the SHUTTER dial and bring the cursor (K) to the FRAME RATE item and press the SHUTTER dial.
•The setting for the selected item flashes and can be changed.
“CHANGE THE SYSTEM” is displayed on the screen.
Screen Size (4:3/16:9) Mode Selection
The screen size of recorded images can be selected with the ASPECT item on the VIDEO FORMAT[1/2] menu screen. X See page 78.
•To record using the standard screen, set ASPECT to 4:3.
•To record using the 16:9 screen, set ASPECT to 16:9.
screen as well as a 16:9 screen in the viewfinder or LCD |
monitor. |
X See page 89. |
• When the ASPECT item is set to 4:3, the screen that is |
displayed may differ depending on the 16:9 television |
you are using. |
54 | 55 |