RX-730RBK
Per I’ltalia
English Deutsch Français Nederlands Español Italiano
Voorzichtig -- Power en STANDBY/ON
RX-730RBK
Table of Contents
Before Installation
Checking the Supplied Accessories
Getting Started
Switches, Buttons and Controls
Front Panel
Front Panel
Outside panel
Remote Control
How to open the outside panel
Remote Control Outside panel
AM MW/LW Antenna Connections
Connecting the FM and AM MW/LW Antennas
Using the Supplied FM Antenna
FM Antenna Connections
Connecting the front speakers
Connecting the Speakers
Close the terminal
Connecting the rear and center speakers
Connecting the subwoofer speaker
Open the terminal
About the speaker impedance of the speakers
Case 1 When you connect only front speakers
Case 2 When you connect front speakers and a center speaker
Case 3 When you connect front and rear speakers
If your audio components have a Compu LINK-3 terminal
Connecting Audio/Video Components
Audio component connections
Audio Components Video Components
VCR
Video component connections
Press Power to set it in the on position
Connecting the Power Cord
Putting Batteries in the Remote Control
Plug the power cord into an AC outlet
Turning the Power On and Off
Basic Operations
Selecting the Source to Play
On the front panel only
Adjusting the Volume
From the remote control
Selecting the Front Speakers
Muting the Sound
Listening with Headphones
From the remote control only
Mute appears on the display and the volume turns off
From the remote control Press Balance L/R -/+
Basic Settings
Adjusting the Front Speaker Output Balance
Listening at Low Volume Loudness
Using the Sleep Timer
To cancel the Sleep Timer
From the remote control Press Sleep repeatedly
Small
Selecting the Center Speaker Size
Large Small
Large
Examples
Using Visual Confirmation
One Touch Operation
Using the One Touch Operation
To store the sound settings Press ONE Touch Operation
To cancel the One Touch Operation function
Receiving Radio Broadcasts
Tuning in Stations Manually
Using Preset Tuning
Storing the preset stations
Mono
Selecting the FM Reception Mode
Tuning in a preset station
Auto
Assigning Names to Preset Stations
Using the RDS Radio Data System to Receive FM Stations
What Information Can RDS Signals Provide?
PTY
Searching for a Program by PTY Codes
Info
Alarm
News
Affairs
Case
Switching to a Broadcast Program of Your Choice Temporarily
TA NEWS/INFO TA/INFO TA/NEWS
News Info TA/NEWS/INFO
Using the SEA Modes
Selecting Your Favorite SEA Mode
Rock Musical Movie Country SEA OFF Usermode Jazz
To erase a stored adjustment
Creating Your Own SEA Mode
Adjust the SEA frequency and its level
To recall your own SEA adjustment
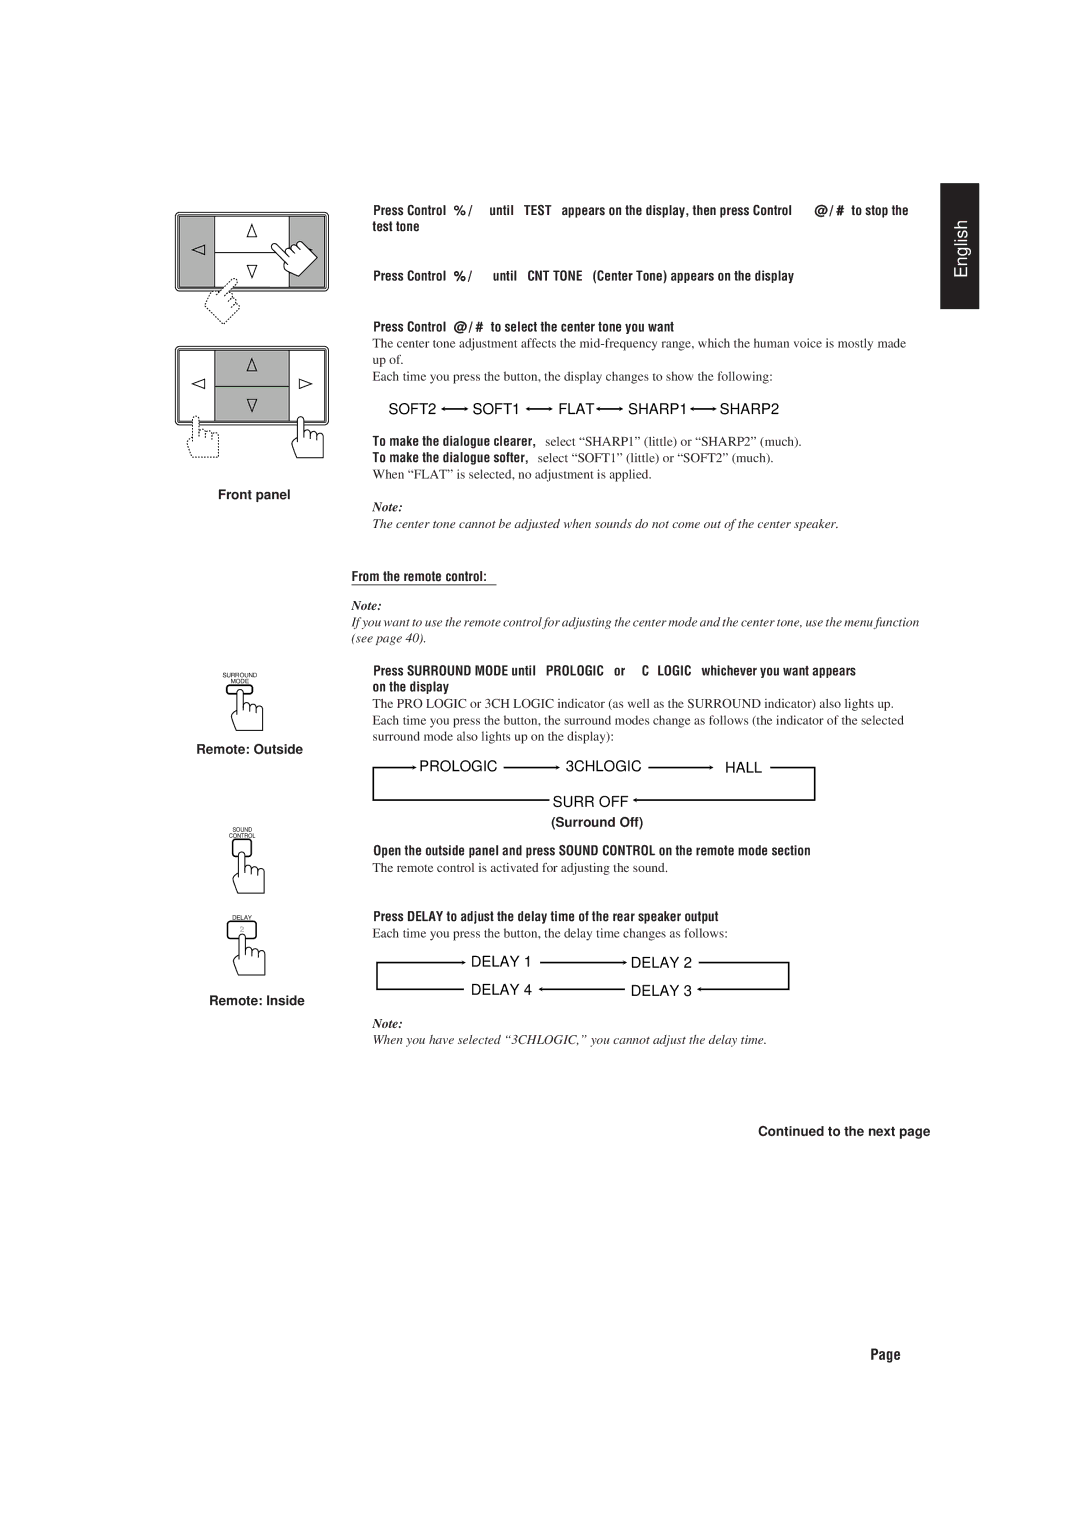
Prologic 3CHLOGIC Hall Surr OFF
Using the Surround Processor
Using JVC’s Hall Surround
What is surround?
Press Delay to adjust the delay time
Delay
Delay 1 Delay Delay 4 Delay
Delay
This case
Speaker Arrangements for Dolby Surround
Wide Normal Phantom
Preparing for Dolby Surround
If necessary, adjust the speaker output level as follows
SOFT2 SOFT1 Flat SHARP1 SHARP2
Press Test again to stop the test tone
Press Test to start checking the speaker output balance
Using Dolby Surround
Press %/ Þto move to SOURCE, then press @/ #
Using the On-Screen Display to Control the Receiver
From the remote control Press Menu
Press %/ Þto move To SETTING, then press @ / #
Listening at Low Volume Loudness Also see
Press %/ Þto move to SEA, then press @ / #
Press %/ Þ to move To SEA Adjust then press @ / #
Press %/ Þ / @ / #to adjust the SEA mode as you want
Press %/ Þto move to TUNER, then press @ / #
For Dolby 3ch Logic
Press %/ Þto move to Surround ADJUST, then press @ / #
Press %/ Þto move To SURROUND, then press @/ #
Press %/ Þto move to one of the surround modes
Synchronized Recording
Compu Link Remote Control System
Remote Control through the Remote Sensor on the Receiver
Automatic Source Selection
Sound control section Amplifier
Using the Remote Control
To operate JVC audio components using this remote control
Tuner
Turntable
CD player
CD player-changer
Cassette deck
Enter button after selecting a channel number
To operate JVC video components using this remote control
Preset Channel +
0, +10 Selects the TV channels
Programing a series of operations
Simplifying the Operations Using the Remote Control
Press Cancel
Erasing a program
Repeat until you program up to 16 steps
Operating the Other Manufacturers’ Audio/Video Components
Storing the signals
Open the outside panel of this remote control
Press one of the buttons on the remote mode section
Press Learn to finish the storing procedure
Using stored signals
Erasing stored signals
Problem Possible Cause Solution
Troubleshooting
Specifications
Amplifier
Video
FM tuner IHF
AM MW/LW tuner
General
EN, GE, FR, NL, SP, IT 0697OFYOTKJEM


 SOFT1
SOFT1 
 FLAT
FLAT
 SHARP1
 SHARP2
 PROLOGIC
  3CHLOGIC
  HALL
HALL![]()
 DELAY 1
  DELAY 2
![]() DELAY 3
DELAY 3 ![]()
