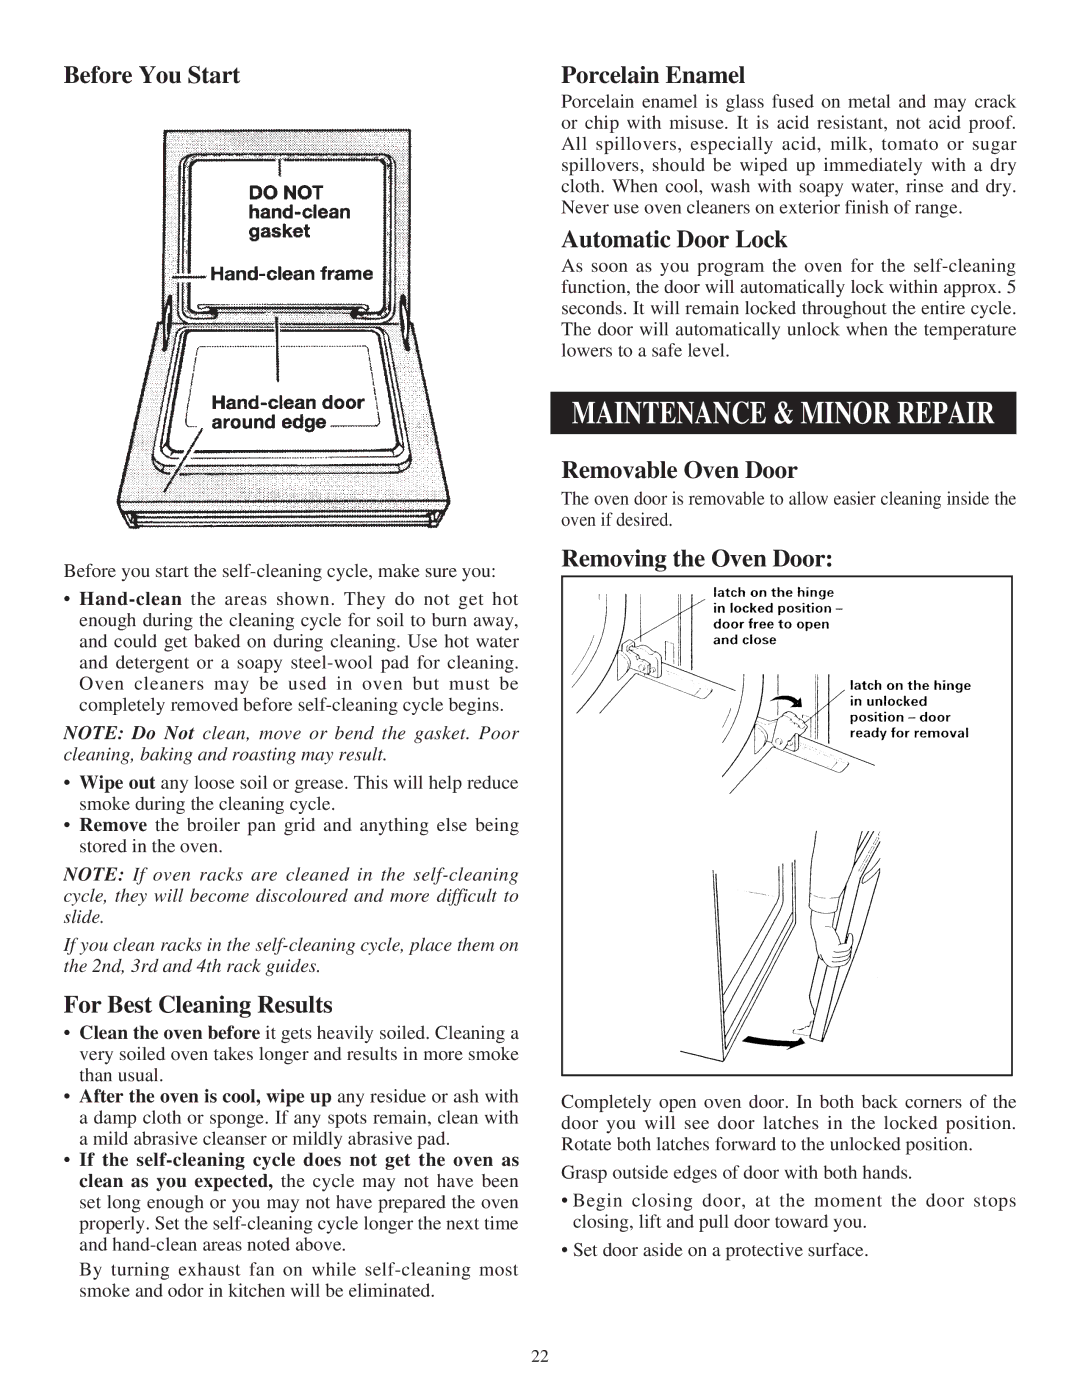
Before You Start
Before you start the
•
NOTE: Do Not clean, move or bend the gasket. Poor cleaning, baking and roasting may result.
•Wipe out any loose soil or grease. This will help reduce smoke during the cleaning cycle.
•Remove the broiler pan grid and anything else being stored in the oven.
NOTE: If oven racks are cleaned in the
If you clean racks in the
For Best Cleaning Results
•Clean the oven before it gets heavily soiled. Cleaning a very soiled oven takes longer and results in more smoke than usual.
•After the oven is cool, wipe up any residue or ash with a damp cloth or sponge. If any spots remain, clean with a mild abrasive cleanser or mildly abrasive pad.
•If the
By turning exhaust fan on while
Porcelain Enamel
Porcelain enamel is glass fused on metal and may crack or chip with misuse. It is acid resistant, not acid proof. All spillovers, especially acid, milk, tomato or sugar spillovers, should be wiped up immediately with a dry cloth. When cool, wash with soapy water, rinse and dry. Never use oven cleaners on exterior finish of range.
Automatic Door Lock
As soon as you program the oven for the
Maintenance & Minor Repair
Removable Oven Door
The oven door is removable to allow easier cleaning inside the oven if desired.
Removing the Oven Door:
Completely open oven door. In both back corners of the door you will see door latches in the locked position. Rotate both latches forward to the unlocked position.
Grasp outside edges of door with both hands.
•Begin closing door, at the moment the door stops closing, lift and pull door toward you.
•Set door aside on a protective surface.
22