Extended User Guide
Kodak Hero 7.1 All-in-One Printer
Page
Table of contents
Scanning
Printing
Mobile Printing
Copying
Troubleshooting
119
Components
Printer Overview
Control panel
Feature Description
Using the LCD touch screen
Feature Icon Displays
Home Screen Menu
Home Screen Status Icons
Kodak Hero 7.1 All-in-One Printer
Home Center Software
Ordering supplies
Configuring printer settings
Connecting to a wireless network
Networking Your Printer
Before you connect
Touch Wi-Fi Setup Wizard
Connecting to a non-WPS wireless router
Kodak Hero 7.1 All-in-One Printer
Connecting to a WPS wireless router
Touch Wi-Fi Setup Wizard Touch WPS Connect
Touch Push Button Configuration
Setting up an IP Address
Touch Advanced IP Address Setup
Dynamic Dhcp Manual Static
Touch Print Network Configuration
Viewing the network configuration
Printing the network configuration
Touch View Network Configuration
On a computer with MAC OS Select Apple System Preferences
Connecting to another Kodak All-in-One Printer
Select No, my printer is not listed, then click Next
Select Yes, my printer is listed, then click Next
Connecting to an Ethernet network
If your printer is connected to a computer with MAC OS
Changing from USB to a wireless connection
Select Network Wireless/Wi-Fi, then click Next
If your printer is connected to a computer with Windows OS
Select Network Ethernet cable, then click Next
Changing from USB to an Ethernet connection
Online Printer Management Tool
Accessing the Online Printer Management Tool
Directly from Home Center Software v7.x or higher
On any printer-supported computer
Configuring printer settings
Using the Online Printer Management Tool
Changing the printer name
Adding an outgoing email profile
Setting up Scan To Email
Online Printer Management Tool
Type the User ID and Password for your email account
Select Scan To Email Address Book
Setting up the email address book
Select Scan To Email Email Option
Setting options for scan to email
Online Printer Management Tool
Before you create a network folder profile
Setting up Scan To Network Folder
Adding a network folder profile
Profile Name Folder Path
Type
Select Scan To Network Folder Scan Settings
Setting scan settings for scan to network folder
Adding a Google Cloud Print Account
Click Register Printer
Editing a Google Cloud Print Account
Click Claim Printer Now
Adding a Kodak Email Print Service Account
Click Sign in with Google
Click Send Test Email to Google Account
Changing printer settings for copying and printing
Changing Copy Document and Copy Photo settings
Select Copy & Print Copy Documents or Copy Photo
Online Printer Management Tool
Select Copy & Print Print Photo
Changing Print Photo settings
Paper types
Handling Paper
Photo top paper tray Main bottom paper tray
Paper sizes
Envelope sizes
Loading paper in the main paper tray
Loading paper
Handling Paper
Paper stop Output tray extender
Loading the photo paper tray
Kodak Hero 7.1 All-in-One Printer
Loading envelopes
Kodak Hero 7.1 All-in-One Printer
Printing
Manually selecting paper trays
Touch , then touch Copy Photo or View and Print Photos
Printing documents
Printing two-sided documents
Automatic two-sided printing
Manual two-sided printing
Automatic two-sided printing from a computer with MAC OS
Manual two-sided printing from a computer with Windows OS
Manual two-sided printing from a computer with MAC OS
Printing forms from the control panel
Touch Find Photo
Printing pictures
Viewing pictures on a memory card or USB-connected device
Finding pictures on a memory card or USB-connected device
Front USB port
Printing from a memory card or USB-connected device
Important Use only one slot or port at a time
Using default settings to print a picture
Print Photos Option Settings Description
Changing the settings and printing pictures
Select Copy & Print Print Photo
Settings Description
Printing tagged pictures
Touch Options, Tray Selection, then Bottom Tray
Printing panoramic pictures
Zooming and cropping pictures
Touch Transfer All to PC
Printing from a wireless device
Transferring pictures to a computer
Transferring pictures to a computer with Windows OS
Transferring pictures to a computer with MAC OS
Mobile Printing
Printing from an iPhone, iPad, or iPod Touch
Printing from a Blackberry Device
Printing from an Android OS Device
Touch Copy Document
Using the default settings to copy a document
Copying
Copying a document
Copy Document Setting Description Option
Adjusting the settings and copying a document
Copy Document Setting Description
Changing the number of copies of a document
Touch Copy Size
Enlarging or reducing the size of a copy
Darkening or lightening a copy
Using the default settings to copy a photo
Copying a photo
Touch Copy Photo
Copy Photo Option Setting Description
Adjusting the settings and copying a photo
Printer detects photo paper
Changing the number of copies of a photo
Enlarging or reducing the size of a copy of a photo
Darkening or lightening a copy of a photo
Before you begin scanning
Scanning
Setting Options
Scanning
Scanning from the control panel
Scanning to a computer
Scan Action File
Scanning to a memory card or USB flash drive
Scan Option Settings Description
Scan Option Settings Description
Scanning to email
Touch Scan to Network Folder Touch Sharing folder
Scanning to network folder
Scanning from the computer
Scanning multiple pictures simultaneously
Select Applications Webscan
Scanning from the Online Printer Management Tool
Maintaining Your Printer
General care and cleaning
Cleaning the scanner glass and document backing
Kodak Hero 7.1 All-in-One Printer
Replacing ink cartridges
Remove the cap
Maintaining Your Printer
Replacing the printhead
Maintaining Your Printer
Kodak Hero 7.1 All-in-One Printer
100
Kodak Kodak AiO Printer Tools
To update the software
To update the printer firmware
Updating the software and printer firmware
Checking ink levels
Monitoring and adjusting printer performance
Resetting factory defaults
Checking paper levels
Touch Check Paper Levels
Troubleshooting
Basic troubleshooting
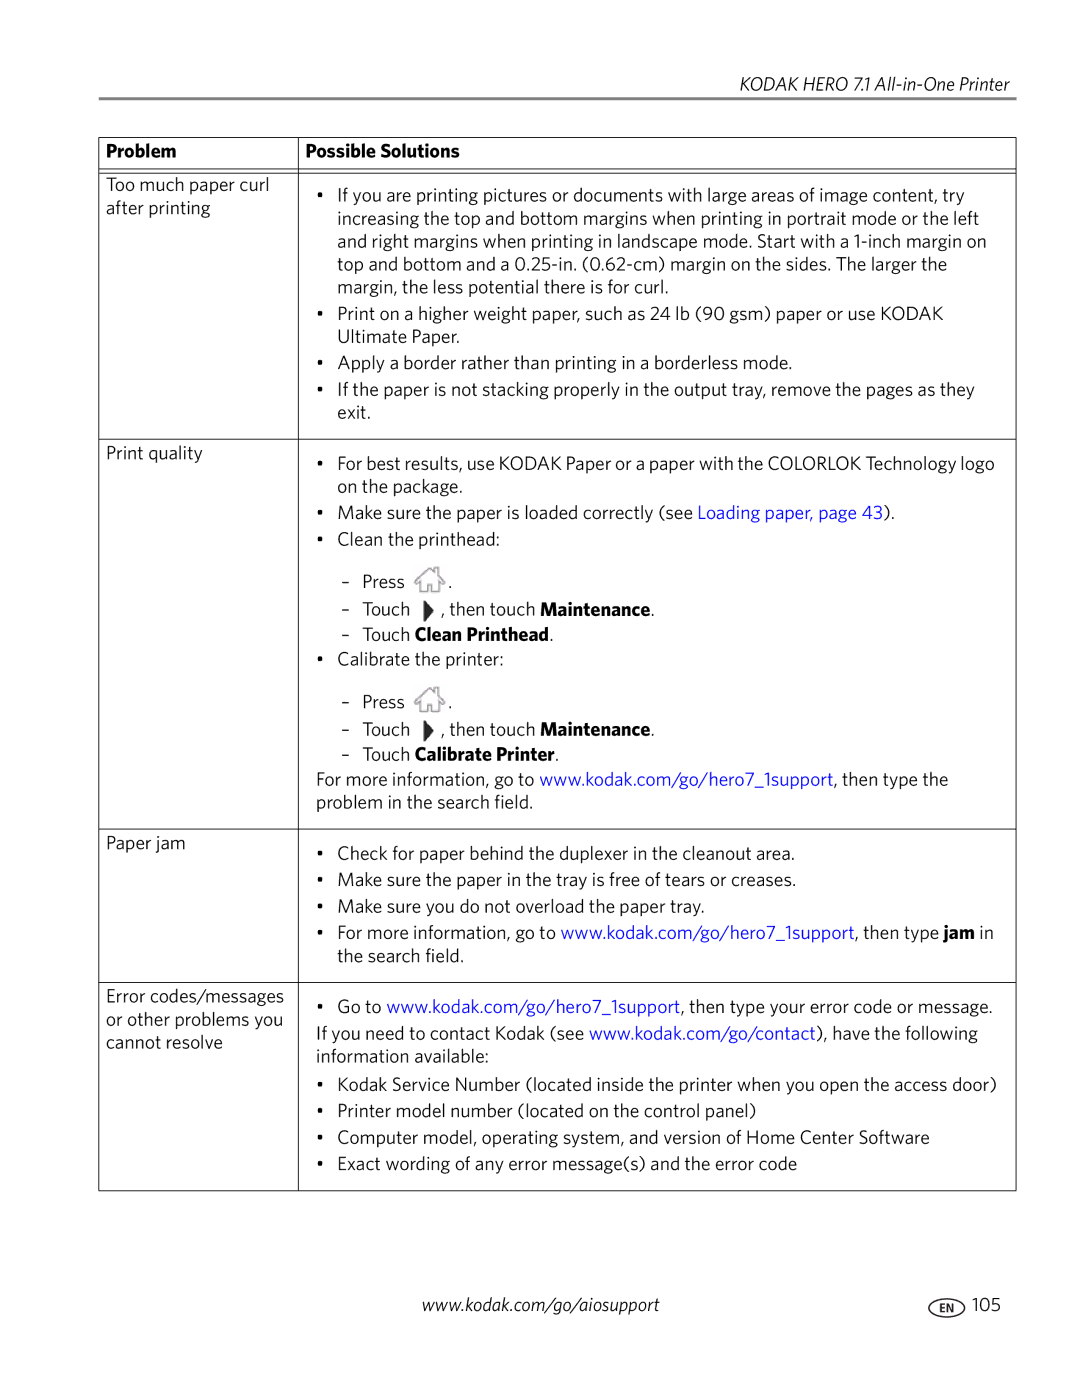
Problem Possible Solutions
Touch Calibrate Printer
Touch Clean Printhead
Getting help on the Web
For more troubleshooting information
Wi-Fi status light What it means
Power status light
Wi-Fi status light
Power light What it means
Print Performance
Product and Safety Specifications
Features and Specifications
Photo Printing Features
Main paper tray
Copy document features
Copy photo features
Scanning features
Connectivity
Photo paper tray
Output paper tray
Ink cartridges
Digital image sources
Physical specifications
Power
Software support
Computer with MAC OS
Warranty
System requirements
Computer with Windows OS
Paper sizes supported
Paper types supported
Photos 4 x 6 in. / 10 x 15 cm 4 x 7 in. / 10 x 18 cm
Safety information
Ink cartridge safety
LCD touch screen safety
FCC Statement
Regulatory Compliance
Industry Canada IC Radiation Exposure Statement
Canadian Statements
European Compliance Statement
German compliance statement
Reach Article 33 Declarations Power Supply Information
Energy Star Qualified
Waste Electrical and Electronic Equipment Labeling
Limitations
Warranty Information
Limited Warranty
Limited Warranty Coverage
Outside the United States and Canada
Declaration of Conformity