Sewing material edges with feather stitch
Type of stitch No. | Stitch length |
|
|
17 (Feather stitch) | fixed at 2.5 in the factory |
|
|
Use the feather stitch as a decorative border stitch or to hem bed covers, table cloths and curtains or even for embroidery work.
1.Set the stitch type selector w at 17.
2.Position the fabric with the good side up on the sewing table of the machine and sew the seam ca. 1 cm (3/8”) from and parallel to the edge.
3.Trim the fabric close to the seam along the edge.
Besides this, the decorative effect of the feather stitch also prevents the fabric edge from fraying.
Sewing with three-fold zigzag stretch stitches
Type of stitch No. | Stitch length |
|
|
20 (Triple zigzag stretch stitch) | fixed at 2.5 in the factory |
|
|
This type of stitch can be used to sew heavy stretch materials whenever a stitch with zigzag pattern is practical. It may also be used as a decorative edge stitch.
•Set the stitch type selector w at 20.
5.Open the caliper on the buttonhole foot N and position the button to be sewn on between the jaws.
6.Pull the buttonhole lever d down and press it backwards slightly as shown.
7.Start the machine, at the same time holding the upper thread carefully.
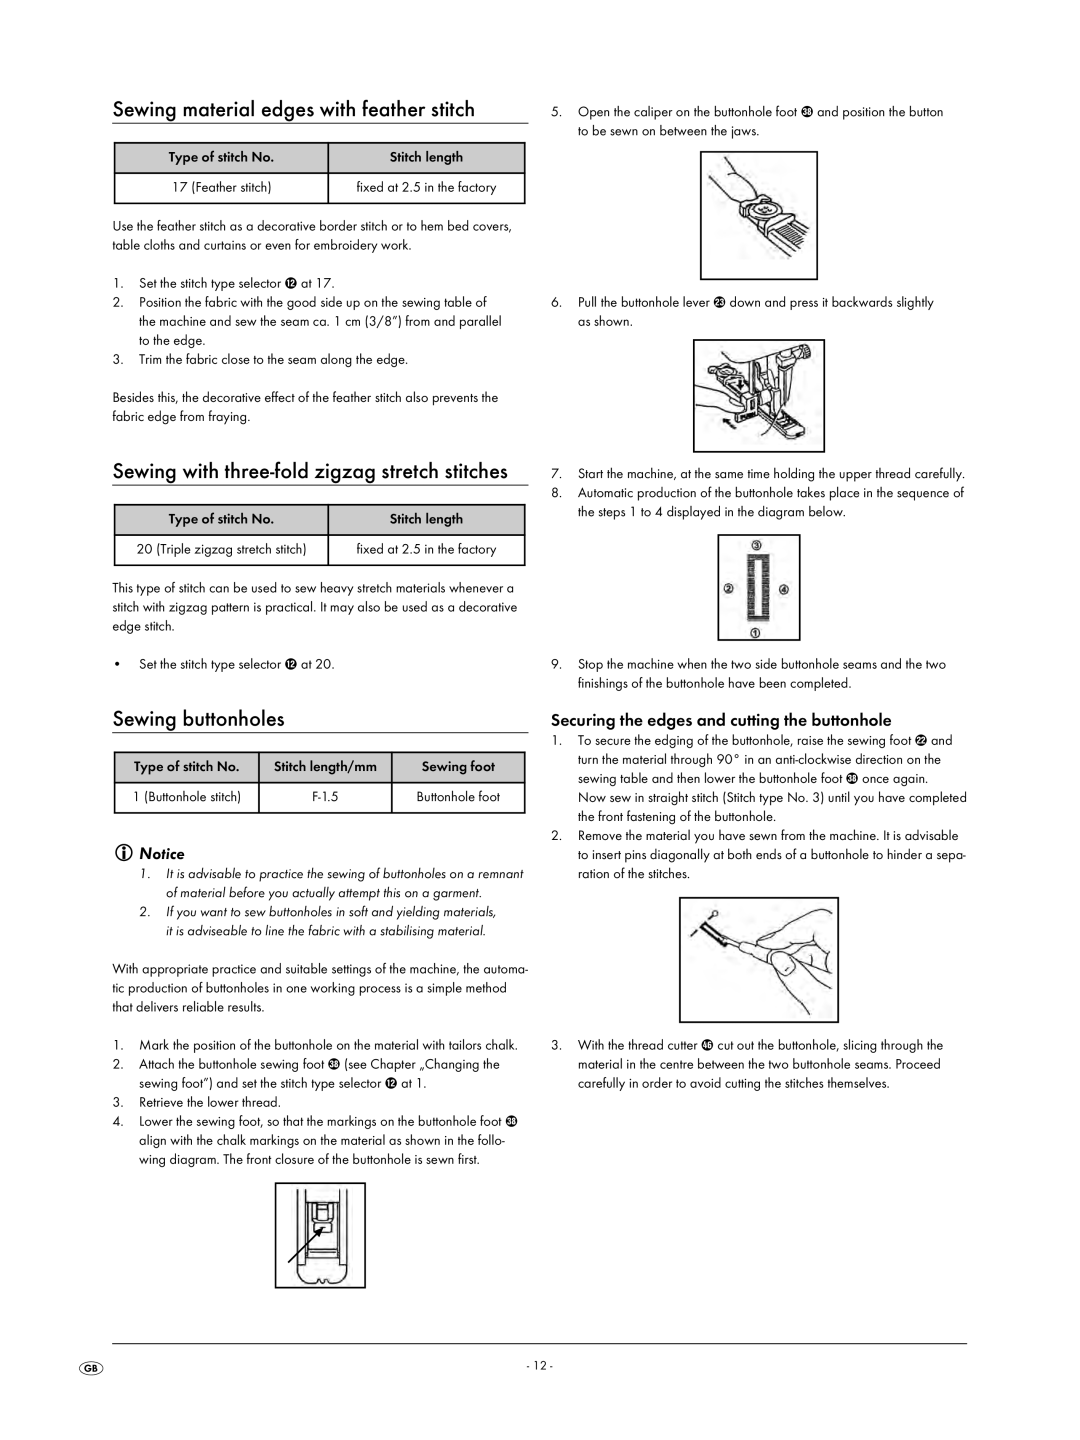
8.Automatic production of the buttonhole takes place in the sequence of the steps 1 to 4 displayed in the diagram below.
9.Stop the machine when the two side buttonhole seams and the two finishings of the buttonhole have been completed.
Sewing buttonholes
Type of stitch No. | Stitch length/mm | Sewing foot |
|
|
|
1 (Buttonhole stitch) | Buttonhole foot | |
|
|
|
Notice
1.It is advisable to practice the sewing of buttonholes on a remnant of material before you actually attempt this on a garment.
2.If you want to sew buttonholes in soft and yielding materials, it is adviseable to line the fabric with a stabilising material.
With appropriate practice and suitable settings of the machine, the automa- tic production of buttonholes in one working process is a simple method that delivers reliable results.
1.Mark the position of the buttonhole on the material with tailors chalk.
2.Attach the buttonhole sewing foot N (see Chapter „Changing the sewing foot”) and set the stitch type selector w at 1.
3.Retrieve the lower thread.
4.Lower the sewing foot, so that the markings on the buttonhole foot N align with the chalk markings on the material as shown in the follo- wing diagram. The front closure of the buttonhole is sewn first.
Securing the edges and cutting the buttonhole
1.To secure the edging of the buttonhole, raise the sewing foot s and turn the material through 90° in an
Now sew in straight stitch (Stitch type No. 3) until you have completed the front fastening of the buttonhole.
2.Remove the material you have sewn from the machine. It is advisable to insert pins diagonally at both ends of a buttonhole to hinder a sepa- ration of the stitches.
3.With the thread cutter J cut out the buttonhole, slicing through the material in the centre between the two buttonhole seams. Proceed carefully in order to avoid cutting the stitches themselves.
- 12 -