3.Position the sewing foot s to be mounted with the base lying on the stitch plate a in such a manner that the suspension pin on the foot and the slot on the foot spindle are directly in line.
4.Lower the lifting lever g and complete connection of the sewing foot s with the sewing spindle. When the foot is correctly positioned, it must click into place at the suspension pin of the foot.
Changeover to free arm operation
Sewing with the free arm option is suitable for
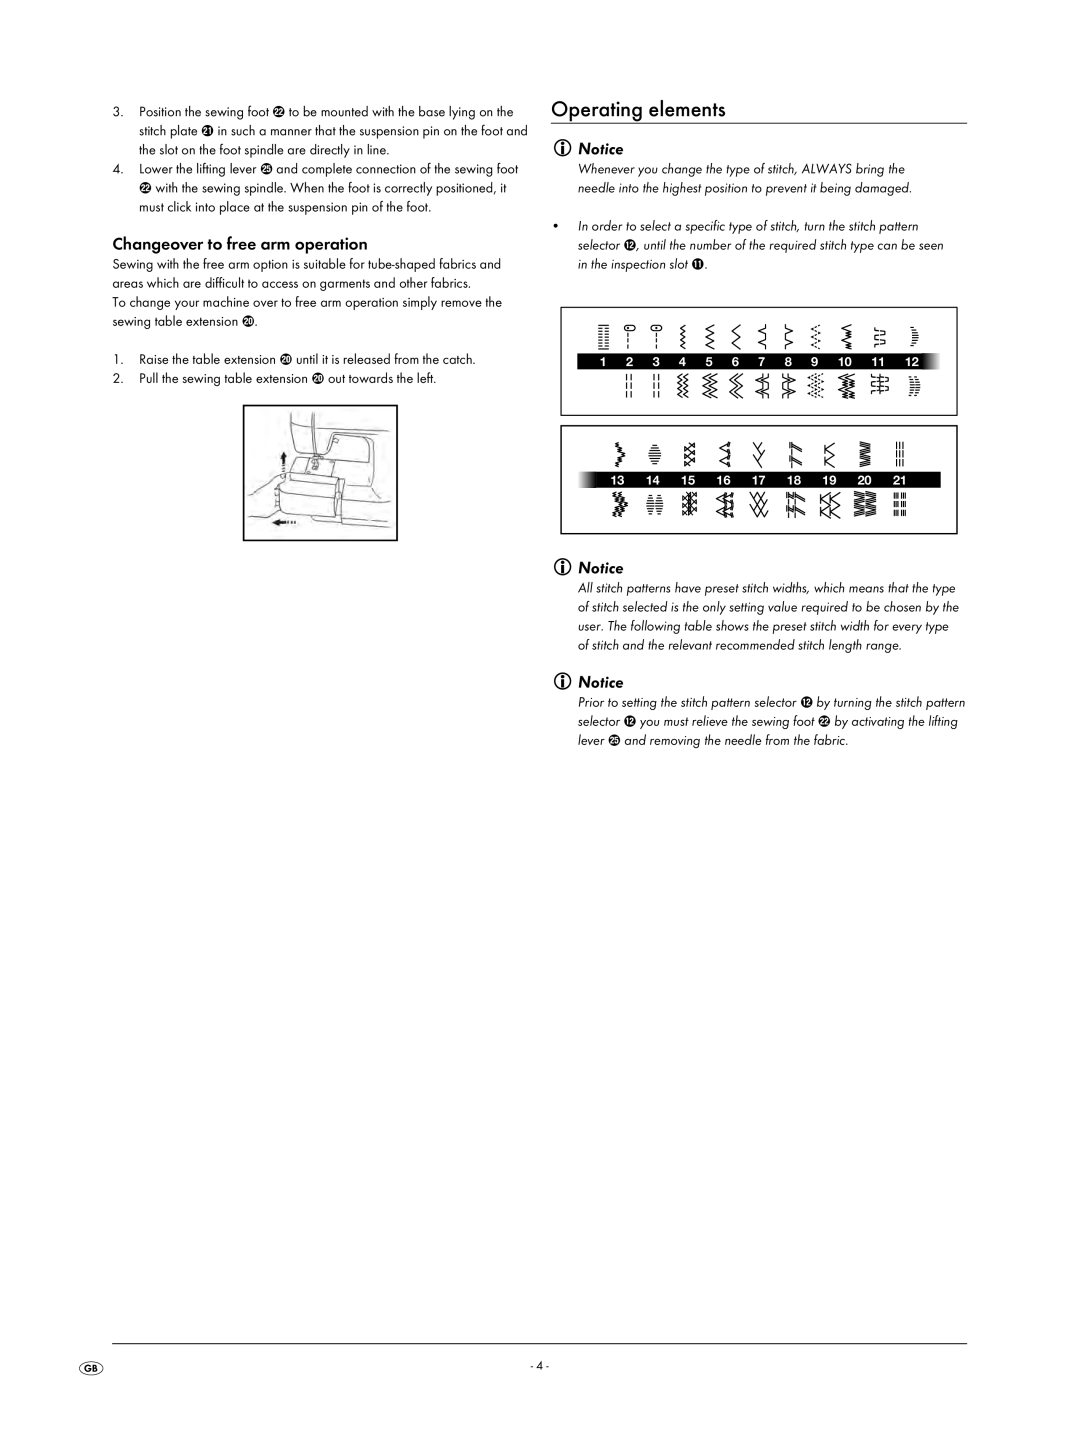
To change your machine over to free arm operation simply remove the sewing table extension p.
1.Raise the table extension p until it is released from the catch.
2.Pull the sewing table extension p out towards the left.
Operating elements
Notice
Whenever you change the type of stitch, ALWAYS bring the needle into the highest position to prevent it being damaged.
•In order to select a specific type of stitch, turn the stitch pattern selector w, until the number of the required stitch type can be seen in the inspection slot q.
|
|
|
|
|
|
|
|
|
|
|
|
|
|
|
|
|
|
|
|
|
|
|
|
|
|
|
|
|
|
|
|
|
|
|
|
|
|
|
|
|
|
|
|
|
|
|
|
|
|
|
|
|
|
|
|
|
|
|
|
|
|
|
|
|
|
|
|
|
|
|
|
|
|
|
|
|
|
1 | 2 |
| 3 | 4 | 5 | 6 | 7 | 8 | 9 | 10 | 11 | 12 |
| ||||||||||||
|
| ||||||||||||||||||||||||
|
|
|
|
|
|
|
|
|
|
|
|
|
|
|
|
|
|
|
|
|
|
|
|
|
|
|
|
|
|
|
|
|
|
|
|
|
|
|
|
|
|
|
|
|
|
|
|
|
|
|
|
|
|
|
|
|
|
|
|
|
|
|
|
|
|
|
|
|
|
|
|
|
|
|
|
|
|
|
|
|
|
|
|
|
|
|
|
|
|
|
|
|
|
|
|
|
|
|
|
|
|
|
|
|
|
|
|
|
|
|
|
|
|
|
|
|
|
|
|
|
|
|
|
|
|
|
|
|
|
|
|
|
|
|
|
|
|
|
|
|
|
|
|
|
|
|
|
|
|
|
|
|
|
|
|
|
|
|
|
|
|
|
|
|
|
|
|
|
|
|
|
|
|
|
|
|
|
|
|
|
|
|
|
|
|
|
|
|
|
|
|
|
|
|
|
|
|
|
|
|
|
|
|
|
|
|
|
| 13 | 14 | 15 | 16 | 17 | 18 | 19 | 20 | 21 | |||||||||
| ||||||||||||||||||
|
|
|
|
|
|
|
|
|
|
|
|
|
|
|
|
|
|
|
|
|
|
|
|
|
|
|
|
|
|
|
|
|
|
|
|
|
|
|
|
|
|
|
|
|
|
|
|
|
|
|
|
|
|
|
|
|
Notice
All stitch patterns have preset stitch widths, which means that the type of stitch selected is the only setting value required to be chosen by the user. The following table shows the preset stitch width for every type of stitch and the relevant recommended stitch length range.
Notice
Prior to setting the stitch pattern selector w by turning the stitch pattern selector w you must relieve the sewing foot s by activating the lifting lever g and removing the needle from the fabric.
- 4 -
