Configuring and Controlling the
8.1.6The Geometry Screen
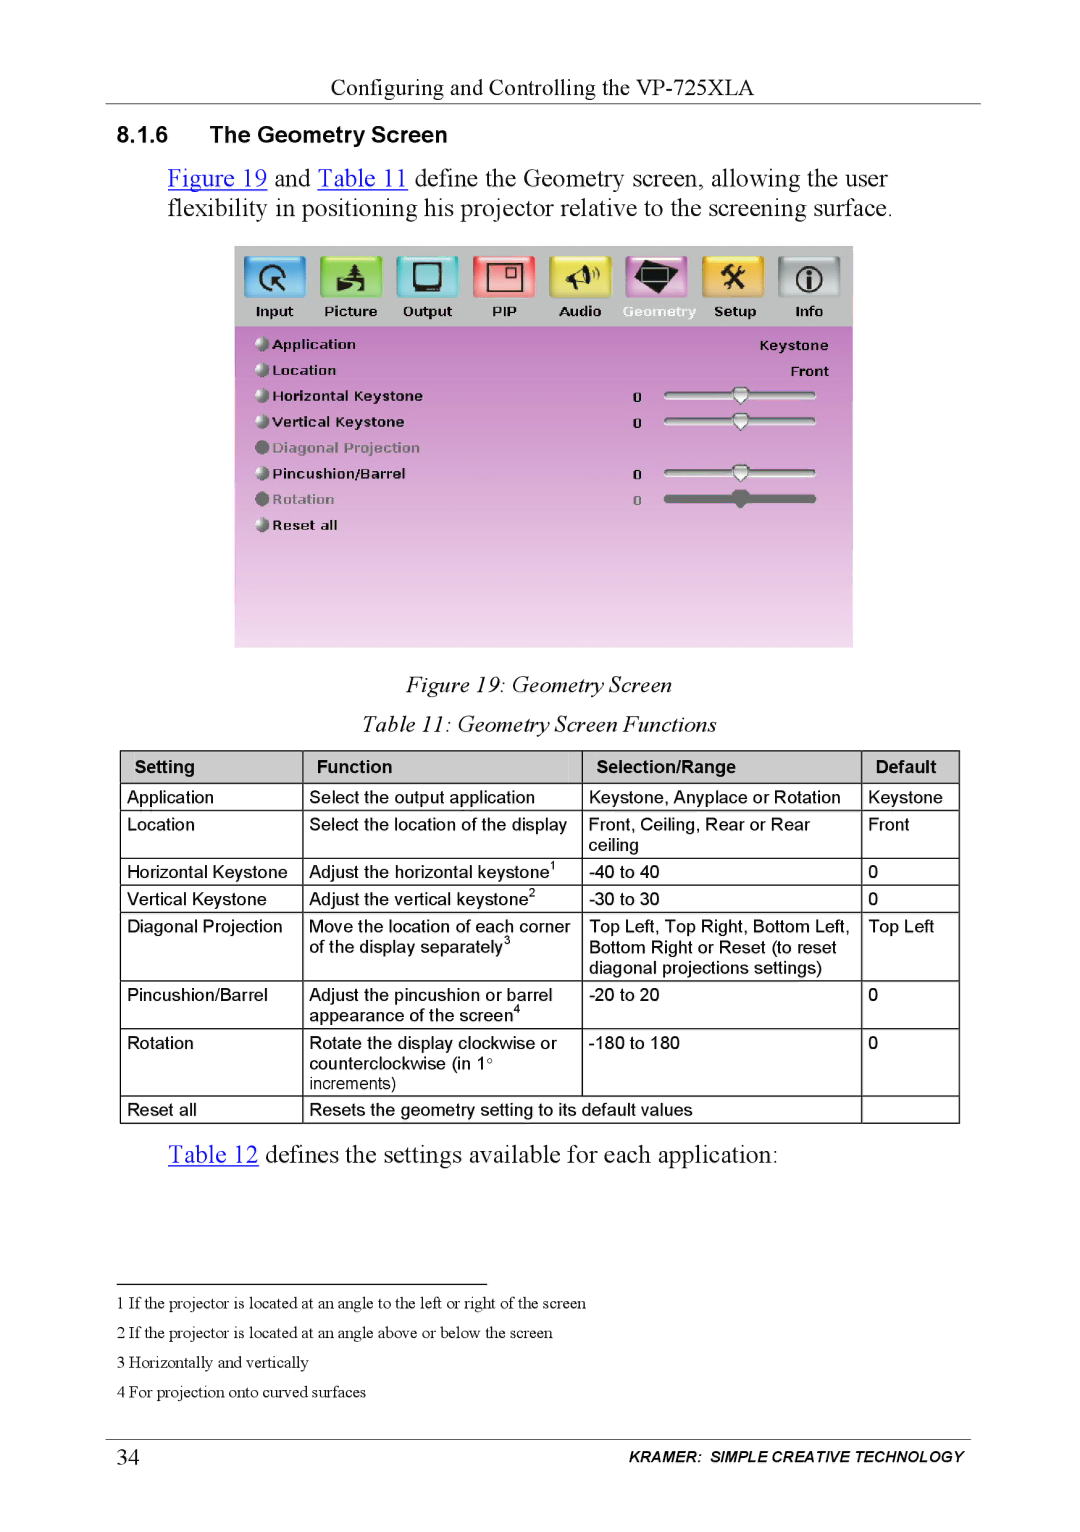
Figure 19 and Table 11 define the Geometry screen, allowing the user flexibility in positioning his projector relative to the screening surface.
Figure 19: Geometry Screen
Table 11: Geometry Screen Functions
Setting | Function | Selection/Range | Default |
Application | Select the output application | Keystone, Anyplace or Rotation | Keystone |
Location | Select the location of the display | Front, Ceiling, Rear or Rear | Front |
|
| ceiling |
|
Horizontal Keystone | Adjust the horizontal keystone1 | 0 | |
Vertical Keystone | Adjust the vertical keystone2 | 0 | |
Diagonal Projection | Move the location of each corner | Top Left, Top Right, Bottom Left, | Top Left |
| of the display separately3 | Bottom Right or Reset (to reset |
|
|
| diagonal projections settings) |
|
Pincushion/Barrel | Adjust the pincushion or barrel | 0 | |
| appearance of the screen4 |
|
|
Rotation | Rotate the display clockwise or | 0 | |
| counterclockwise (in 1° |
|
|
| increments) |
|
|
Reset all | Resets the geometry setting to its default values |
| |
Table 12 defines the settings available for each application:
1 If the projector is located at an angle to the left or right of the screen 2 If the projector is located at an angle above or below the screen
3 Horizontally and vertically
4 For projection onto curved surfaces
34 | KRAMER: SIMPLE CREATIVE TECHNOLOGY |