Operating the
9.3 Operating via the Infrared Remote Control Transmitter
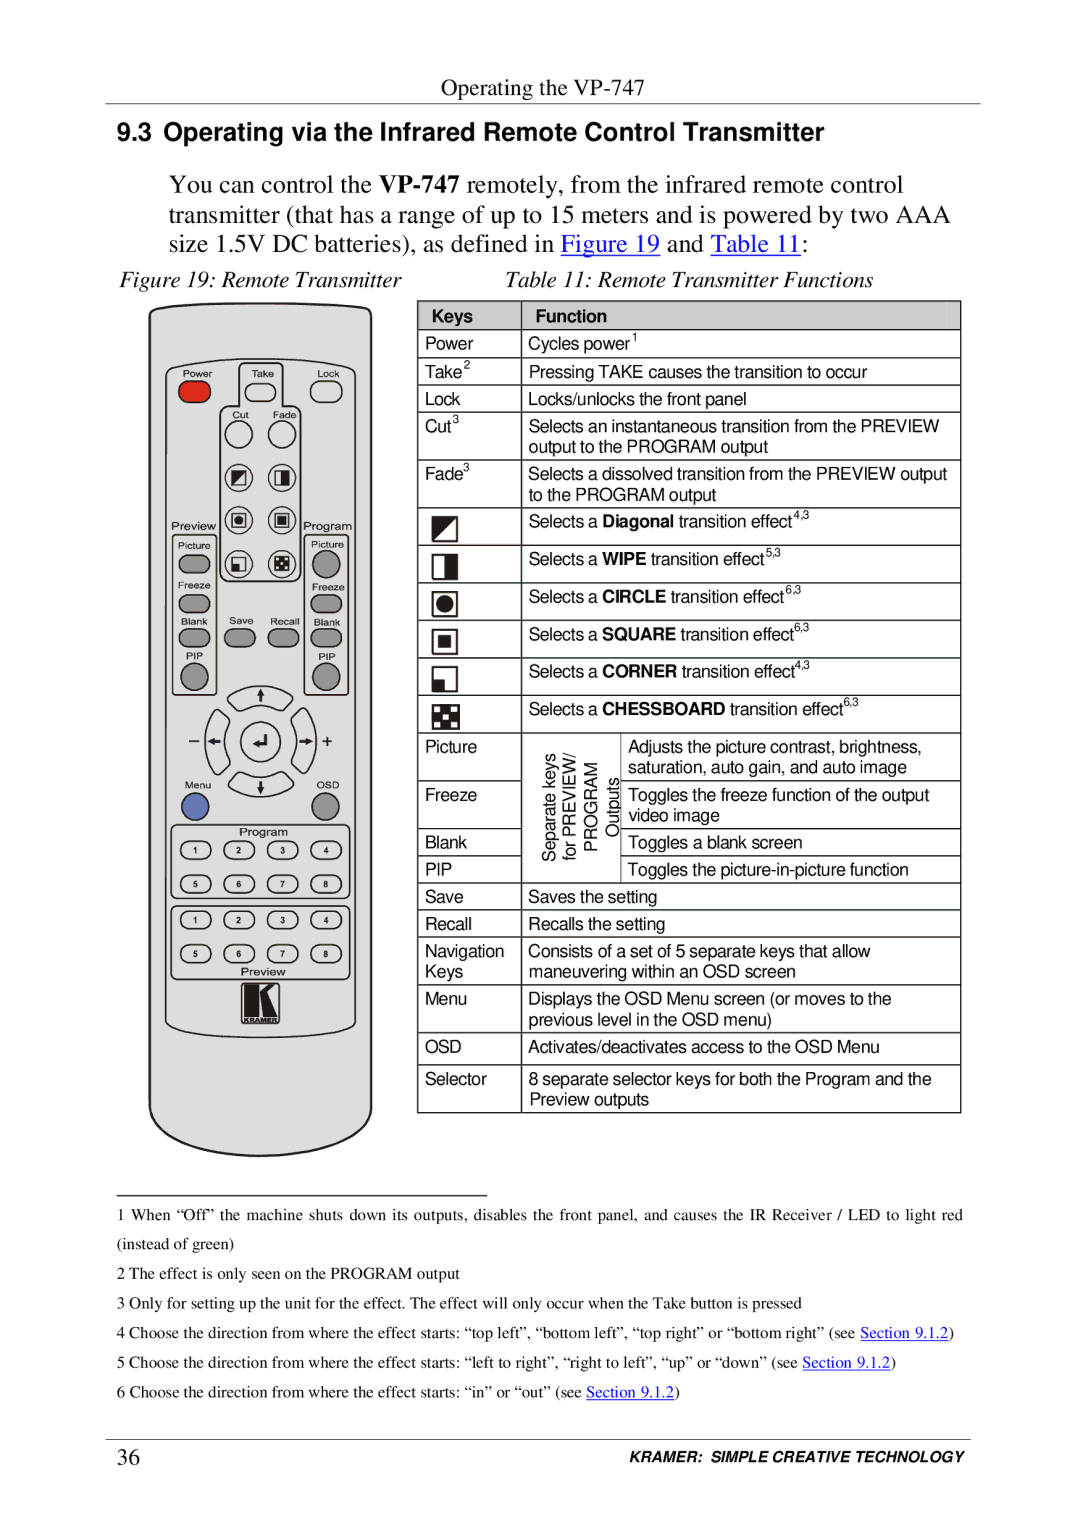
You can control the
Figure 19: Remote Transmitter | Table 11: Remote Transmitter Functions |
Keys
Power
Take2
Lock
Cut3
Fade3
Picture
Freeze
Blank
PIP
Save
Recall
Navigation Keys
Menu
OSD
Selector
Function
Cycles power1
Pressing TAKE causes the transition to occur
Locks/unlocks the front panel
Selects an instantaneous transition from the PREVIEW output to the PROGRAM output
Selects a dissolved transition from the PREVIEW output to the PROGRAM output
Selects a Diagonal transition effect4,3
Selects a WIPE transition effect5,3
Selects a CIRCLE transition effect6,3
Selects a SQUARE transition effect6,3
Selects a CORNER transition effect4,3
Selects a CHESSBOARD transition effect6,3
keysSeparate PREVIEW/for | PROGRAM Outputs | Adjusts the picture contrast, brightness, | |
saturation, auto gain, and auto image | |||
|
| ||
|
| Toggles the freeze function of the output | |
|
| video image | |
|
| Toggles a blank screen | |
|
| Toggles the |
Saves the setting
Recalls the setting
Consists of a set of 5 separate keys that allow maneuvering within an OSD screen
Displays the OSD Menu screen (or moves to the previous level in the OSD menu)
Activates/deactivates access to the OSD Menu
8 separate selector keys for both the Program and the Preview outputs
1 When “Off” the machine shuts down its outputs, disables the front panel, and causes the IR Receiver / LED to light red (instead of green)
2 The effect is only seen on the PROGRAM output
3 Only for setting up the unit for the effect. The effect will only occur when the Take button is pressed
4 Choose the direction from where the effect starts: “top left”, “bottom left”, “top right” or “bottom right” (see Section 9.1.2)
5 Choose the direction from where the effect starts: “left to right”, “right to left”, “up” or “down” (see Section 9.1.2)
6 Choose the direction from where the effect starts: “in” or “out” (see Section 9.1.2)
36 | KRAMER: SIMPLE CREATIVE TECHNOLOGY |
