6: Web-Based Browser Management
9.Click Update Setting. A confirmation window appears. Close the confirmation window.
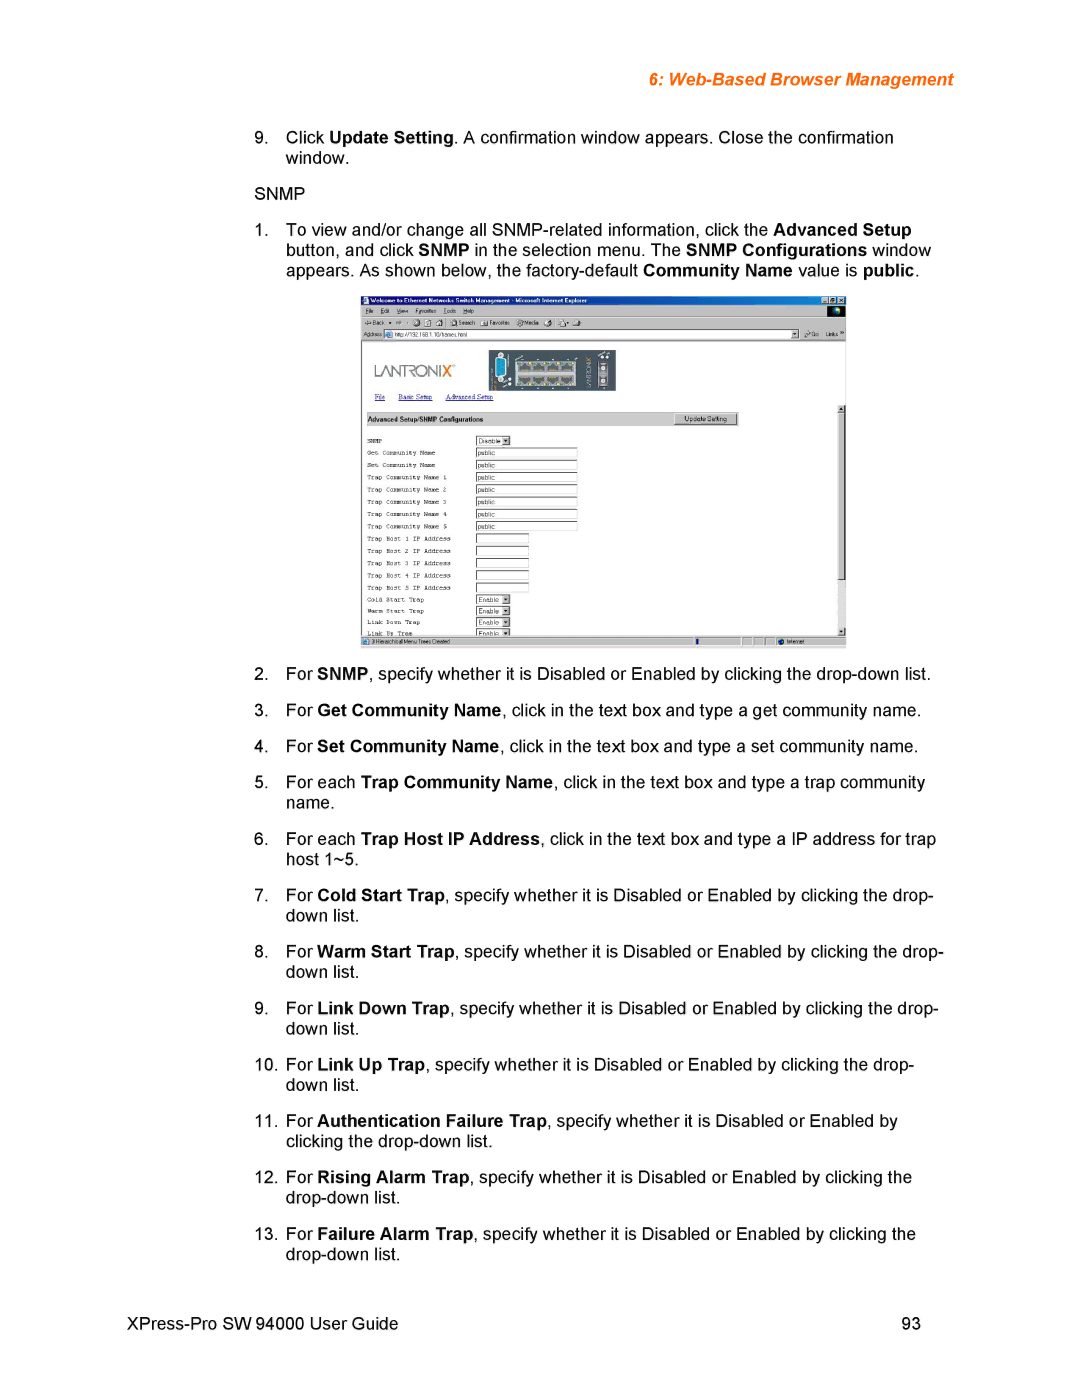
SNMP
1.To view and/or change all
2.For SNMP, specify whether it is Disabled or Enabled by clicking the
3.For Get Community Name, click in the text box and type a get community name.
4.For Set Community Name, click in the text box and type a set community name.
5.For each Trap Community Name, click in the text box and type a trap community name.
6.For each Trap Host IP Address, click in the text box and type a IP address for trap host 1~5.
7.For Cold Start Trap, specify whether it is Disabled or Enabled by clicking the drop- down list.
8.For Warm Start Trap, specify whether it is Disabled or Enabled by clicking the drop- down list.
9.For Link Down Trap, specify whether it is Disabled or Enabled by clicking the drop- down list.
10.For Link Up Trap, specify whether it is Disabled or Enabled by clicking the drop- down list.
11.For Authentication Failure Trap, specify whether it is Disabled or Enabled by clicking the
12.For Rising Alarm Trap, specify whether it is Disabled or Enabled by clicking the
13.For Failure Alarm Trap, specify whether it is Disabled or Enabled by clicking the
93 |