Notes:
•If Auto Cut Sheet Load is set to On, the paper feeds automatically to the
•If Auto Cut Sheet Load is set to Off, press FormFeed.
11Make sure the printer is online, and the Ready light is on solid. Note: If not, press Start/Stop until the Ready light is on solid.
Aligning the left margin
You can manually change the first print position at the left margin. The first print position is indicated by the [A symbol. You can also set the left margin in your program.
Notes:
• Setting the left margin in your program adds that amount to the left margin setting on the printer. For example, if you set the left margin at one inch on the printer, and also have the left margin set at one inch in your program, the printer begins printing two inches from the left edge of the page.
• The location of the [A symbol depends on the position of the tractor unit.
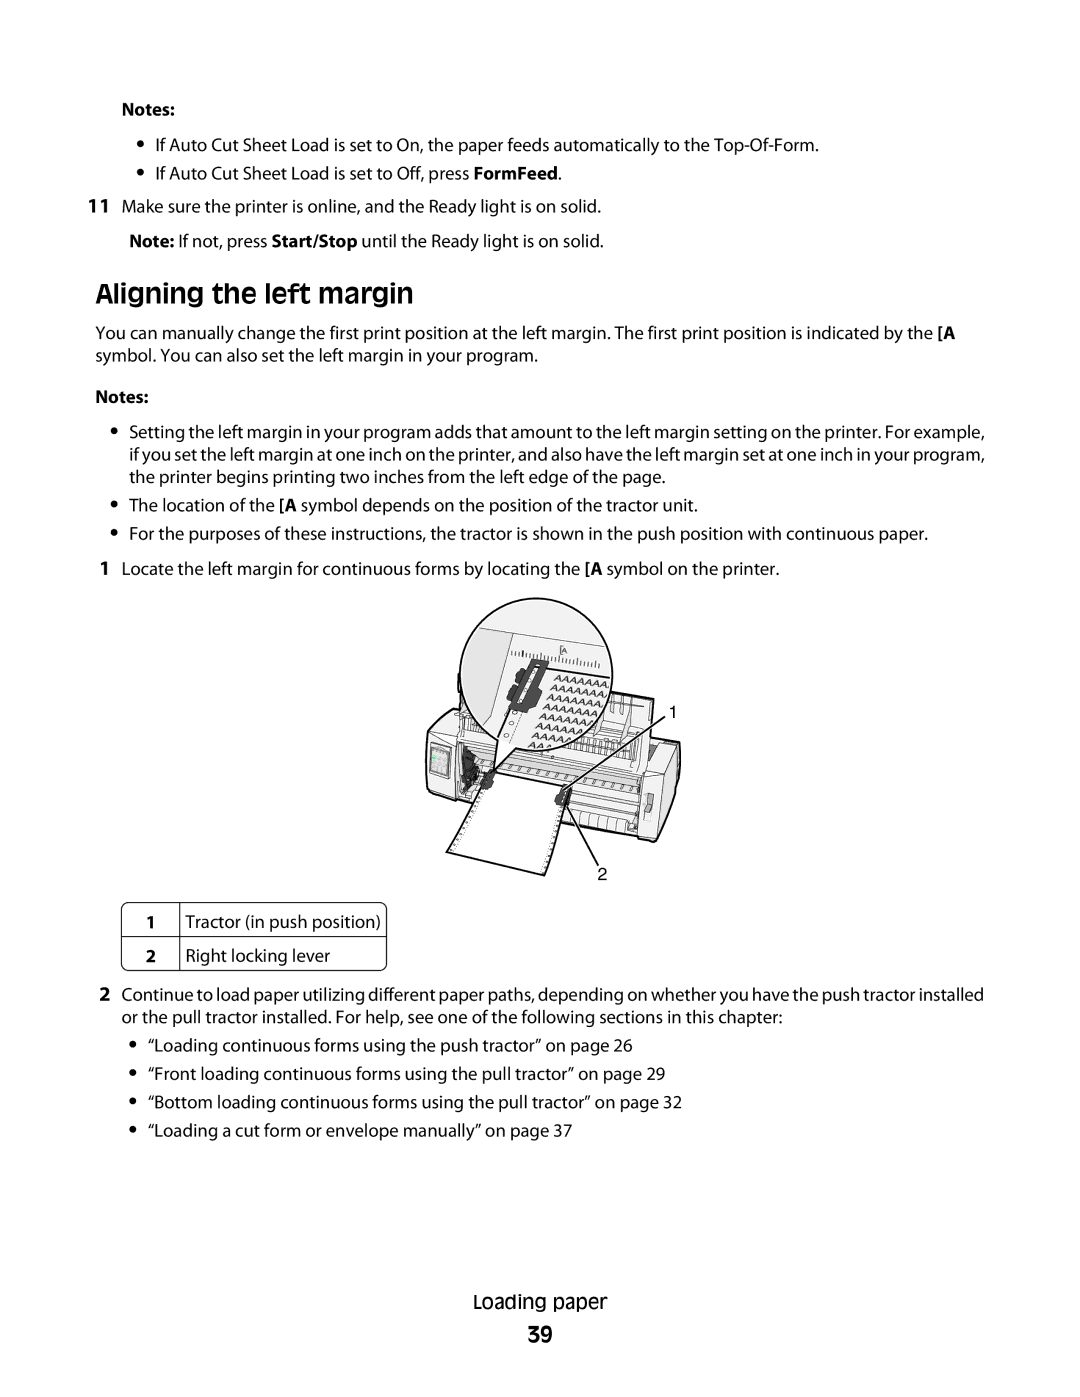
• For the purposes of these instructions, the tractor is shown in the push position with continuous paper.
1 Locate the left margin for continuous forms by locating the [A symbol on the printer.
1
2
1
2
Tractor (in push position)
Right locking lever
2Continue to load paper utilizing different paper paths, depending on whether you have the push tractor installed or the pull tractor installed. For help, see one of the following sections in this chapter:
•“Loading continuous forms using the push tractor” on page 26
•“Front loading continuous forms using the pull tractor” on page 29
•“Bottom loading continuous forms using the pull tractor” on page 32
•“Loading a cut form or envelope manually” on page 37
Loading paper
39
