Local keyboard, video monitor and mouse
A locally connected keyboard, video monitor and mouse are required during the initial configuration. These are also useful during normal use to allow quick local control of any connected host computers.
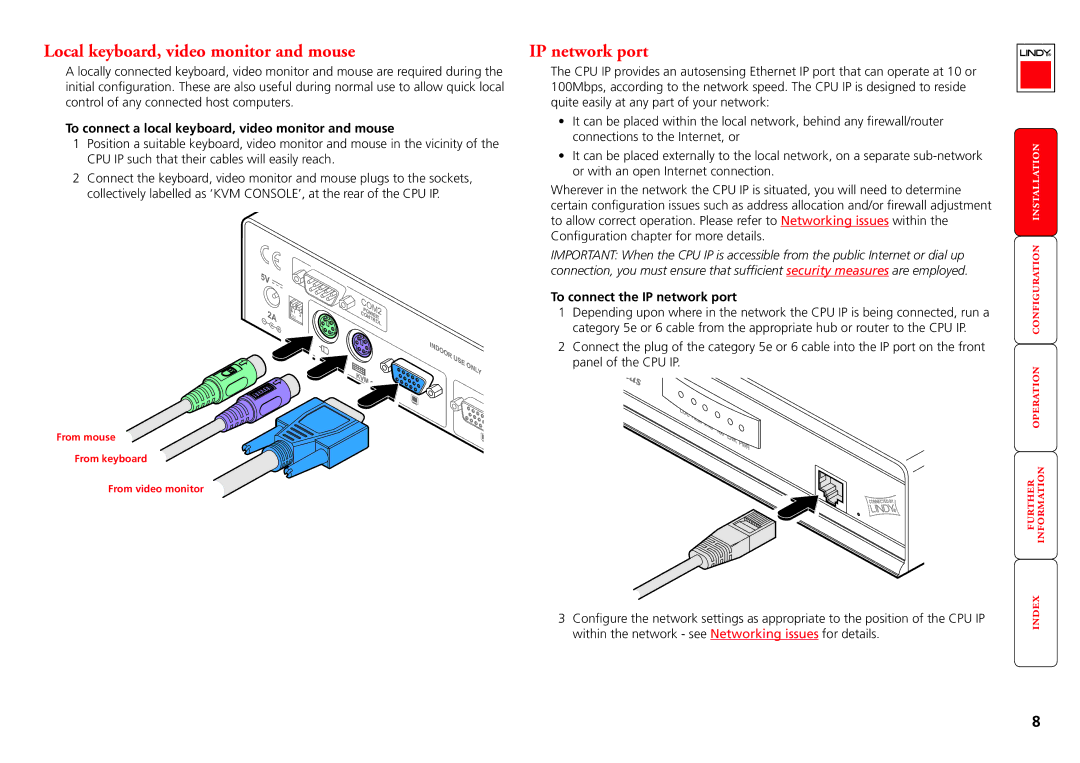
To connect a local keyboard, video monitor and mouse
1Position a suitable keyboard, video monitor and mouse in the vicinity of the CPU IP such that their cables will easily reach.
2Connect the keyboard, video monitor and mouse plugs to the sockets, collectively labelled as ‘KVM CONSOLE’, at the rear of the CPU IP.
5V |
|
|
|
|
|
|
| ON |
| COM2 |
|
|
|
2A |
| POWER |
|
|
| |
| 1 | 2 | CONTROL |
|
|
|
|
|
|
|
| ||
|
|
|
|
|
| |
|
|
|
| INDOOR | USE | ONLY |
|
|
|
|
| ||
|
|
| KVM |
|
| |
|
|
|
|
|
|
From mouse
From keyboard
From video monitor
IP network port
The CPU IP provides an autosensing Ethernet IP port that can operate at 10 or 100Mbps, according to the network speed. The CPU IP is designed to reside quite easily at any part of your network:
•It can be placed within the local network, behind any firewall/router connections to the Internet, or
•It can be placed externally to the local network, on a separate
Wherever in the network the CPU IP is situated, you will need to determine certain configuration issues such as address allocation and/or firewall adjustment to allow correct operation. Please refer to Networking issues within the Configuration chapter for more details.
IMPORTANT: When the CPU IP is accessible from the public Internet or dial up connection, you must ensure that sufficient security measures are employed.
To connect the IP network port
1Depending upon where in the network the CPU IP is being connected, run a category 5e or 6 cable from the appropriate hub or router to the CPU IP.
2Connect the plug of the category 5e or 6 cable into the IP port on the front panel of the CPU IP.
lus
LOC | REM |
|
|
|
|
| VNC |
|
|
| |
|
| 100 |
|
| |
|
|
| LNK |
| |
|
|
|
| PWR | |
|
|
|
|
|
3Configure the network settings as appropriate to the position of the CPU IP within the network - see Networking issues for details.
8