Using the System
On-Screen Display (cont’d.)
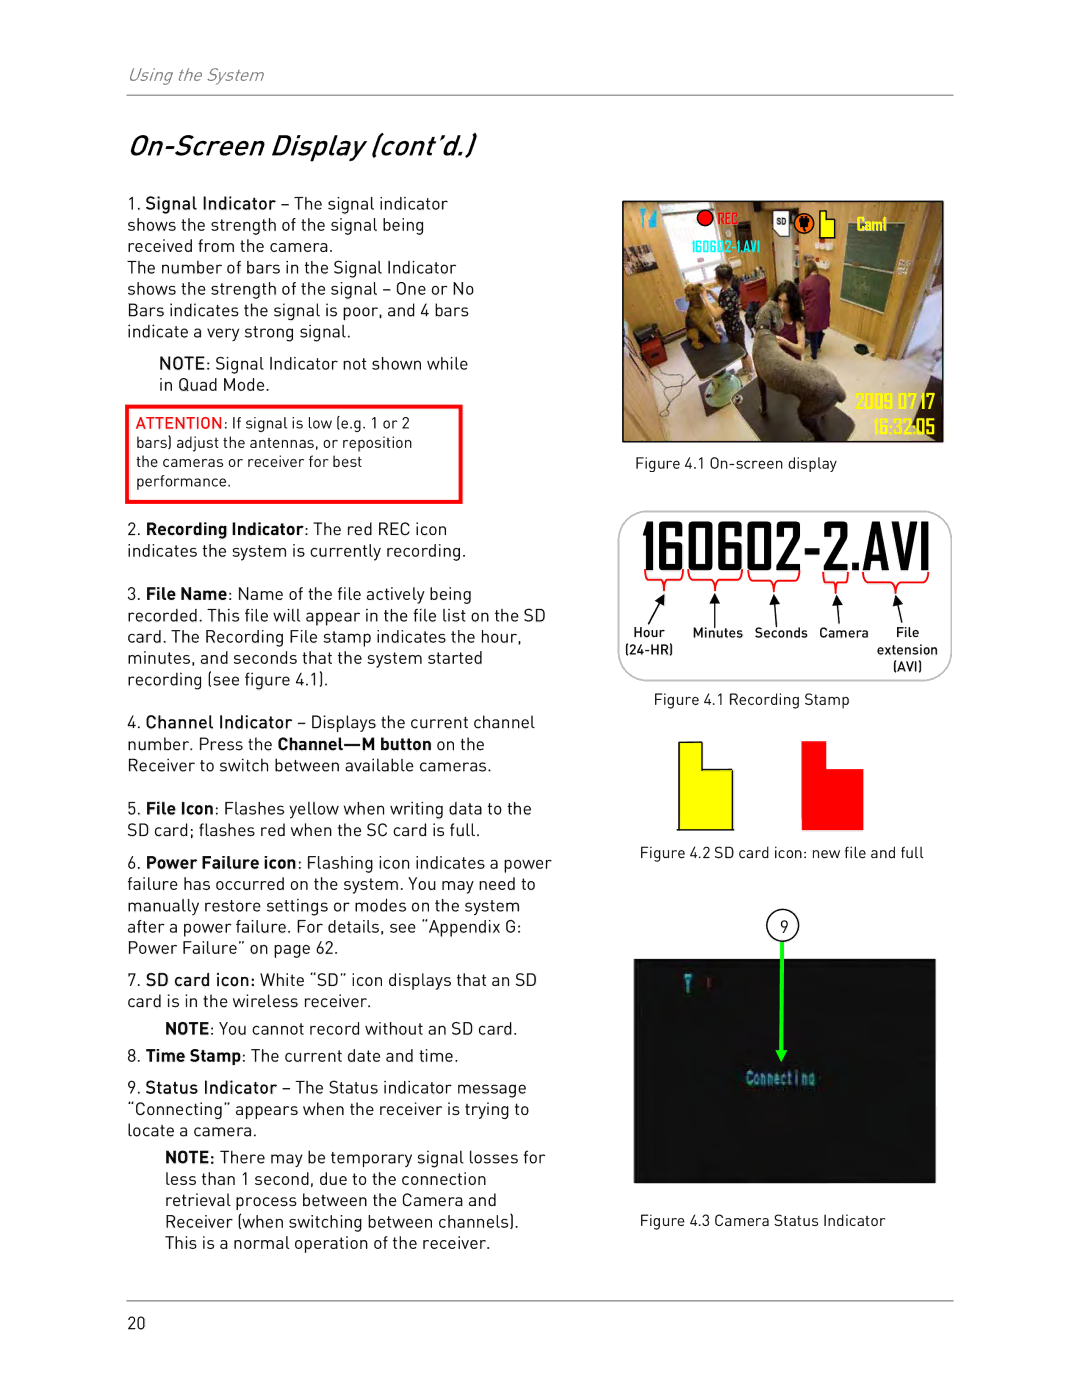
1.Signal Indicator – The signal indicator shows the strength of the signal being received from the camera.
The number of bars in the Signal Indicator shows the strength of the signal – One or No Bars indicates the signal is poor, and 4 bars indicate a very strong signal.
NOTE: Signal Indicator not shown while in Quad Mode.
ATTENTION: If signal is low (e.g. 1 or 2 bars) adjust the antennas, or reposition the cameras or receiver for best performance.
2.Recording Indicator: The red REC icon
indicates the system is currently recording.
3.File Name: Name of the file actively being recorded. This file will appear in the file list on the SD card. The Recording File stamp indicates the hour, minutes, and seconds that the system started recording (see figure 4.1).
4.Channel Indicator – Displays the current channel number. Press the
5.File Icon: Flashes yellow when writing data to the SD card; flashes red when the SC card is full.
6.Power Failure icon: Flashing icon indicates a power failure has occurred on the system. You may need to manually restore settings or modes on the system after a power failure. For details, see “Appendix G: Power Failure” on page 62.
7.SD card icon: White “SD” icon displays that an SD card is in the wireless receiver.
NOTE: You cannot record without an SD card.
8.Time Stamp: The current date and time.
9.Status Indicator – The Status indicator message “Connecting” appears when the receiver is trying to locate a camera.
NOTE: There may be temporary signal losses for less than 1 second, due to the connection retrieval process between the Camera and Receiver (when switching between channels). This is a normal operation of the receiver.
REC | Cam1 |
2009 07 17 16:32:05
Figure 4.1 On-screen display
160602-2.AVI
Hour | Minutes Seconds Camera | File |
| extension | |
|
| (AVI) |
Figure 4.1 Recording Stamp
Figure 4.2 SD card icon: new file and full
9
Figure 4.3 Camera Status Indicator
20
