
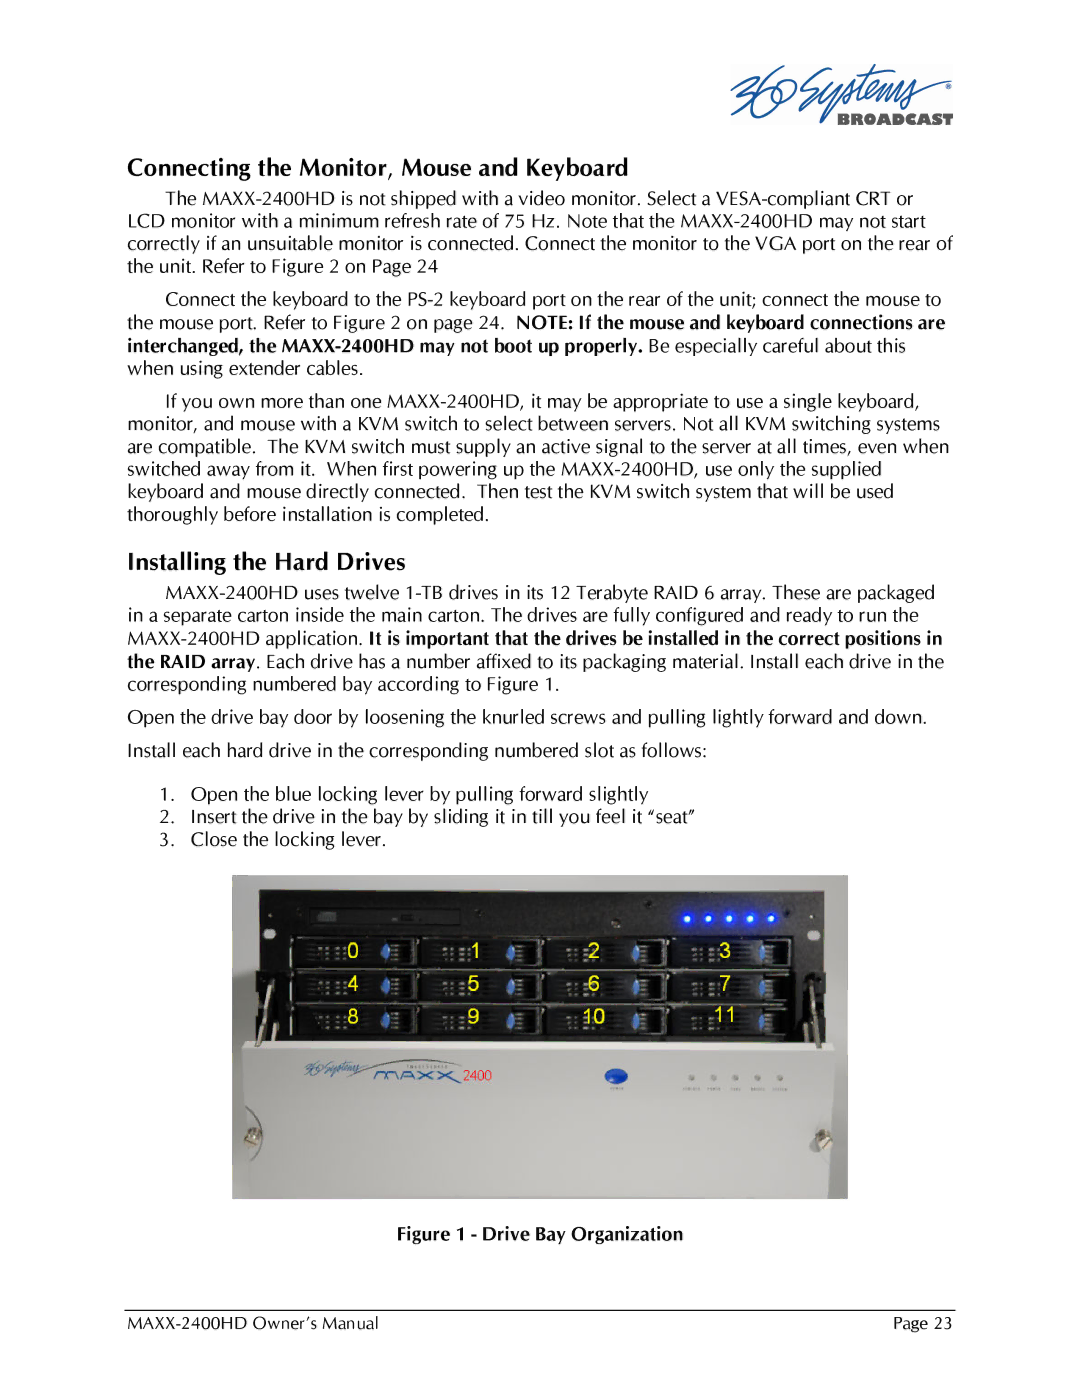
MAXX-2400HD specifications
The Maxxsonics MAXX-2400HD is a powerful and versatile amplifier designed to elevate your audio experience, whether you're an avid audiophile or simply looking to upgrade your car's sound system. This amplifier is part of Maxxsonics’ renowned MAXX series, known for delivering exceptional performance, reliability, and innovative technology.One of the standout features of the MAXX-2400HD is its robust power output. With a peak power rating of 2400 watts, it is designed to drive multiple speakers or subwoofers, allowing for an immersive sound experience. The amplifier is capable of achieving 1200 watts RMS, giving it the muscle needed for demanding audio applications. This high output ensures that you can enjoy clear and powerful sound even at high volumes, making it an ideal choice for those who appreciate deep bass and crisp highs.
The MAXX-2400HD employs advanced Class D amplification technology. This not only contributes to its compact size and lightweight design but also enhances its energy efficiency compared to traditional Class AB amplifiers. The Class D design minimizes heat production, which means the amplifier can run cooler, ensuring durability and extending its lifespan.
In terms of connectivity, the MAXX-2400HD is equipped with flexible input options. It features high-level and low-level inputs, allowing users to connect it to a variety of audio sources, including factory or aftermarket head units. The integrated crossover network further enhances audio performance by allowing users to tailor the output to their specific speakers or subwoofers. This includes adjustable low-pass and high-pass filters, ensuring that each component of your audio system performs optimally.
The build quality of the MAXX-2400HD is equally impressive. It comes housed in a stylish, durable chassis designed to withstand the rigors of automotive environments. The amplifier features heavy-duty connectors and heat sinks that facilitate efficient heat dissipation, allowing for sustained performance without the risk of overheating.
Overall, the Maxxsonics MAXX-2400HD is a reliable amplifier that combines power, efficiency, and versatility. Its innovative technologies and features make it an excellent choice for anyone looking to enhance their audio setup, delivering high-quality sound for a dynamic listening experience. Whether you're cruising down the highway or parked at a car show, this amplifier ensures that your music sounds its absolute best.