LENS
Attaching the Lens
This camera uses interchangeable lenses. See page 116 for information on which lenses are compatible with this camera.
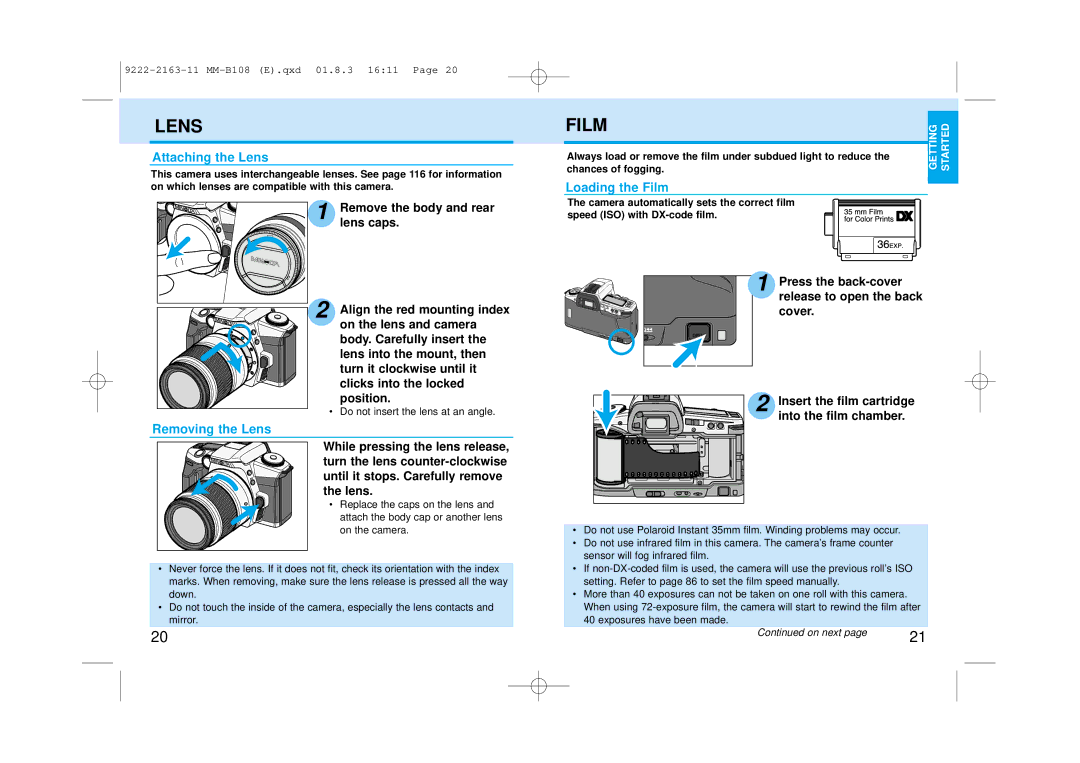
1 | Remove the body and rear |
| lens caps. |
2 Align the red mounting index on the lens and camera body. Carefully insert the lens into the mount, then turn it clockwise until it clicks into the locked position.
• Do not insert the lens at an angle.
Removing the Lens
While pressing the lens release, turn the lens
• Replace the caps on the lens and attach the body cap or another lens on the camera.
•Never force the lens. If it does not fit, check its orientation with the index marks. When removing, make sure the lens release is pressed all the way down.
•Do not touch the inside of the camera, especially the lens contacts and mirror.
FILM | GETTING | STARTED | |
Always load or remove the film under subdued light to reduce the | |||
|
|
chances of fogging.
Loading the Film
The camera automatically sets the correct film speed (ISO) with
1 Press the
2 Insert the film cartridge into the film chamber.
•Do not use Polaroid Instant 35mm film. Winding problems may occur.
•Do not use infrared film in this camera. The camera’s frame counter sensor will fog infrared film.
•If
•More than 40 exposures can not be taken on one roll with this camera. When using
20 | Continued on next page | 21 |
|