FOR OWNERS OF THE QUARTZ DATE MODEL
Setting the Date or Time
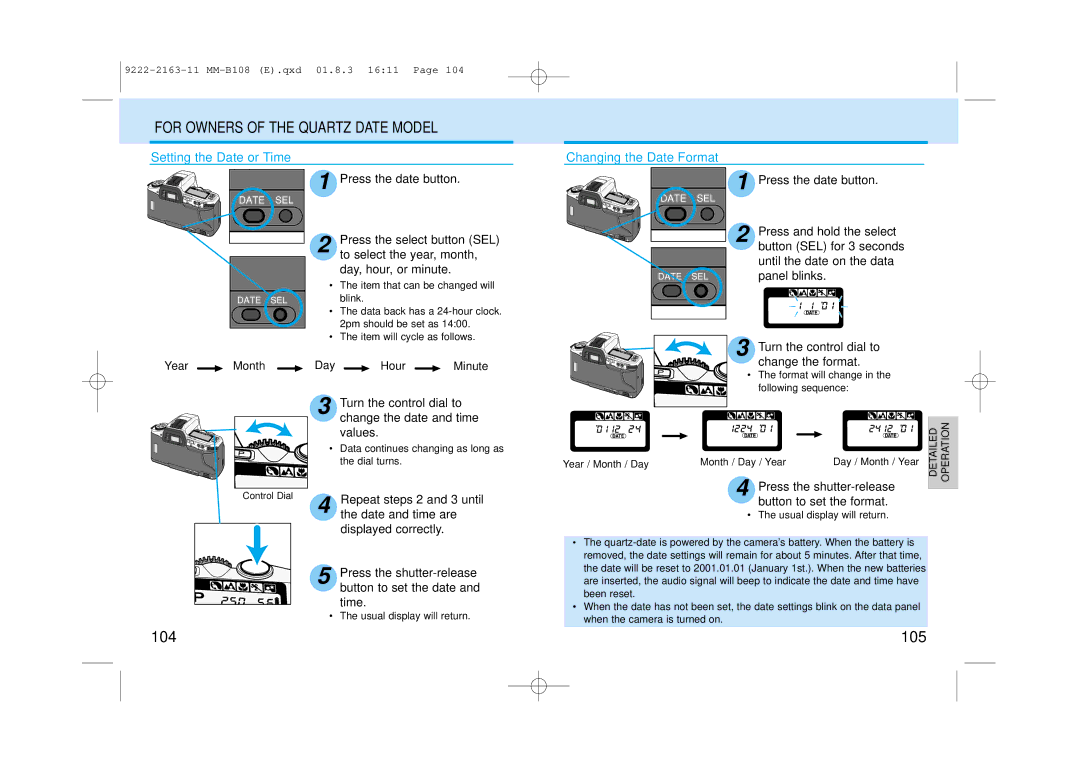
1 Press the date button.
2 Press the select button (SEL)
to select the year, month, day, hour, or minute.
• The item that can be changed will blink.
• The data back has a
• The item will cycle as follows.
Year ![]() Month
Month ![]() Day
Day ![]() Hour
Hour ![]() Minute
Minute
| 3 | Turn the control dial to |
|
| change the date and time |
|
| values. |
| • | Data continues changing as long as |
|
| the dial turns. |
Control Dial | 4 | Repeat steps 2 and 3 until |
| the date and time are | |
|
| displayed correctly. |
| 5 | Press the |
|
| button to set the date and |
|
| time. |
| • | The usual display will return. |
Changing the Date Format
1 Press the date button.
2 Press and hold the select button (SEL) for 3 seconds until the date on the data panel blinks.
| 3 | Turn the control dial to |
|
| |
|
| change the format. |
|
| |
| • | The format will change in the |
|
| |
|
| following sequence: |
|
| |
Year / Month / Day | Month / Day / Year | Day / Month / Year | DETAILED | OPERATION | |
|
| ||||
| 4 | Press the |
|
| |
|
| button to set the format. |
|
| |
•The usual display will return.
•The
•When the date has not been set, the date settings blink on the data panel when the camera is turned on.
104 | 105 |
