DATA IMPRINTING
Data can be printed on a still image and saved to the file’s Exif data. The function must be activated before the image is taken. Once activated, data will continue to be imprinted until the function is reset; a yellow bar is displayed behind the frame counter on the monitors to indicate the function is active. Data imprinting is selected in section 2 of the recording menu (p. 80). Data imprinting cannot be used with TIFF or RAW images. Only one imprinting format can be used with each image.
Menu option
Off
YYYY/MM/DD
MM/DD/hr:min
Text
Text + ID#
Data imprinting function disabled.
Prints the year, month, and day the image was taken. The date format can be changed with Date/Time set option in section 2 of the setup menu (p. 30).
Prints the date and time the image was taken.
To imprint alphanumeric characters. When this option is selected, the electronic keyboard opens (p. 99).
To imprint text with a serial number. As each successive image is cap- tured, the ID number will increase by one. When this option is selected, the electronic keyboard opens (p. 99). The serial number is reset every time this option is selected.
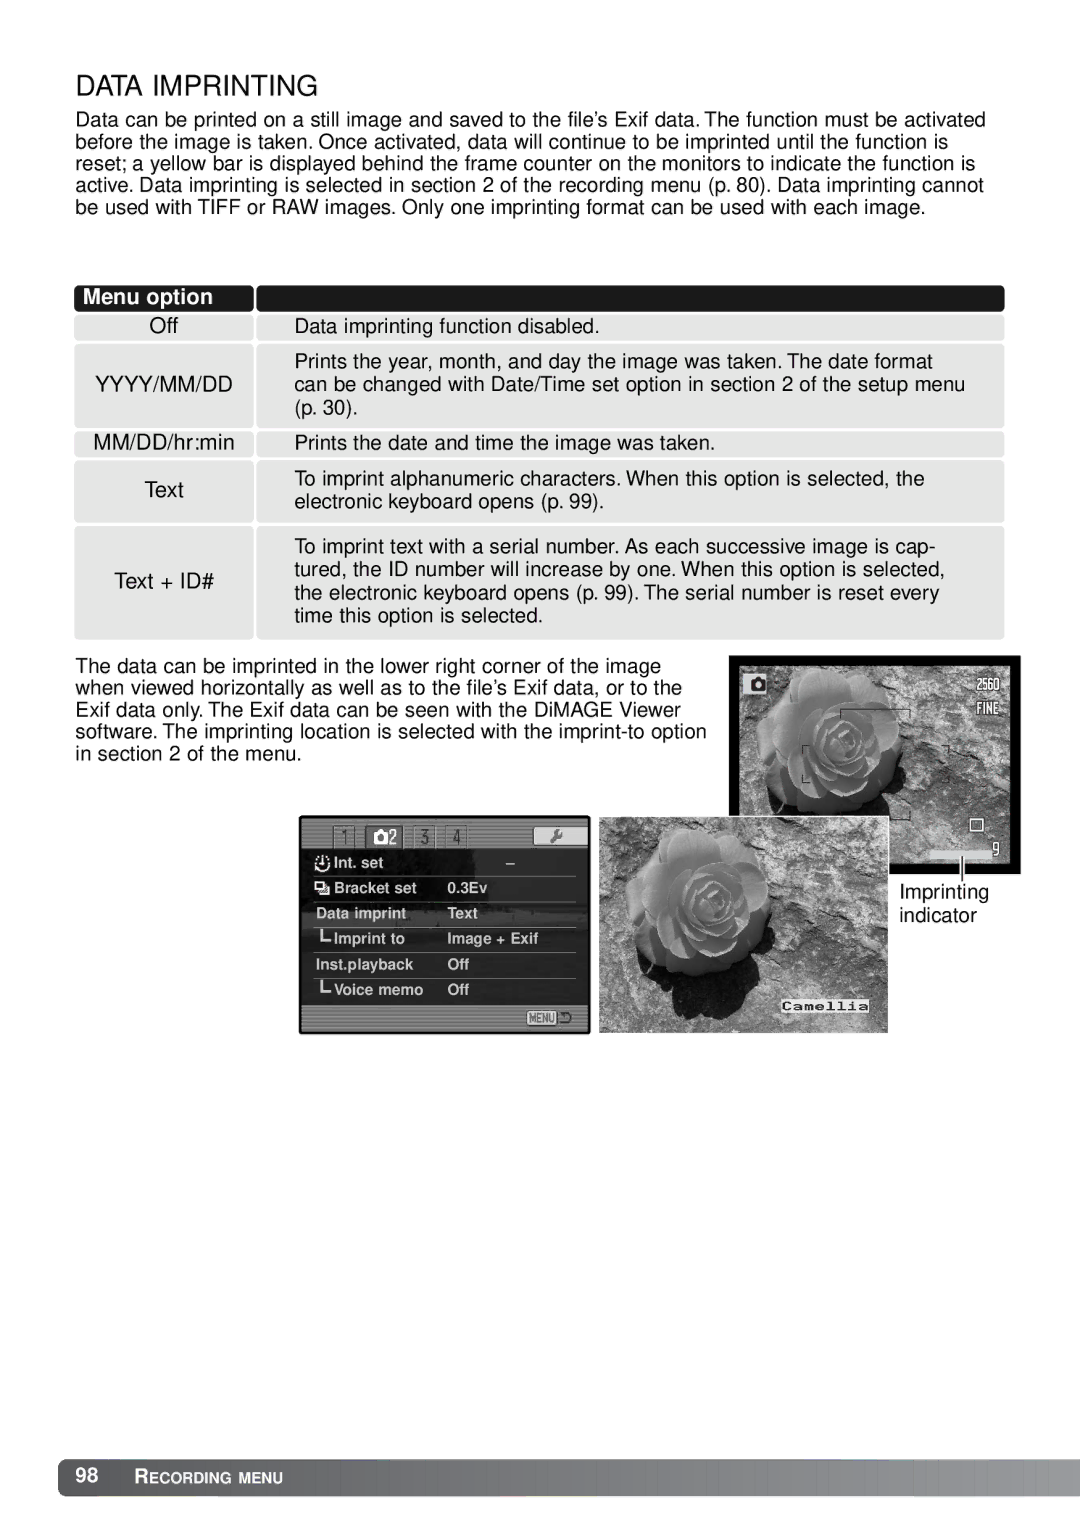
The data can be imprinted in the lower right corner of the image | ||
when viewed horizontally as well as to the file’s Exif data, or to the | ||
Exif data only. The Exif data can be seen with the DiMAGE Viewer | ||
software. The imprinting location is selected with the | ||
in section 2 of the menu. |
|
|
Int. set |
| – |
Bracket set | 0.3Ev | Imprinting |
Data imprint | Text | indicator |
|
| Imprint to | Image + Exif |
|
| ||
|
|
|
|
Inst.playback | Off | ||
|
|
|
|
|
| Voice memo | Off |
|
| ||
