Parts Name and Functions |
|
Buttons, Switch, and Indicator |
|
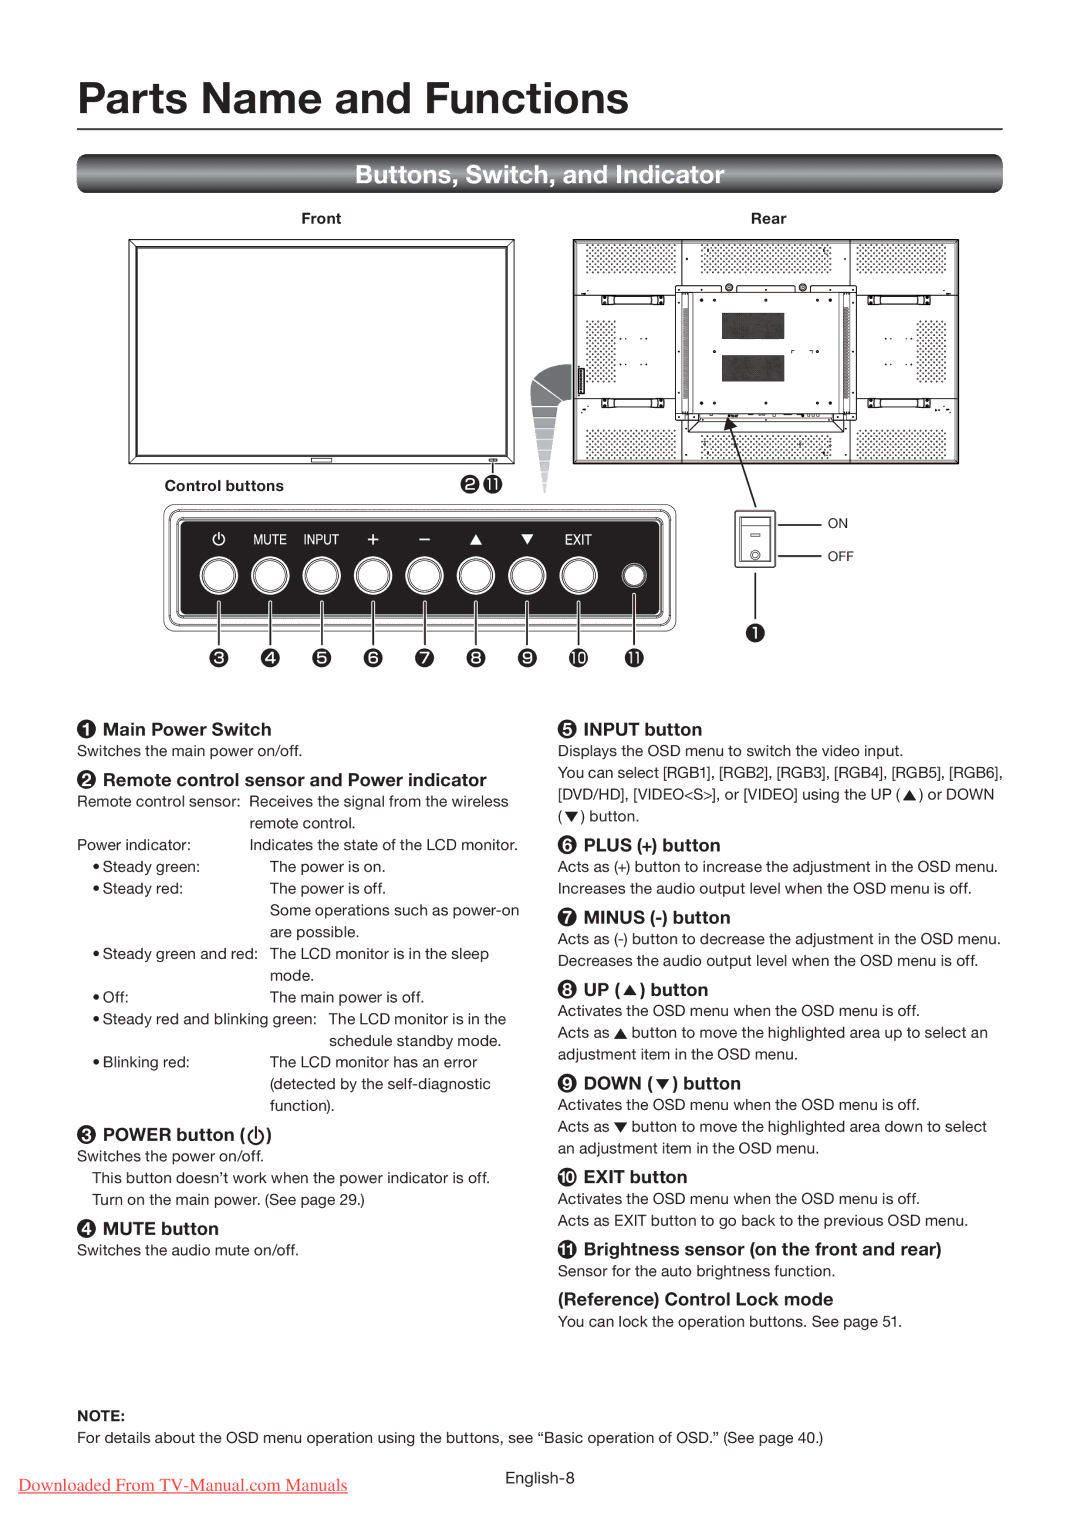
Front | Rear |
Control buttons |
|
| ON |
| OFF |
1Main Power Switch
Switches the main power on/off.
2Remote control sensor and Power indicator
Remote control sensor: Receives the signal from the wireless
| remote control. |
Power indicator: | Indicates the state of the LCD monitor. |
• Steady green: | The power is on. |
• Steady red: | The power is off. |
| Some operations such as |
| are possible. |
• Steady green and red: The LCD monitor is in the sleep | |
| mode. |
• Off: | The main power is off. |
•Steady red and blinking green: The LCD monitor is in the schedule standby mode.
• Blinking red: | The LCD monitor has an error |
| (detected by the |
| function). |
3POWER button ( )
)
Switches the power on/off.
This button doesn’t work when the power indicator is off. Turn on the main power. (See page 29.)
4MUTE button
Switches the audio mute on/off.
5INPUT button
Displays the OSD menu to switch the video input.
You can select [RGB1], [RGB2], [RGB3], [RGB4], [RGB5], [RGB6], [DVD/HD], [VIDEO<S>], or [VIDEO] using the UP (![]() ) or DOWN (
) or DOWN (![]() ) button.
) button.
6PLUS (+) button
Acts as (+) button to increase the adjustment in the OSD menu. Increases the audio output level when the OSD menu is off.
7MINUS (-) button
Acts as
8UP (  ) button
Activates the OSD menu when the OSD menu is off.
Acts as ![]() button to move the highlighted area up to select an adjustment item in the OSD menu.
button to move the highlighted area up to select an adjustment item in the OSD menu.
9DOWN (  ) button
Activates the OSD menu when the OSD menu is off.
Acts as ![]() button to move the highlighted area down to select an adjustment item in the OSD menu.
button to move the highlighted area down to select an adjustment item in the OSD menu.
10EXIT button
Activates the OSD menu when the OSD menu is off.
Acts as EXIT button to go back to the previous OSD menu.
11Brightness sensor (on the front and rear)
Sensor for the auto brightness function.
(Reference) Control Lock mode
You can lock the operation buttons. See page 51.
NOTE:
For details about the OSD menu operation using the buttons, see “Basic operation of OSD.” (See page 40.)
Downloaded From | |
|
