Connecting CAT5 |
|
| |
Carry out as necessary |
| ||
|
|
|
|
CAT5 for
or
The CAT5 video connection function is for transmitting the analog RGB video signal of the computer and the control signal of the monitor over a long distance using CAT5 cables. The computer can control the monitor via the supplied CAT5 Tx BOX.
CAUTION:
Never connect network devices (such as a hub and a computer for LAN) to the CAT5 Tx BOX and the IN and OUT connectors of the monitor. If they are connected, the network devices themselves, CAT5 Tx BOX, and monitor may be damaged.
1. Installation of the USB driver for CAT5 serial communication control
To connect the computer and the CAT5 Tx BOX via USB interface, it is necessary to install the USB driver to the computer from the
(When connecting the computer and the CAT5 Tx BOX via
OS supported: Windows® XP, Windows Vista®
How to install:
1) Installation to Windows® XP
Start the
and install the driver according to the instructions displayed on the screen.
2) Installation to Windows Vista®
Start the “PL2303_Prolific_Vista_******.exe” file in the Windows VISTA folder on the
monitor and install the driver according to the instructions displayed on the screen.
NOTE:
It is unnecessary to install the USB driver if you don’t use the communication control or the USB driver. When the window asking you to install the driver is displayed, select cancel.
As for the latest driver for the Windows operating system, check the operation of the interface IC
Operation check by Mitsubishi
•File name: PL2303_Prolific_DriverInstaller_v110.zip, Release
date: December 2, 2009, Version: V1.1.0
Windows XP (32 bits): Operated
Windows Vista (32 bits): Operated
Windows 7 (32 bits): Operated
2. Connection of the CAT5 video connection function
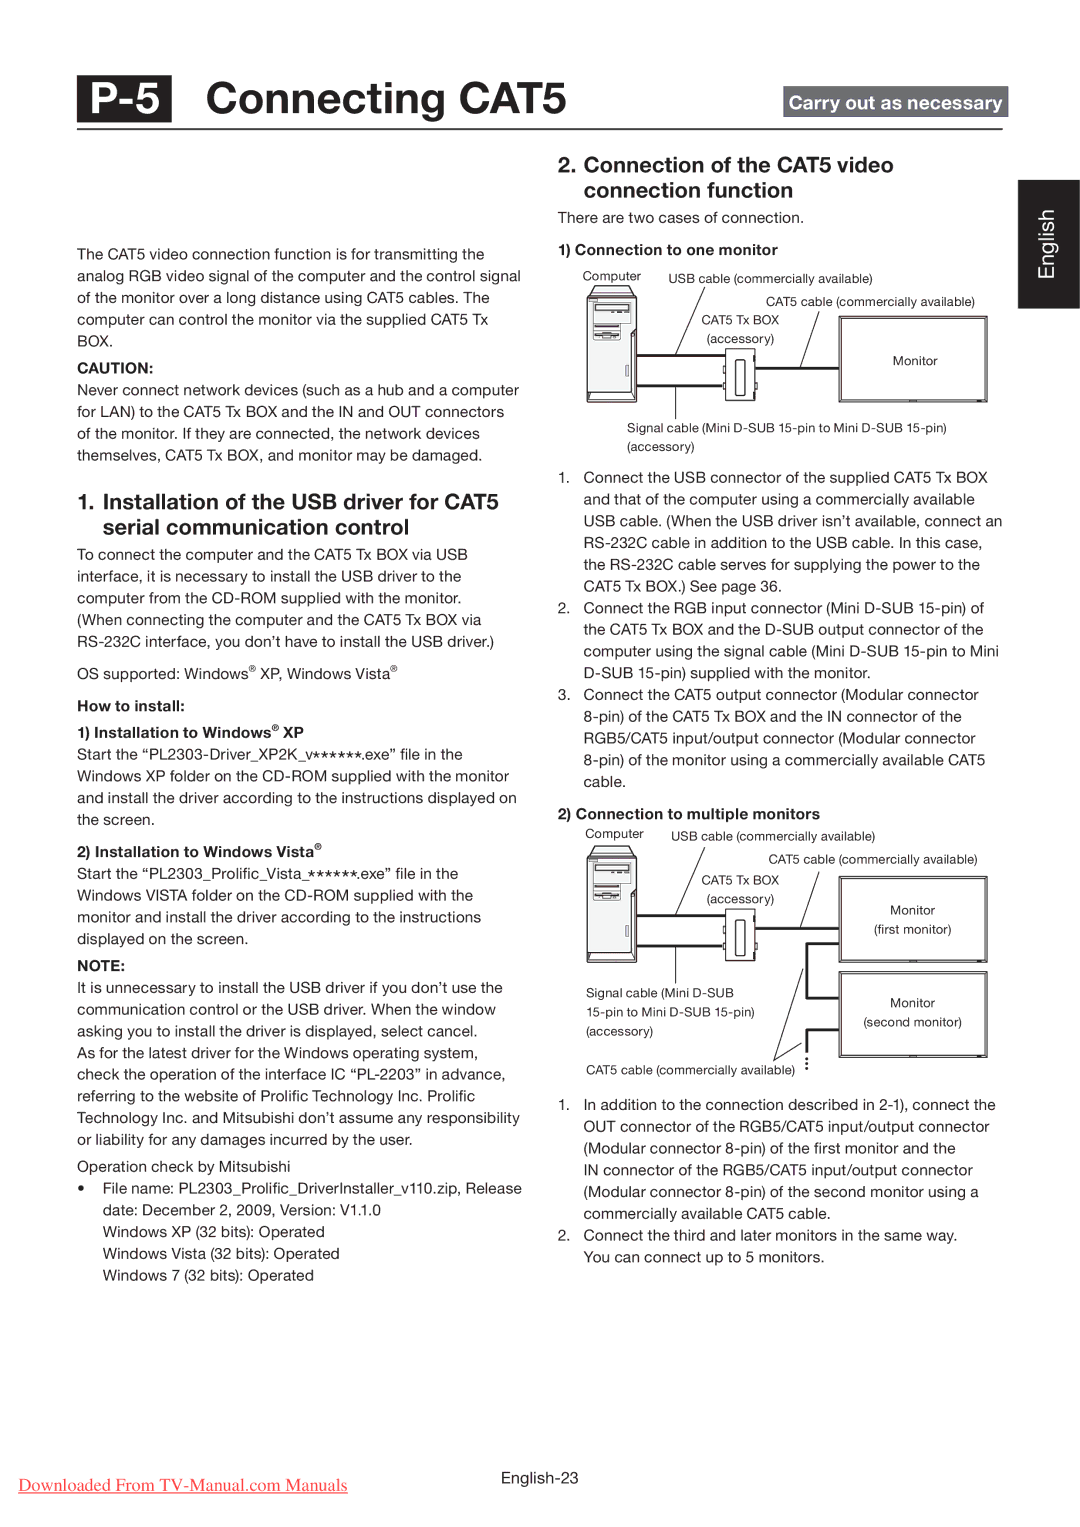
There are two cases of connection.
1) Connection to one monitor
Computer | USB cable (commercially available) |
CAT5 cable (commercially available) CAT5 Tx BOX ![]() (accessory)
(accessory)
Monitor
Signal cable (Mini
1.Connect the USB connector of the supplied CAT5 Tx BOX and that of the computer using a commercially available USB cable. (When the USB driver isn’t available, connect an
2.Connect the RGB input connector (Mini
3.Connect the CAT5 output connector (Modular connector
2) Connection to multiple monitors
Computer | USB cable (commercially available) |
| CAT5 cable (commercially available) |
| CAT5 Tx BOX |
| (accessory) |
| Monitor |
| (first monitor) |
Signal cable (Mini | |
| Monitor |
(accessory) | (second monitor) |
| |
CAT5 cable (commercially available)
1.In addition to the connection described in
IN connector of the RGB5/CAT5 input/output connector (Modular connector
2.Connect the third and later monitors in the same way. You can connect up to 5 monitors.
English
Downloaded From | |
|
