Other functions (continued)
Supplemental information of the auto brightness function
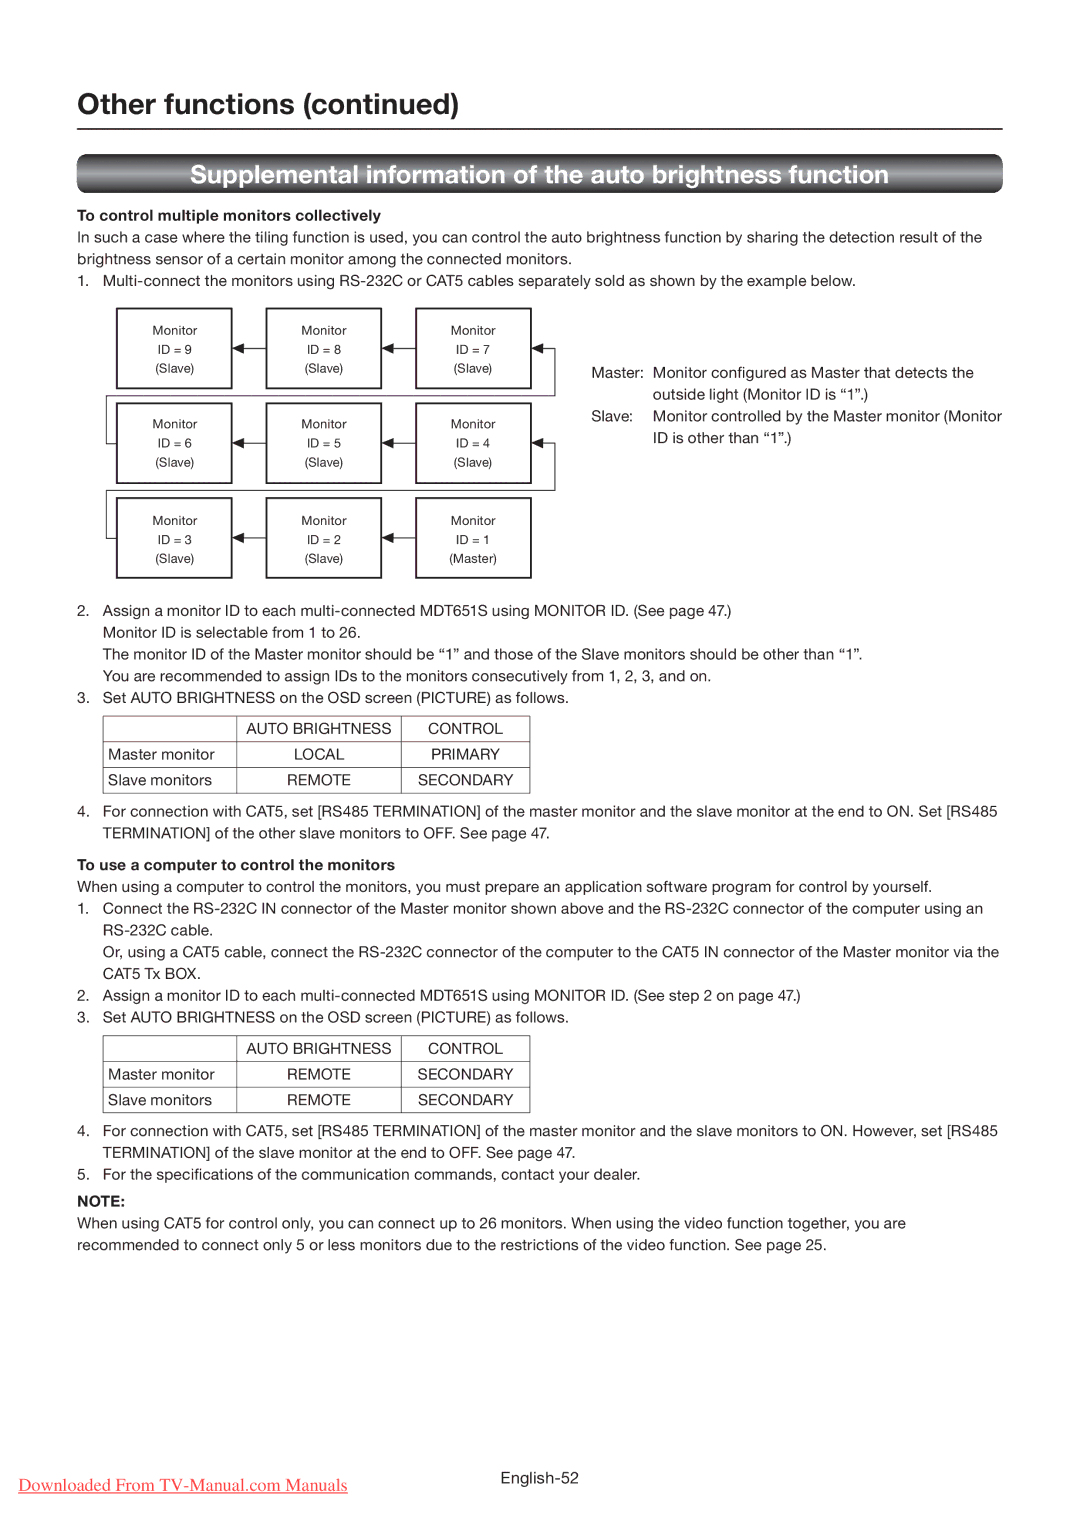
To control multiple monitors collectively
In such a case where the tiling function is used, you can control the auto brightness function by sharing the detection result of the brightness sensor of a certain monitor among the connected monitors.
1.
Monitor | Monitor | Monitor |
|
|
ID = 9 | ID = 8 | ID = 7 |
|
|
(Slave) | (Slave) | (Slave) | Master: Monitor configured as Master that detects the | |
|
|
|
| outside light (Monitor ID is “1”.) |
Monitor | Monitor | Monitor | Slave: | Monitor controlled by the Master monitor (Monitor |
| ID is other than “1”.) | |||
ID = 6 | ID = 5 | ID = 4 |
| |
|
| |||
(Slave) | (Slave) | (Slave) |
|
|
Monitor | Monitor | Monitor |
|
|
ID = 3 | ID = 2 | ID = 1 |
|
|
(Slave) | (Slave) | (Master) |
|
|
2. | Assign a monitor ID to each | |||
| Monitor ID is selectable from 1 to 26. |
|
| |
| The monitor ID of the Master monitor should be “1” and those of the Slave monitors should be other than “1”. | |||
| You are recommended to assign IDs to the monitors consecutively from 1, 2, 3, and on. | |||
3. | Set AUTO BRIGHTNESS on the OSD screen (PICTURE) as follows. | |||
|
|
|
|
|
|
| AUTO BRIGHTNESS | CONTROL |
|
|
|
|
|
|
| Master monitor | LOCAL | PRIMARY |
|
|
|
|
|
|
| Slave monitors | REMOTE | SECONDARY |
|
|
|
|
|
|
4. | For connection with CAT5, set [RS485 TERMINATION] of the master monitor and the slave monitor at the end to ON. Set [RS485 | |||
| TERMINATION] of the other slave monitors to OFF. See page 47. | |||
To use a computer to control the monitors
When using a computer to control the monitors, you must prepare an application software program for control by yourself.
1. Connect the
|
|
|
|
| |
|
| Or, using a CAT5 cable, connect the | |||
|
| CAT5 Tx BOX. |
|
|
|
2. |
| Assign a monitor ID to each | |||
3. |
| Set AUTO BRIGHTNESS on the OSD screen (PICTURE) as follows. | |||
|
|
|
|
|
|
|
|
| AUTO BRIGHTNESS | CONTROL |
|
|
|
|
|
|
|
|
| Master monitor | REMOTE | SECONDARY |
|
|
|
|
|
|
|
|
| Slave monitors | REMOTE | SECONDARY |
|
|
|
|
|
|
|
4. |
| For connection with CAT5, set [RS485 TERMINATION] of the master monitor and the slave monitors to ON. However, set [RS485 | |||
|
| TERMINATION] of the slave monitor at the end to OFF. See page 47. | |||
5. | For the specifications of the communication commands, contact your dealer. | ||||
NOTE:
When using CAT5 for control only, you can connect up to 26 monitors. When using the video function together, you are recommended to connect only 5 or less monitors due to the restrictions of the video function. See page 25.
Downloaded From | |
|