Disassembly/Reassembly Procedures: Transmit and Receive Radio Reassembly — Detailed | |
|
|
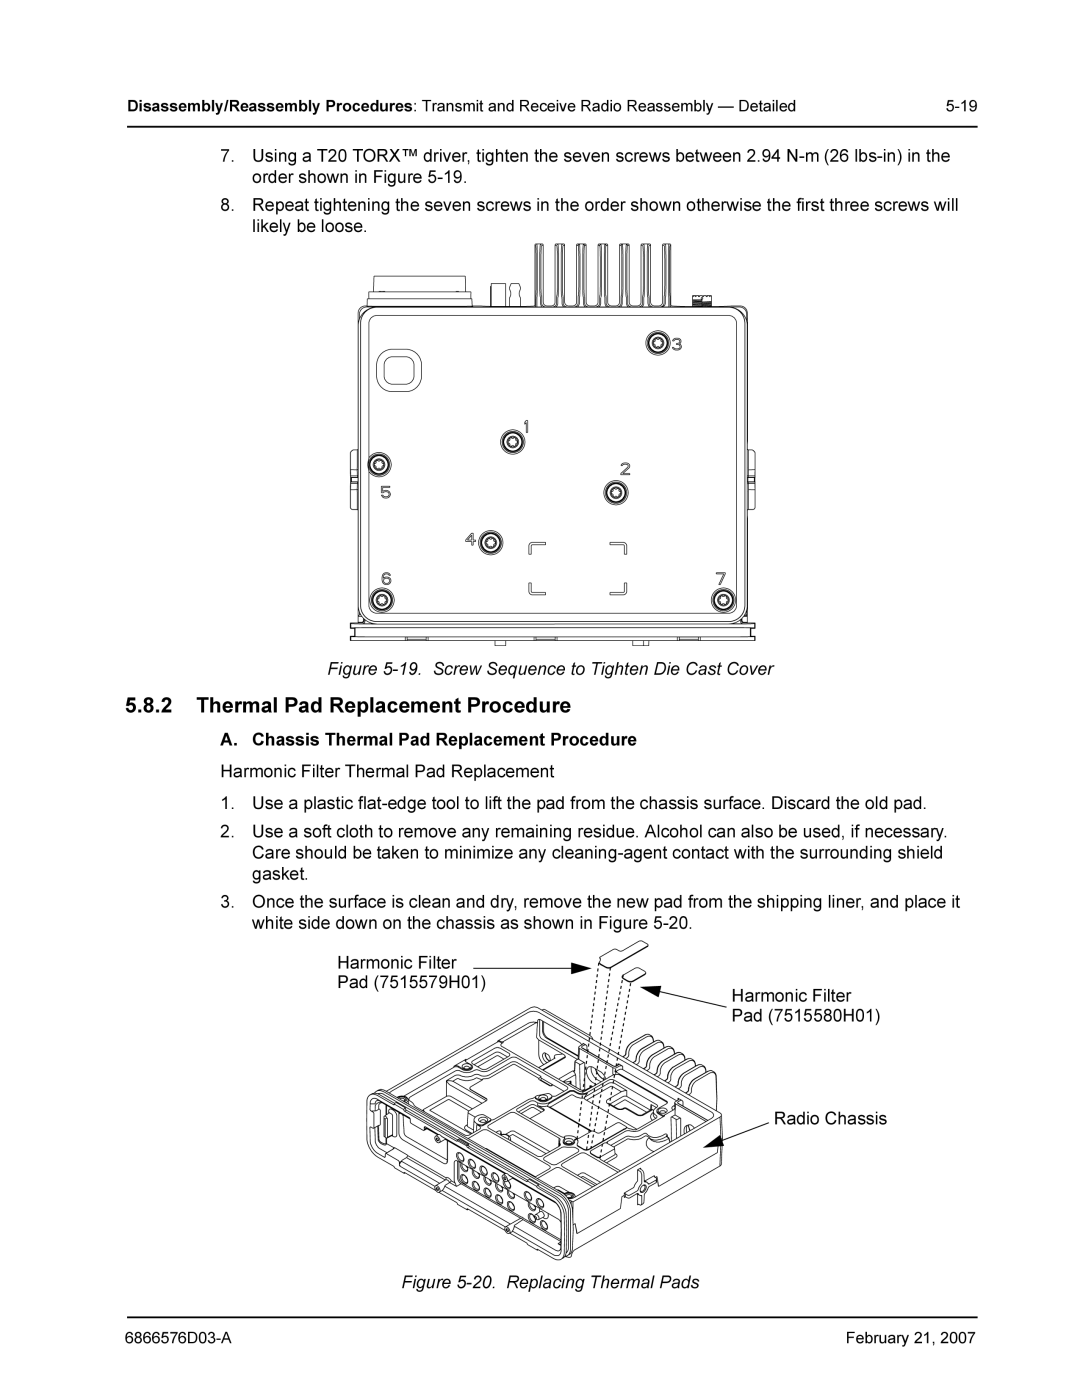
7.Using a T20 TORX™ driver, tighten the seven screws between 2.94
8.Repeat tightening the seven screws in the order shown otherwise the first three screws will likely be loose.
Figure 5-19. Screw Sequence to Tighten Die Cast Cover
5.8.2Thermal Pad Replacement Procedure
A. Chassis Thermal Pad Replacement Procedure
Harmonic Filter Thermal Pad Replacement
1.Use a plastic
2.Use a soft cloth to remove any remaining residue. Alcohol can also be used, if necessary. Care should be taken to minimize any
3.Once the surface is clean and dry, remove the new pad from the shipping liner, and place it white side down on the chassis as shown in Figure
Harmonic Filter ![]() Pad (7515579H01)
Pad (7515579H01)
![]() Harmonic Filter Pad (7515580H01)
Harmonic Filter Pad (7515580H01)
![]() Radio Chassis
Radio Chassis
Figure 5-20. Replacing Thermal Pads
February 21, 2007 |