Disassembly/Reassembly Procedures: Disassembling and Reassembling the Repeater — General | |
|
|
5.5Disassembling and Reassembling the Repeater — General
The following tools are required for disassembling the repeater:
•Small Flat Blade Screwdriver
•TORX™ T30 Driver Bit
•TORX™ T25 Driver Bit
•TORX™ T20 Driver Bit
•TORX™ T15 Driver Bit
•TORX™ T10 Driver Bit
•7 mm Magnetic Socket Driver (extension of >150 mm)
•16 mm Deep Well Socket Driver
•19 mm Deep Well Socket Driver
If a unit requires more complete testing or service than is customarily performed at the basic level, please send repeater to a Motorola Service Center listed in Appendix A.
The following disassembly procedures should be performed only if necessary.
5.6Disassembly Procedures — Detailed
The following are typical procedures to remove and replace the Transmit radio, Receive radio, Repeater Indicator Board, connector board assembly and other miscellaneous parts.
1.Power cord and all external cables must be disconnected before opening up repeater.
2.Take the proper grounding precautions as stated in Section 5.3: Safe Handling of CMOS and LDMOS Devices on page
3.When disassembling repeater, retain all screws for reuse.
5.6.1Disassembly of Cover
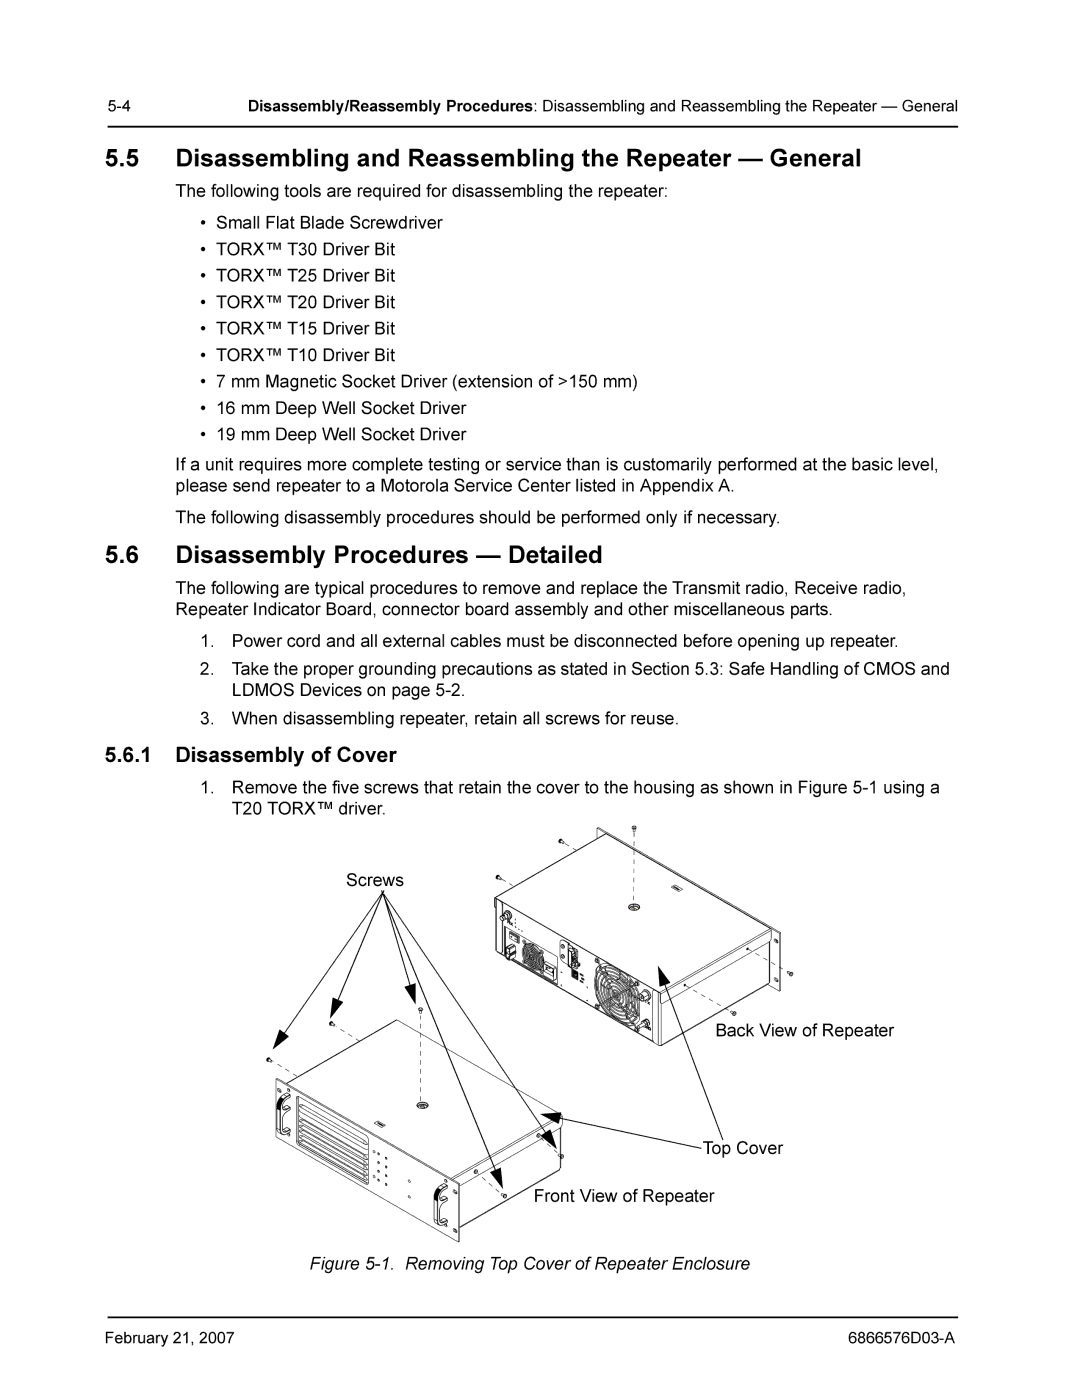
1.Remove the five screws that retain the cover to the housing as shown in Figure
Screws
Back View of Repeater
![]()
![]() Top Cover
Top Cover
Front View of Repeater
Figure 5-1. Removing Top Cover of Repeater Enclosure
February 21, 2007 |
