Chapter 3 - Getting Started with RASExpress
Method A. Do All Configuration using Terminal or Auxiliary PC
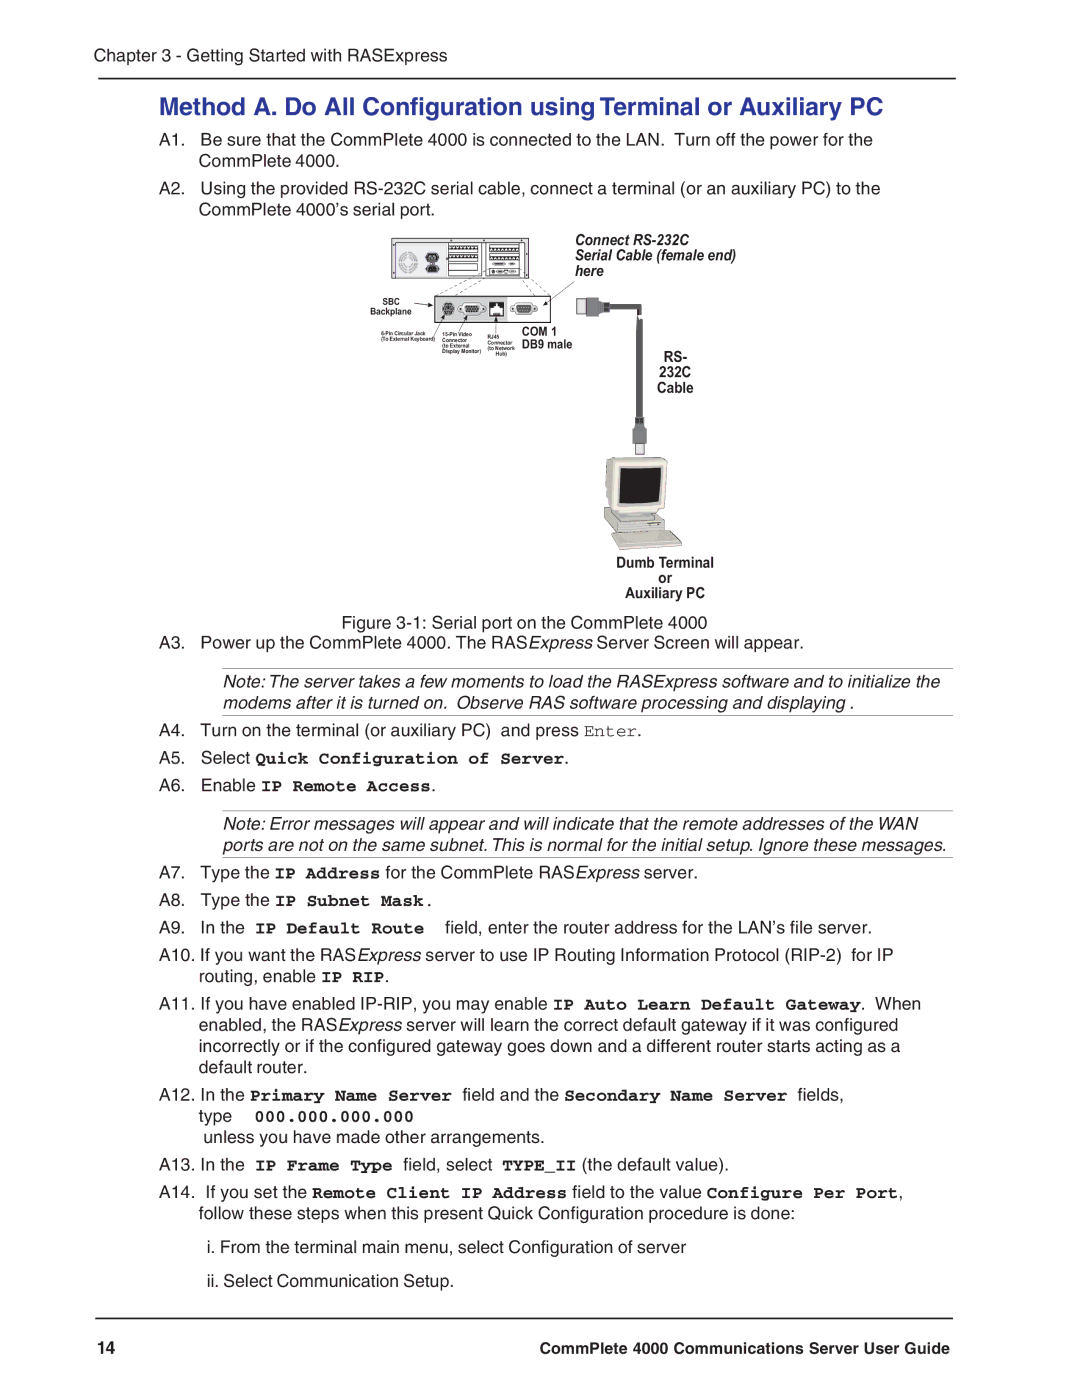
A1. Be sure that the CommPlete 4000 is connected to the LAN. Turn off the power for the CommPlete 4000.
A2. Using the provided
SBC
Backplane
RJ45 | |||
(To External Keyboard) | Connector | ||
Connector | |||
| (to External | ||
| (to Network | ||
| Display Monitor) | ||
| Hub) | ||
|
|
Connect
Serial Cable (female end) here
COM 1
DB9 male
RS-
232C
Cable
Dumb Terminal
or
Auxiliary PC
Figure 3-1: Serial port on the CommPlete 4000
A3. Power up the CommPlete 4000. The RASExpress Server Screen will appear.
Note: The server takes a few moments to load the RASExpress software and to initialize the modems after it is turned on. Observe RAS software processing and displaying .
A4. Turn on the terminal (or auxiliary PC) and press Enter.
A5. Select Quick Configuration of Server.
A6. Enable IP Remote Access.
Note: Error messages will appear and will indicate that the remote addresses of the WAN ports are not on the same subnet. This is normal for the initial setup. Ignore these messages.
A7. Type the IP Address for the CommPlete RASExpress server.
A8. Type the IP Subnet Mask.
A9. In the IP Default Route field, enter the router address for the LAN’s file server.
A10. If you want the RASExpress server to use IP Routing Information Protocol
A11. If you have enabled
A12. In the Primary Name Server field and the Secondary Name Server fields, type 000.000.000.000
unless you have made other arrangements.
A13. In the IP Frame Type field, select TYPE_II (the default value).
A14. If you set the Remote Client IP Address field to the value Configure Per Port, follow these steps when this present Quick Configuration procedure is done:
i. From the terminal main menu, select Configuration of server
ii. Select Communication Setup.
14 | CommPlete 4000 Communications Server User Guide |