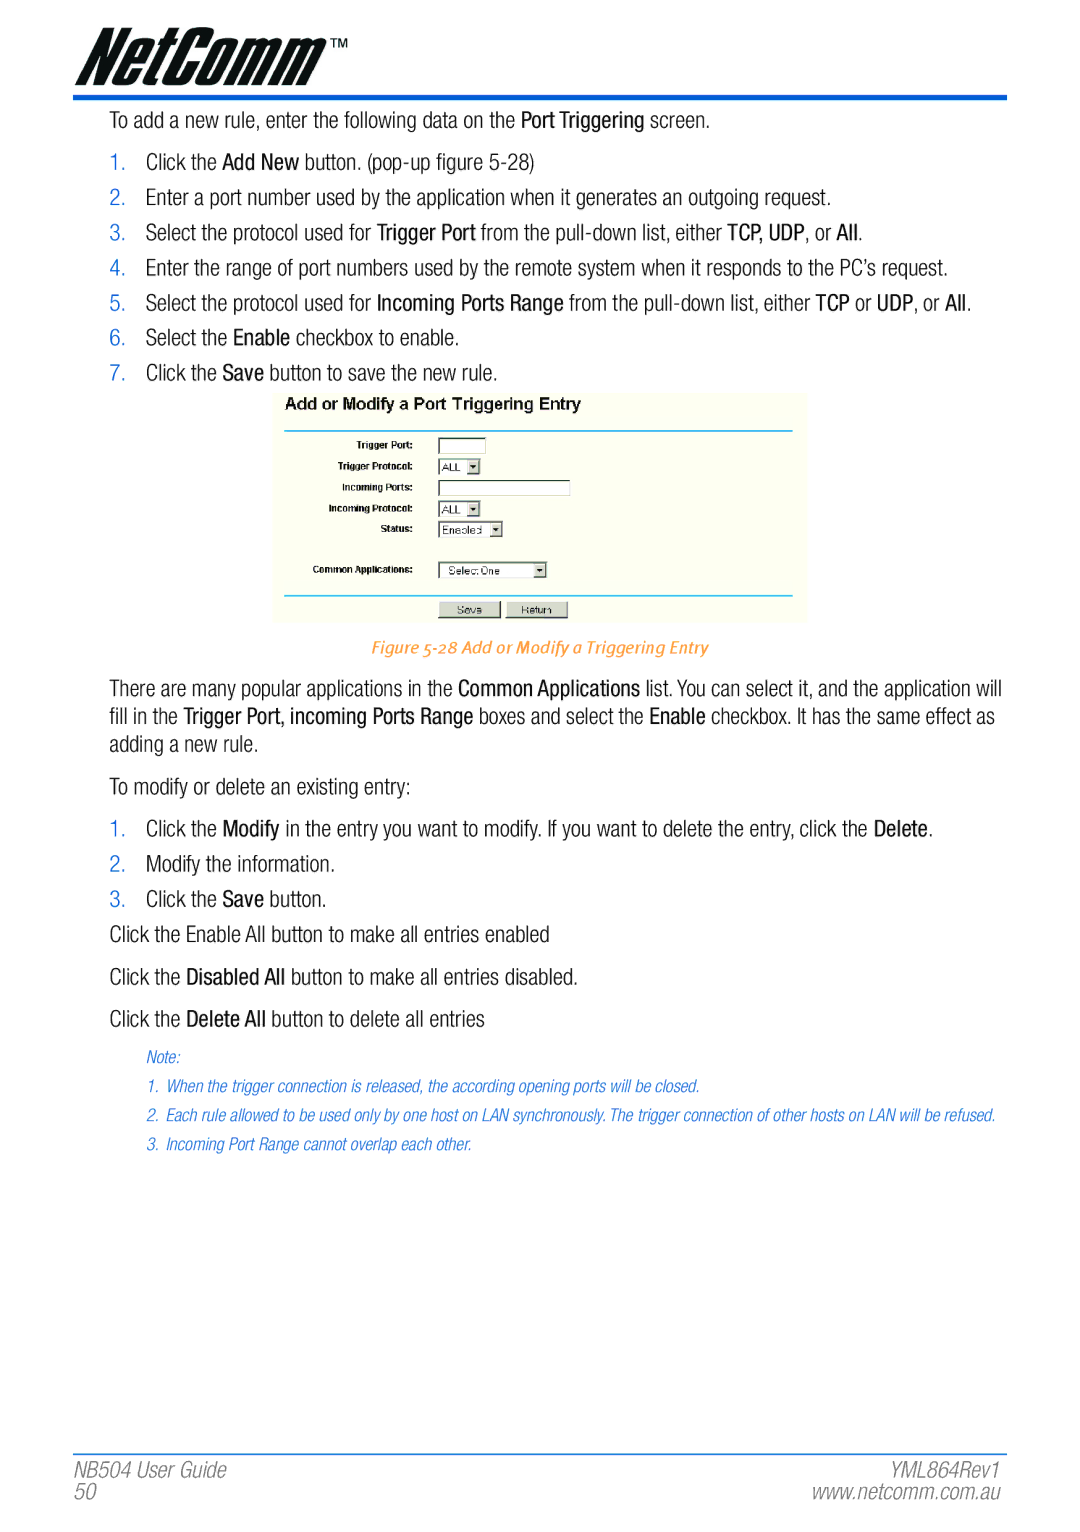
To add a new rule, enter the following data on the Port Triggering screen.
1.Click the Add New button.
2.Enter a port number used by the application when it generates an outgoing request.
3.Select the protocol used for Trigger Port from the
4.Enter the range of port numbers used by the remote system when it responds to the PC’s request.
5.Select the protocol used for Incoming Ports Range from the
6.Select the Enable checkbox to enable.
7.Click the Save button to save the new rule.
Figure 5-28 Add or Modify a Triggering Entry
There are many popular applications in the Common Applications list. You can select it, and the application will fill in the Trigger Port, incoming Ports Range boxes and select the Enable checkbox. It has the same effect as adding a new rule.
To modify or delete an existing entry:
1.Click the Modify in the entry you want to modify. If you want to delete the entry, click the Delete.
2.Modify the information.
3.Click the Save button.
Click the Enable All button to make all entries enabled
Click the Disabled All button to make all entries disabled.
Click the Delete All button to delete all entries
Note:
1.When the tri�gger� connection is r�eleased, the accordi�ng opening por�ts will be closed.
2.Each ru�le allowed to be used only by one host on LAN synchr�onously. The tri�gger� connection of other� hosts on LAN will be r�efused.
3.Incoming Por�t Range cannot over�lap each other�.
NB504 User� Guide | YML864Rev1 |
50 | www.netcomm.com.au |