Reference Manual for the ADSL Modem Router DG834 v3
The router contains a client that can connect to a dynamic DNS service provider. To use this feature, you must select a service provider and obtain an account with them. After you have configured your account information in the router, whenever your
How to Configure Dynamic DNS
1.Log in to the router at its default LAN address of http://192.168.0.1 with its default User Name of admin, default password of password, or using whatever User Name, Password and LAN address you have chosen for the router.
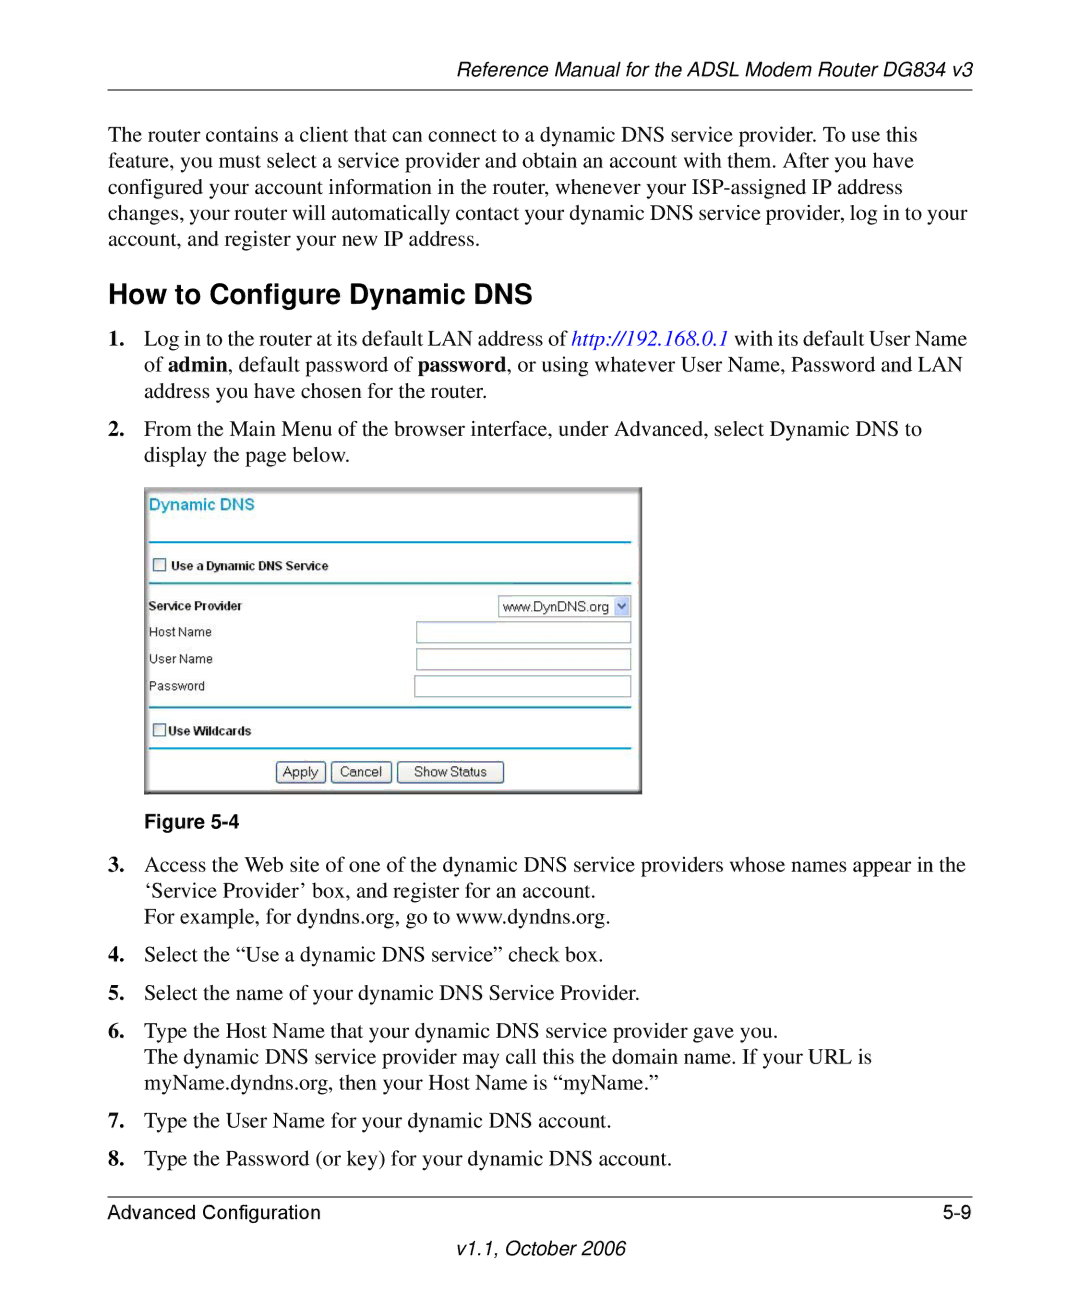
2.From the Main Menu of the browser interface, under Advanced, select Dynamic DNS to display the page below.
Figure
3.Access the Web site of one of the dynamic DNS service providers whose names appear in the ‘Service Provider’ box, and register for an account.
For example, for dyndns.org, go to www.dyndns.org.
4.Select the “Use a dynamic DNS service” check box.
5.Select the name of your dynamic DNS Service Provider.
6.Type the Host Name that your dynamic DNS service provider gave you.
The dynamic DNS service provider may call this the domain name. If your URL is myName.dyndns.org, then your Host Name is “myName.”
7.Type the User Name for your dynamic DNS account.
8.Type the Password (or key) for your dynamic DNS account.
Advanced Configuration |