7.Slide the unit back into the fireplace. Check to be sure that the trim panels are properly po- sitioned and lie flat against the front of the fireplace. If one of more of the panels is out of position, slide the unit out and reset by loosening the mounting screws and repositioning in the slot.
8.Reinstall the top trim panel by sliding the rear lip of the top trim panel underneath the front lip of the mounting bracket already secured to top of unit.
NOTE: Mount the top trim panel so that it sits in front of the top of the side trim panels.
9.Obtain the brass trim kit provided with unit and slip over the top and sides of trim panels. (Top ends of brass may need to be trimmed to fit.
10.If direct connect or positive connect kit is not used, follow instructions in steps
11.Mount top trim panel by drilling mounting holes in center of trim panel mounting brackets, with top end side of top panel overlapping side panel.
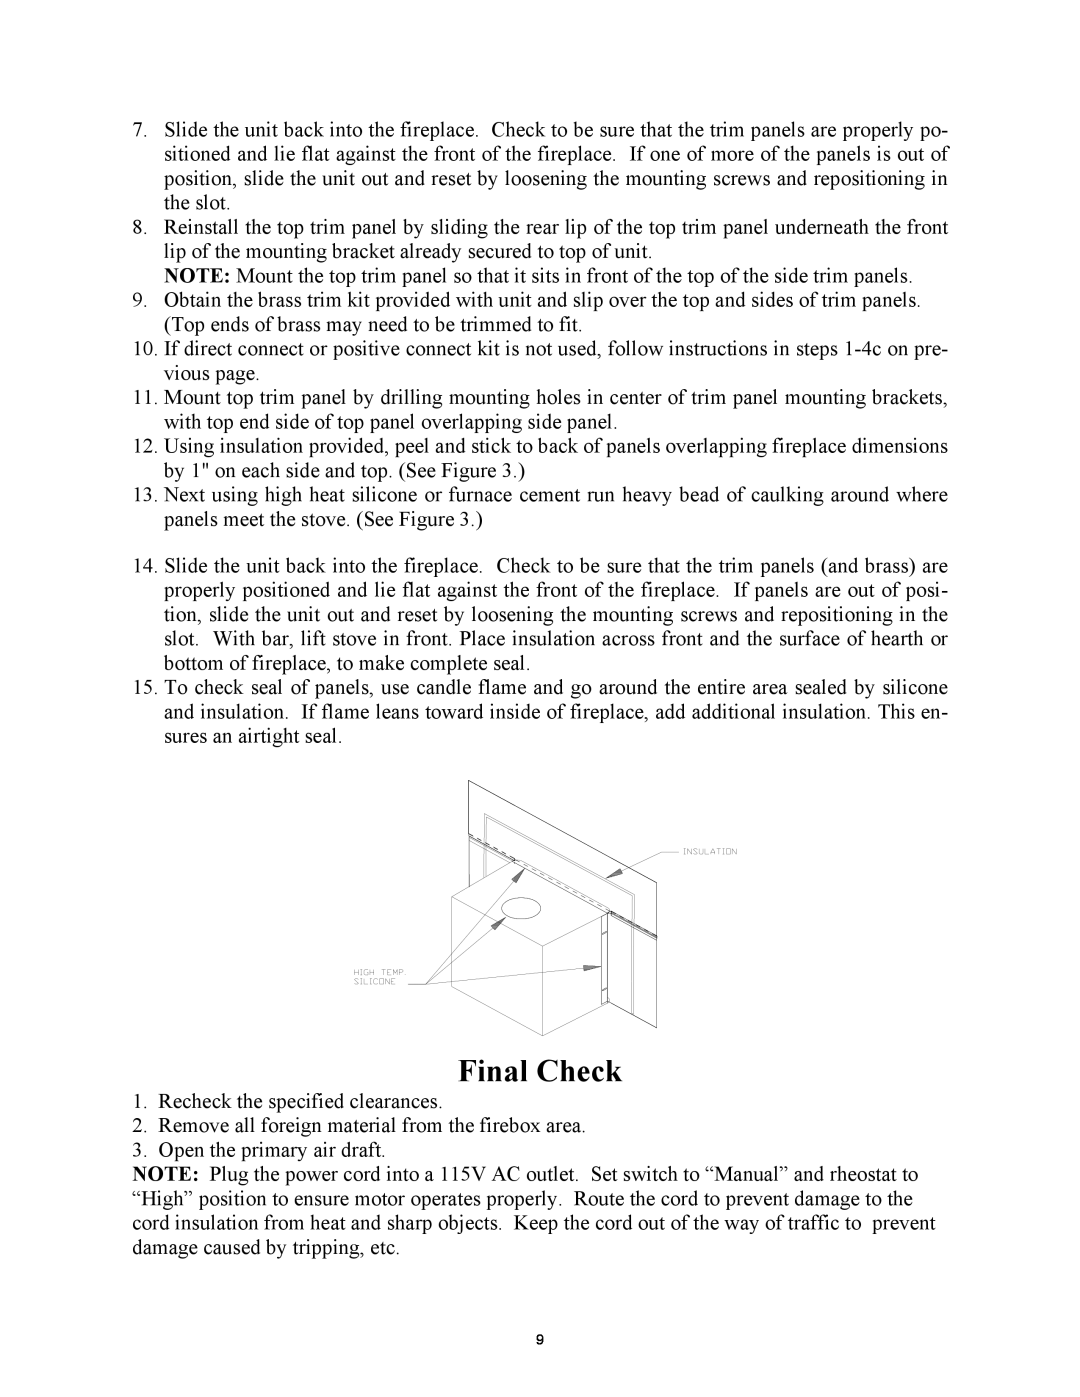
12.Using insulation provided, peel and stick to back of panels overlapping fireplace dimensions by 1" on each side and top. (See Figure 3.)
13.Next using high heat silicone or furnace cement run heavy bead of caulking around where panels meet the stove. (See Figure 3.)
14.Slide the unit back into the fireplace. Check to be sure that the trim panels (and brass) are properly positioned and lie flat against the front of the fireplace. If panels are out of posi- tion, slide the unit out and reset by loosening the mounting screws and repositioning in the slot. With bar, lift stove in front. Place insulation across front and the surface of hearth or bottom of fireplace, to make complete seal.
15.To check seal of panels, use candle flame and go around the entire area sealed by silicone and insulation. If flame leans toward inside of fireplace, add additional insulation. This en- sures an airtight seal.
Final Check
1.Recheck the specified clearances.
2.Remove all foreign material from the firebox area.
3.Open the primary air draft.
NOTE: Plug the power cord into a 115V AC outlet. Set switch to “Manual” and rheostat to “High” position to ensure motor operates properly. Route the cord to prevent damage to the cord insulation from heat and sharp objects. Keep the cord out of the way of traffic to prevent damage caused by tripping, etc.
9