9 OPERATIONS
OSP series portable infrared thermometers are factory calibrated before shipment.
During the
Before entering the procedure to operate the instrument it is useful the understanding of the messages that can be present in the display.
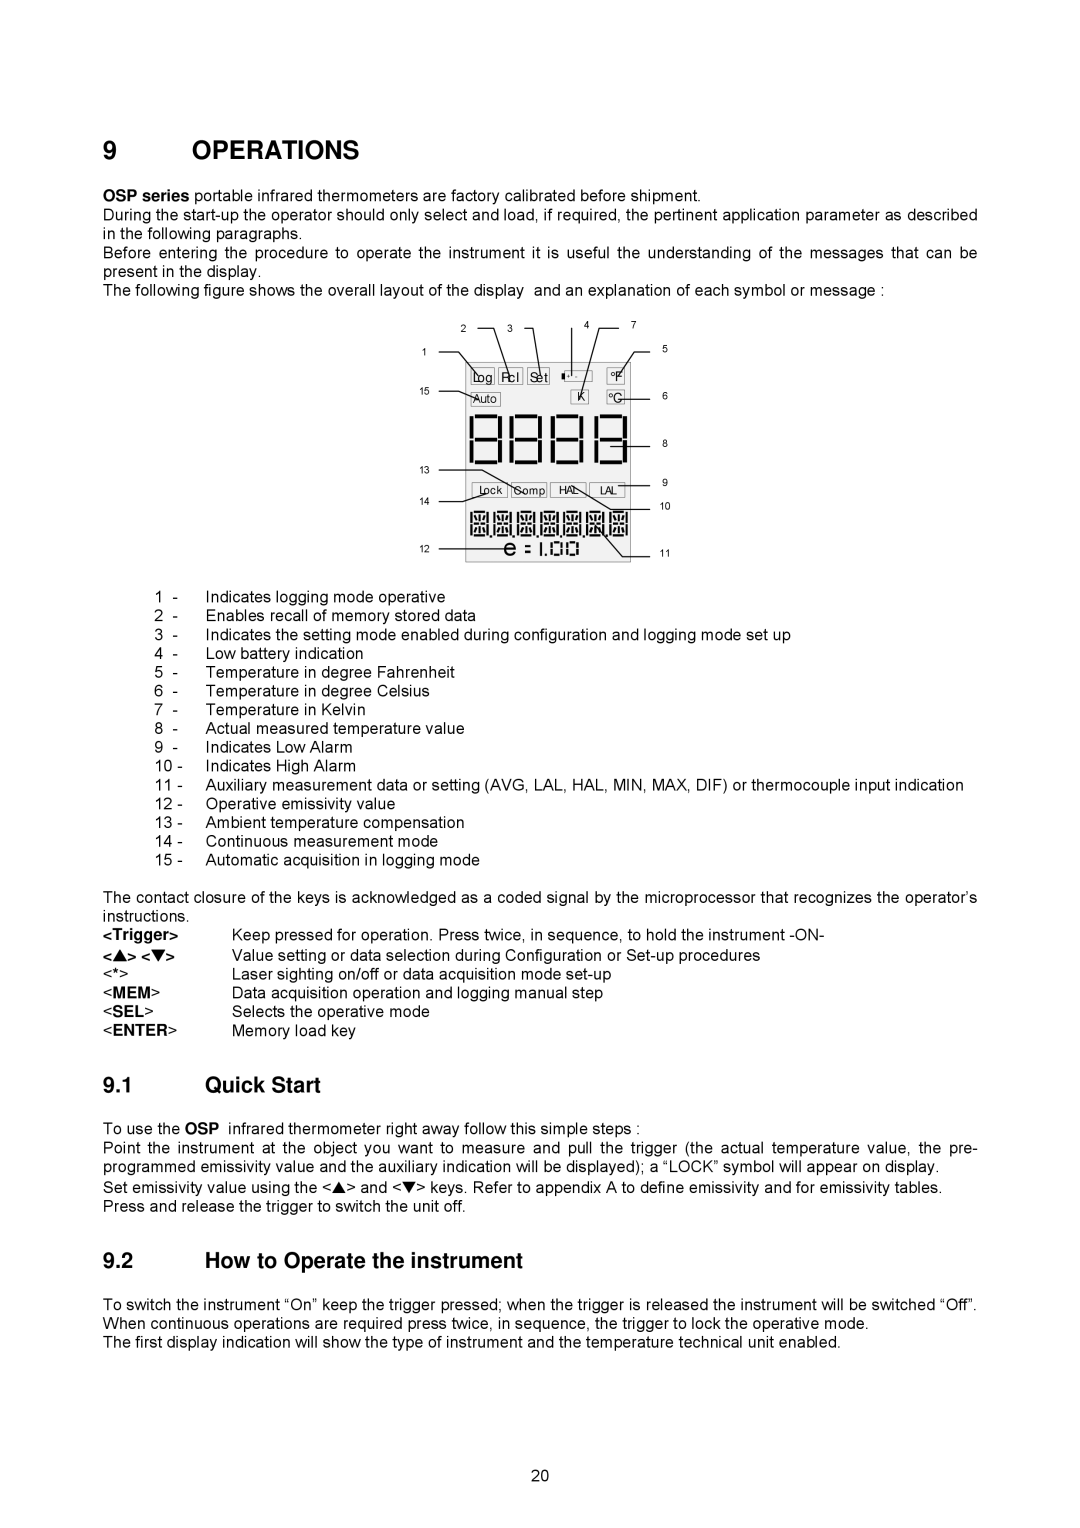
The following figure shows the overall layout of the display and an explanation of each symbol or message :
| 2 |
| 3 |
| 4 |
| 7 |
1 |
|
|
|
|
|
| 5 |
15 | Log | Rcl | Set | + - | °F |
| |
Auto |
|
|
| K | °C | 6 | |
|
|
|
| ||||
|
|
|
|
|
|
| 8 |
13 |
|
|
|
|
|
| 9 |
| Lock | Comp | HAL | LAL | |||
14 |
| ||||||
|
|
|
|
|
| 10 | |
|
|
|
|
|
|
| |
12 |
|
| e |
|
|
| 11 |
|
|
|
|
|
| ||
1 - Indicates logging mode operative
2 - Enables recall of memory stored data
3- Indicates the setting mode enabled during configuration and logging mode set up
4- Low battery indication
5- Temperature in degree Fahrenheit
6- Temperature in degree Celsius
7- Temperature in Kelvin
8- Actual measured temperature value
9- Indicates Low Alarm
10- Indicates High Alarm
11- Auxiliary measurement data or setting (AVG, LAL, HAL, MIN, MAX, DIF) or thermocouple input indication
12- Operative emissivity value
13- Ambient temperature compensation
14- Continuous measurement mode
15- Automatic acquisition in logging mode
The contact closure of the keys is acknowledged as a coded signal by the microprocessor that recognizes the operator’s instructions.
<Trigger> <▲> <▼> <*> <MEM> <SEL> <ENTER>
9.1Quick Start
To use the OSP infrared thermometer right away follow this simple steps :
Point the instrument at the object you want to measure and pull the trigger (the actual temperature value, the pre- programmed emissivity value and the auxiliary indication will be displayed); a “LOCK” symbol will appear on display.
Set emissivity value using the <▲> and <▼> keys. Refer to appendix A to define emissivity and for emissivity tables. Press and release the trigger to switch the unit off.
9.2How to Operate the instrument
To switch the instrument “On” keep the trigger pressed; when the trigger is released the instrument will be switched “Off”. When continuous operations are required press twice, in sequence, the trigger to lock the operative mode.
The first display indication will show the type of instrument and the temperature technical unit enabled.
20