When any needed adjustments are made to the crossovers, one additional adjustment is available to custom tailor the way information is sent to the subwoofer. The LFE LP FLT line adjusts the frequency cutoff of the low pass filter that deter- mines the frequency at which information is sent to the subwoofer when playing a digital sound- track that has a dedicated low frequency effects channel. In most cases the default frequency of 120Hz is appropriate, since that is the frequency most commonly used in the creation of LFE chan- nels during a movie’s sound mixing process. However, you may wish to change the setting based on your individual preference or the charac- teristics and capabilities of your subwoofer.
To change this setting when the SPEAKER X-OVERmenu is on the screen, press the ⁄/¤ Navigation Button Euntil the cursor is on the LFE LP FLT line and then press the ‹/ › Navigation Button Euntil the desired setting is shown in highlighted video.
When all changes to Speaker Crossover settings have been made, press the ⁄/¤ Navigation Button Euntil the cursor is on the BACK TO MANUAL SETUP menu and then press- ing the Set Button Fso that you may make any other adjustments to the system parameters. It is also important to remember to rerun the EzSet/EQ system if any changes have been made to the settings on this menu, following the instructions shown on page 26 for using the Manual mode.
The Speaker Configuration may also be changed at any time without using the full-OSD on-screen menu system by pressing the Speaker Selector
6 on the front panel or on the remote con- trol. Once the button is pressed, FRONT SPEAKER will appear in both the lower third of the video display and the Main Information Display ˜.
Within five seconds, either press the ‹/› buttons 7 $ on the front panel or the ⁄/¤ buttons
Eon the remote to select a different speaker position, or press the Set Button @Fto begin the adjustment process for the front left and right speakers.
When the Set button @ Fhas been pressed and the system is ready for a change to the front speaker setting, the on-screen display and Main Information Display ˜ will read FRONT LARGE or FRONT SMALL depending on the current setting. Press the ‹/› buttons 7 $ on the front panel or the ⁄/¤ buttons Eon the remote until the desired setting is shown, using the instructions for “large” or “small” shown earlier, then press the Set button @F.
If another speaker position needs to be changed, press the ‹/› buttons 7 $ on the front panel or the ⁄/¤ buttons Eon the remote to select a different speaker position, press the Set button
@Fand then the ‹/› buttons 7 $ on the front panel or the ⁄/¤ buttons Eon the remote until the correct speaker setting is shown and press the Set button @ Fagain to con- firm the selection.
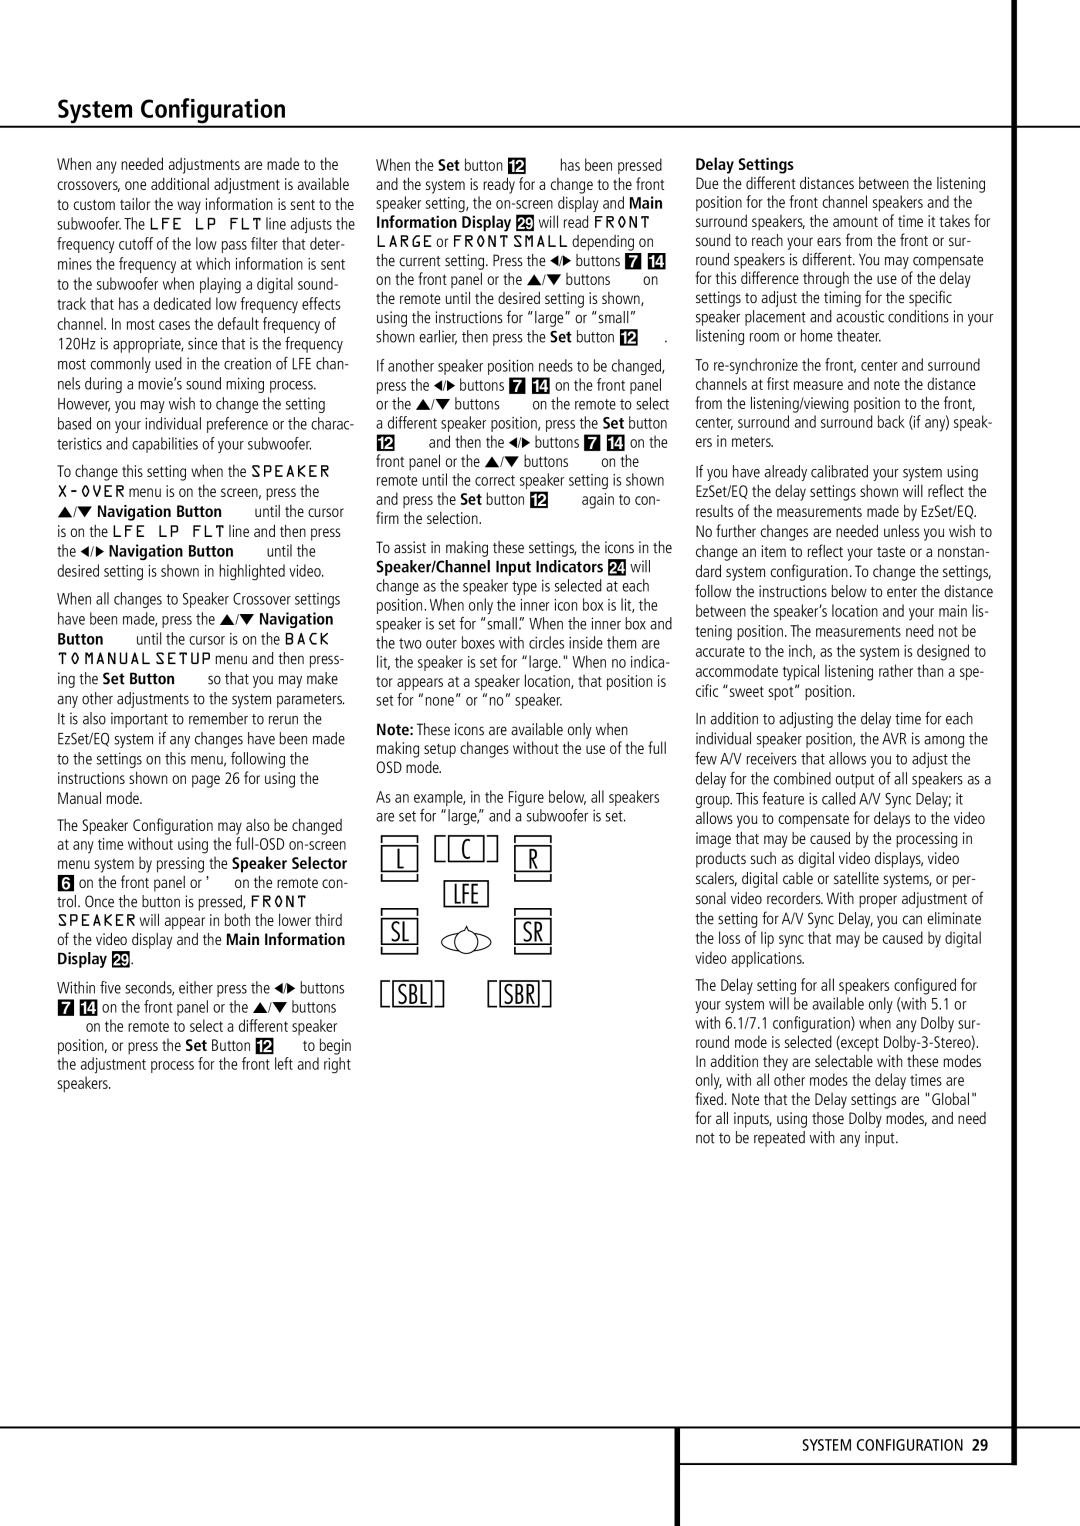
To assist in making these settings, the icons in the Speaker/Channel Input Indicators Ú will change as the speaker type is selected at each position. When only the inner icon box is lit, the speaker is set for “small.” When the inner box and the two outer boxes with circles inside them are lit, the speaker is set for “large." When no indica- tor appears at a speaker location, that position is set for “none” or “no” speaker.
Note: These icons are available only when making setup changes without the use of the full OSD mode.
As an example, in the Figure below, all speakers are set for “large,” and a subwoofer is set.
Delay Settings
Due the different distances between the listening position for the front channel speakers and the surround speakers, the amount of time it takes for sound to reach your ears from the front or sur- round speakers is different. You may compensate for this difference through the use of the delay settings to adjust the timing for the specific speaker placement and acoustic conditions in your listening room or home theater.
To re-synchronize the front, center and surround channels at first measure and note the distance from the listening/viewing position to the front, center, surround and surround back (if any) speak- ers in meters.
If you have already calibrated your system using EzSet/EQ the delay settings shown will reflect the results of the measurements made by EzSet/EQ. No further changes are needed unless you wish to change an item to reflect your taste or a nonstan- dard system configuration. To change the settings, follow the instructions below to enter the distance between the speaker’s location and your main lis- tening position. The measurements need not be accurate to the inch, as the system is designed to accommodate typical listening rather than a spe- cific “sweet spot” position.
In addition to adjusting the delay time for each individual speaker position, the AVR is among the few A/V receivers that allows you to adjust the delay for the combined output of all speakers as a group. This feature is called A/V Sync Delay; it allows you to compensate for delays to the video image that may be caused by the processing in products such as digital video displays, video scalers, digital cable or satellite systems, or per- sonal video recorders. With proper adjustment of the setting for A/V Sync Delay, you can eliminate the loss of lip sync that may be caused by digital video applications.
The Delay setting for all speakers configured for your system will be available only (with 5.1 or with 6.1/7.1 configuration) when any Dolby sur- round mode is selected (except Dolby-3-Stereo). In addition they are selectable with these modes only, with all other modes the delay times are fixed. Note that the Delay settings are "Global" for all inputs, using those Dolby modes, and need not to be repeated with any input.