Timer Recording
5. Setup the recording date
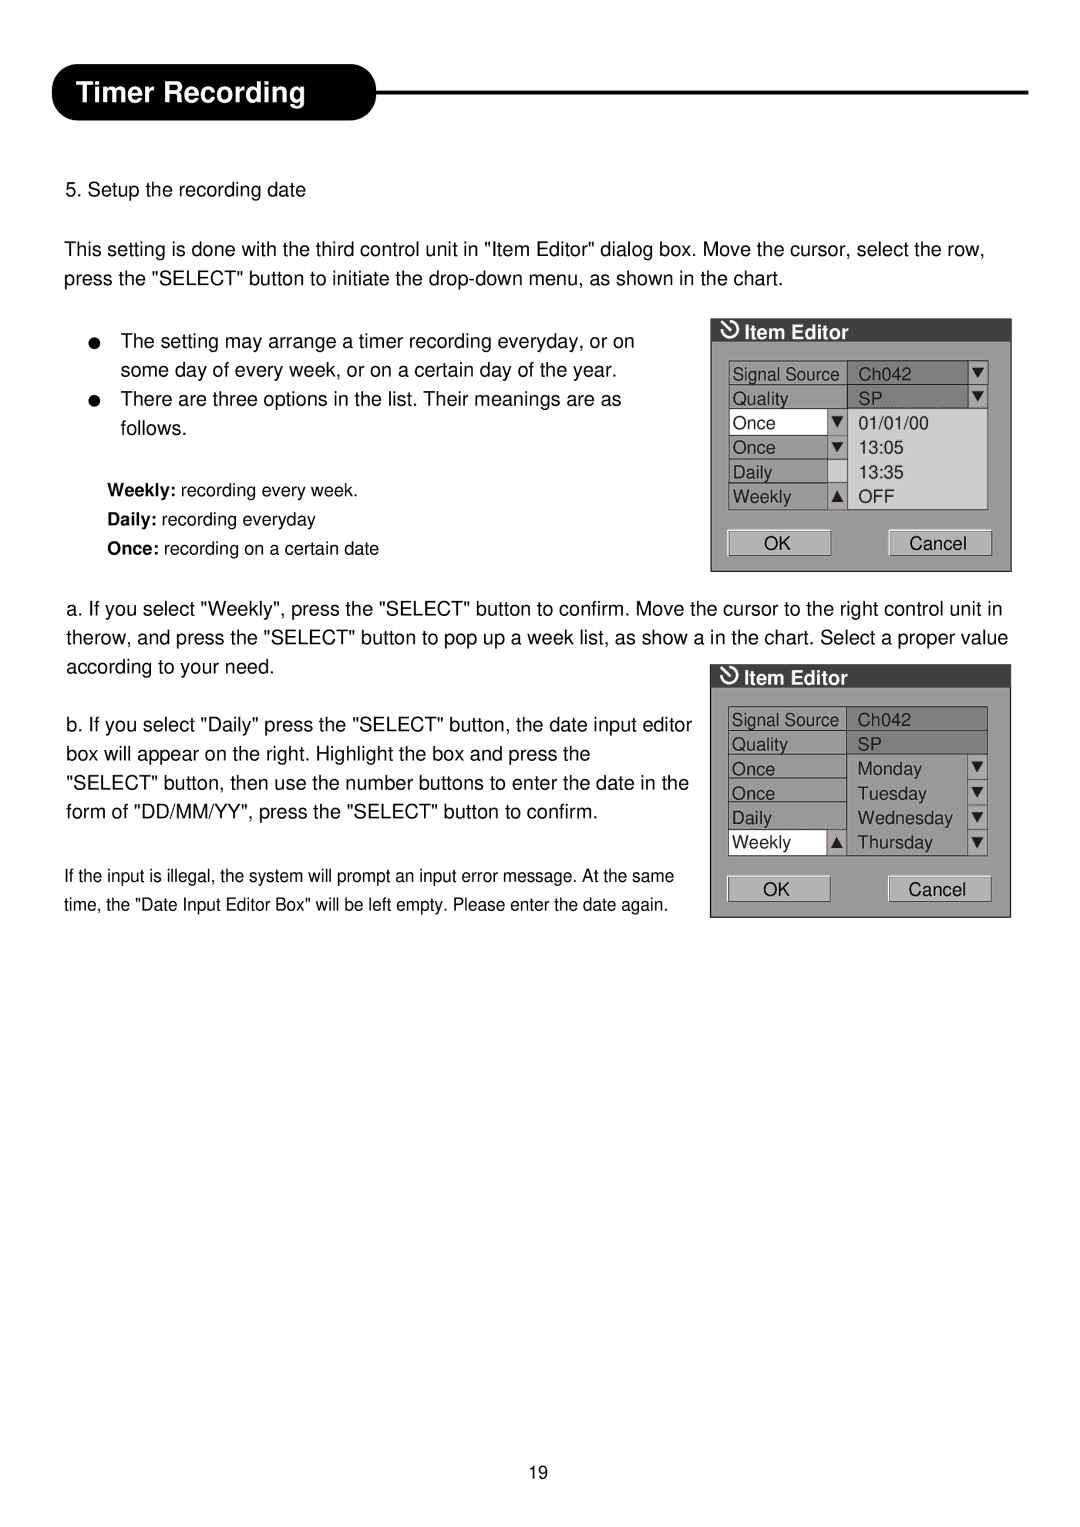
This setting is done with the third control unit in "Item Editor" dialog box. Move the cursor, select the row, press the "SELECT" button to initiate the
The setting may arrange a timer recording everyday, or on some day of every week, or on a certain day of the year. There are three options in the list. Their meanings are as follows.
Weekly: recording every week.
Daily: recording everyday
Once: recording on a certain date
 Item Editor
Signal Source | Ch042 |
Quality | SP |
Once | 01/01/00 |
Once | 13:05 |
Daily | 13:35 |
Weekly | OFF |
OK | Cancel |
a. If you select "Weekly", press the "SELECT" button to confirm. Move the cursor to the right control unit in therow, and press the "SELECT" button to pop up a week list, as show a in the chart. Select a proper value according to your need.
b. If you select "Daily" press the "SELECT" button, the date input editor | Signal Source | Ch042 | |
box will appear on the right. Highlight the box and press the | Quality | SP | |
Once | Monday | ||
"SELECT" button, then use the number buttons to enter the date in the | |||
Once | Tuesday | ||
form of "DD/MM/YY", press the "SELECT" button to confirm. | |||
Daily | Wednesday | ||
| Weekly | Thursday | |
If the input is illegal, the system will prompt an input error message. At the same | OK | Cancel | |
time, the "Date Input Editor Box" will be left empty. Please enter the date again. | |||
|
|
19
