Shooting techniques for different targets (cont.)
Photo shots | Zebra pattern |
You can record still pictures on tape just as if you were taking snapshots with an ordinary camera.
When the PHOTO SHOT button is pressed in the shooting pause mode, a still picture lasting for about 7 seconds is recorded.
Once the still picture has been recorded, the
A photo index for images recorded using the photo shot function is created, enabling you to perform a photo index search when the tape is played back to find any still pictures you have recorded. (P52)
O While shooting is in progress, still pictures cannot be recorded even when the PHOTO SHOT button is pressed.
RESET
SEARCH DIGITAL ZOOM SEARCH | START/ |
DATE/ | PHOTO STOP |
OSD TIME | SHOT |
| REC | BARS | PHOTO SHOT | COUNTER RESET | TITLE ZOOM | |
|
|
|
| |||
|
|
|
| MULTI/ | A.DUB |
|
COUNTER RESET | MODE CHK | ZEBRA | OIS | + | ||
|
| VOL | ||||
|
|
|
|
|
| |
| AUTO | MANUAL |
|
|
| |
When the ZEBRA button is pressed, parts that may be whitened out due to overexposure can be displayed in stripes.
O Parts that are extremely bright O Parts that reflect a lot of light
By adjusting the iris and shutter speed in the manual mode to remove the areas with zebra patterns, you can obtain images with minimal
You can set the brightness level at which the zebra patterns are to be displayed by using the menus
RESET
| SEARCH | DIGITAL ZOOM | SEARCH |
| REC | BARS | PHOTO SHOT |
COUNTER RESET | MODE CHK | ZEBRA | OIS |
| AUTO | MANUAL | |
The markers are displayed when the ZEBRA button is pressed again.
Colour bars
When the BARS button is pressed during shooting or in the shooting pause mode, colour bars (complying with the EBU standard), which come in handy for adjusting the picture quality of TV and external monitor images, can be displayed.
When the BARS button is pressed again, the original image is restored.
When the ID information in the ID SET item on the RECORDING SETUP screen have been set using the menus
If the START/STOP button is now pressed, the images with ID information superimposed onto the colour bars can be recorded on a tape.
RESET
|
| SEARCH | DIGITAL ZOOM | SEARCH |
|
| REC | BARS | PHOTO SHOT |
COUNTER | RESET | MODE CHK | ZEBRA | OIS |
AUTOMANUAL
O The colour bars will not be displayed when the digital zooming is performed. (P35)
38 (E)
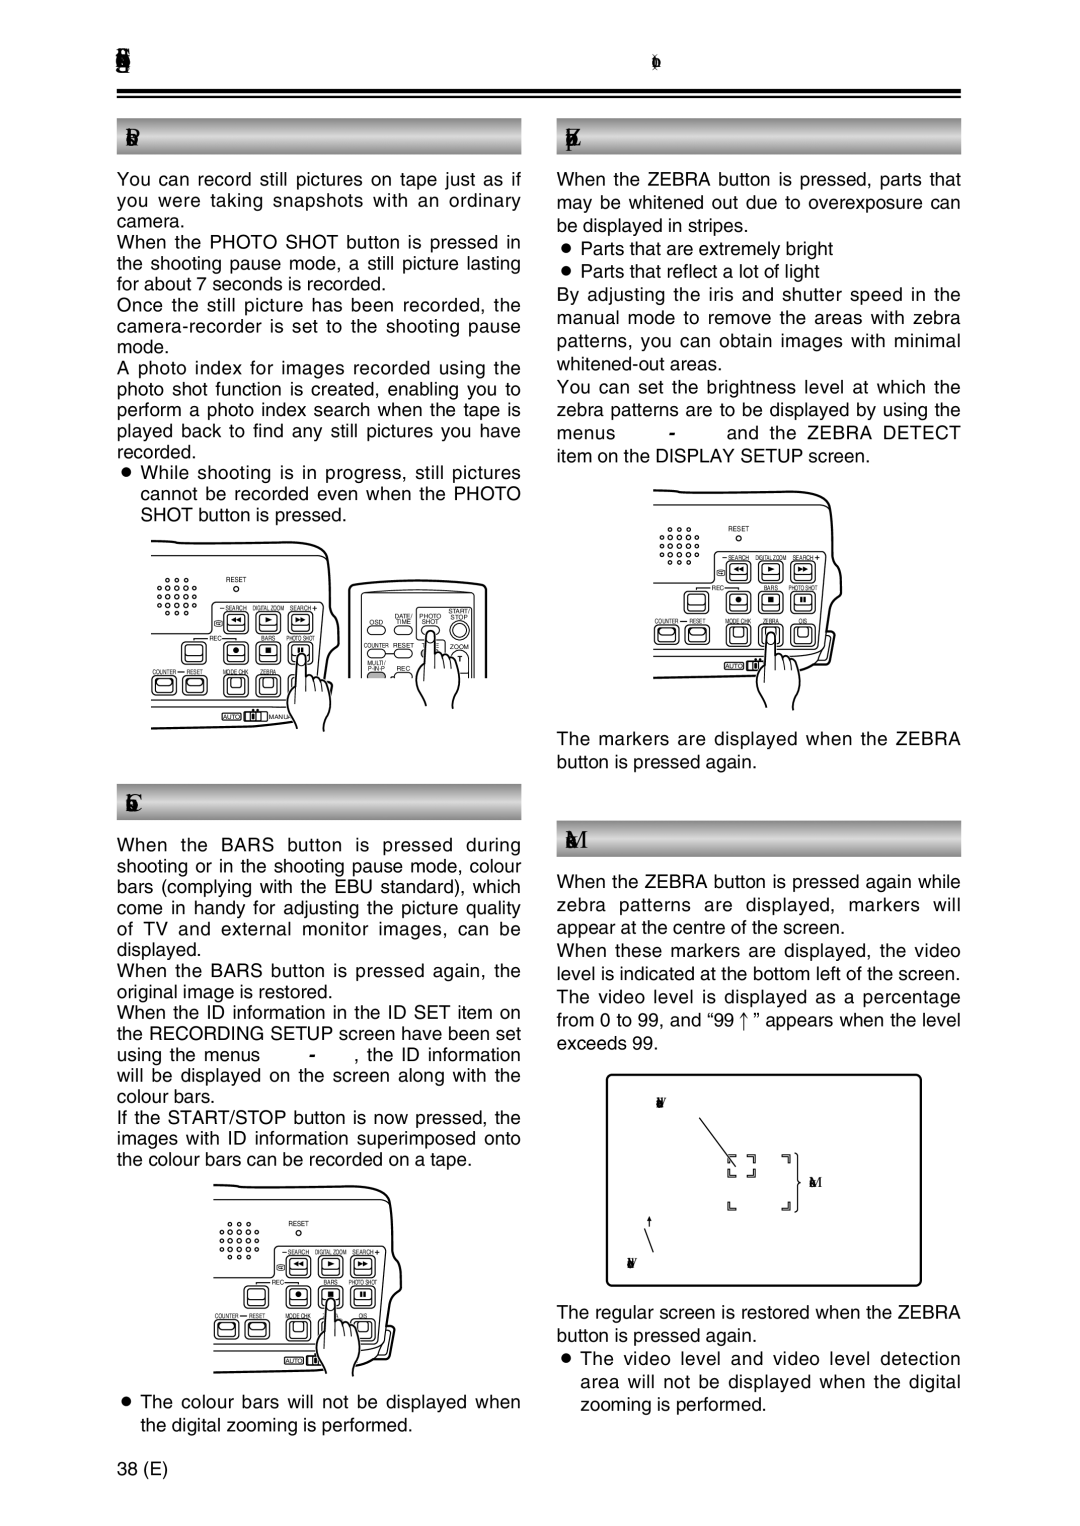
Markers
When the ZEBRA button is pressed again while zebra patterns are displayed, markers will appear at the centre of the screen.
When these markers are displayed, the video level is indicated at the bottom left of the screen. The video level is displayed as a percentage from 0 to 99, and “99:” appears when the level exceeds 99.
Video level detection area
Markers
9 9 ![]()
Video level
The regular screen is restored when the ZEBRA button is pressed again.
O The video level and video level detection area will not be displayed when the digital zooming is performed. (P35)