Dubbing (cont.)
Digital input/output
You can perform dubbing with a high image quality by means of digital signals by using the DV cable (option) to connect the camera- recorder to a digital video unit equipped with a DV connector (IEEE 1394 connector). (P54)
1 Turn the POWER lever to set the player unit and recorder unit to the VCR mode.
CAMERA
![]()
![]()
![]() VCR
VCR
POWER
FF | ON M | O |
O |
| DE |
1
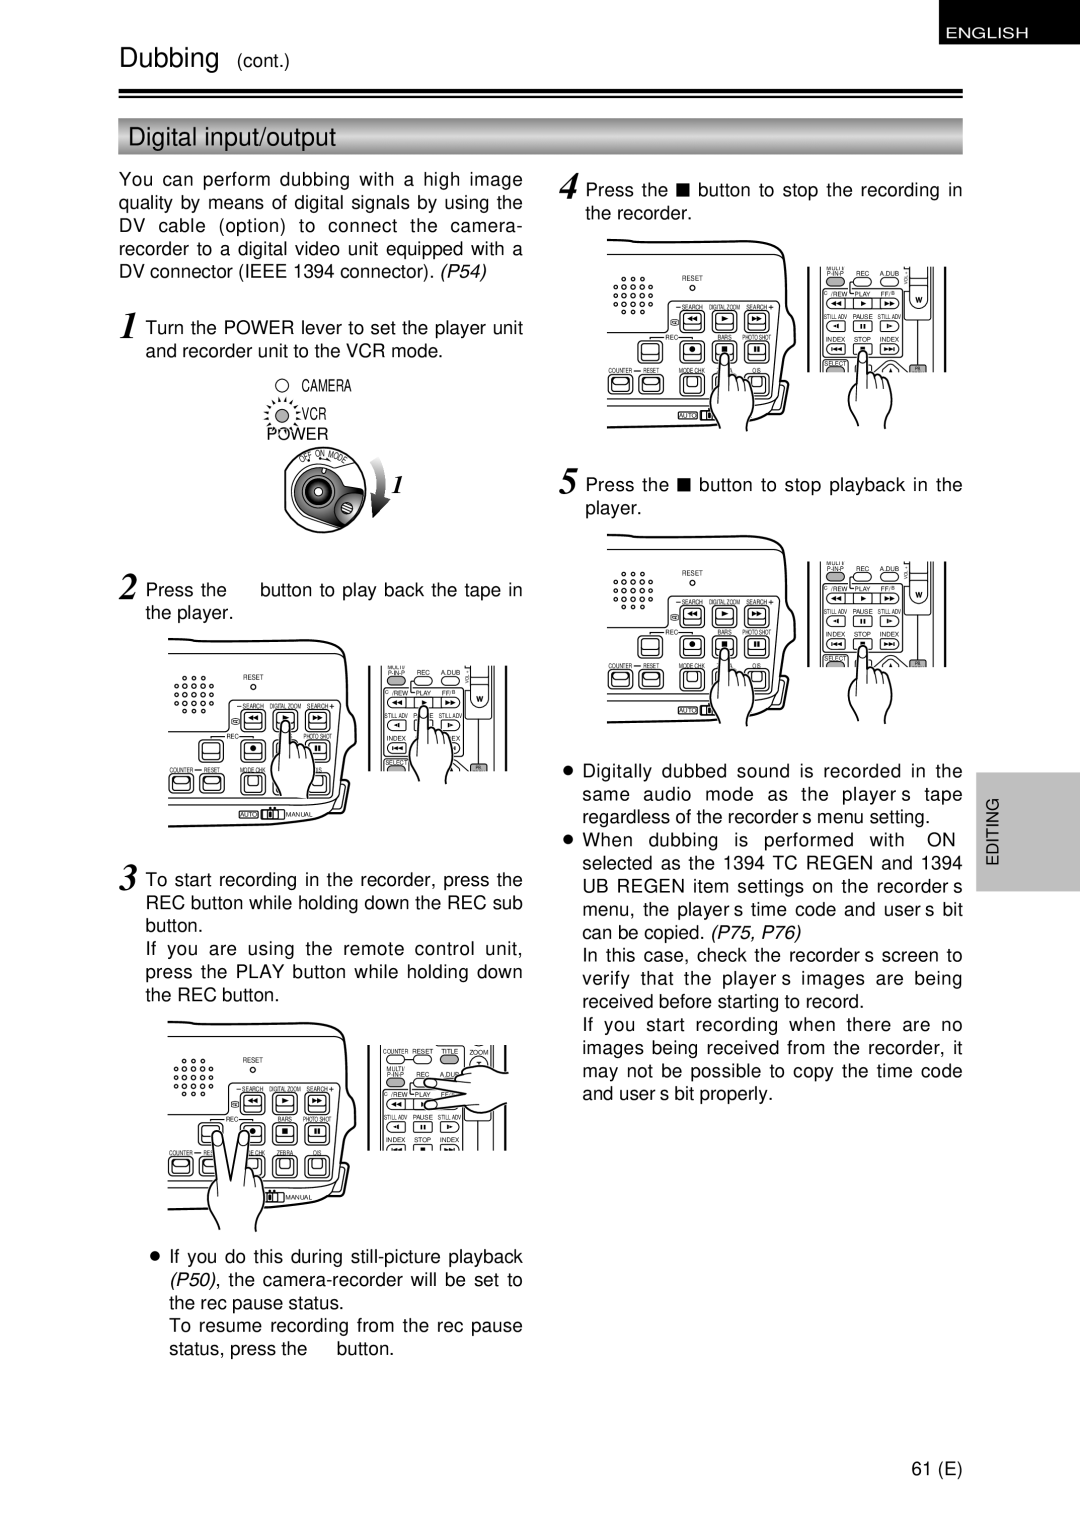
2 Press the 1 button to play back the tape in the player.
|
|
|
| MULTI/ | REC | A.DUB |
|
| RESET |
|
| + | |||
|
|
|
|
|
| VOL | |
|
|
|
|
|
|
| – |
|
|
|
| C/REW | PLAY | FF/ B |
|
| SEARCH | DIGITAL ZOOM | SEARCH |
|
|
|
|
|
|
|
| STILL ADV | PAUSE | STILL ADV |
|
| REC | BARS | PHOTO SHOT | INDEX | STOP | INDEX |
|
|
|
|
| SELECT | VAR. |
| PB. |
COUNTER RESET | MODE CHK | ZEBRA | OIS |
|
| ||
| SEARCH |
| ZOOM | ||||
| AUTO | MANUAL |
|
|
|
| |
3 To start recording in the recorder, press the REC button while holding down the REC sub button.
If you are using the remote control unit, press the PLAY button while holding down the REC button.
|
|
|
| COUNTER RESET | TITLE ZOOM | ||
| RESET |
|
|
|
|
|
|
|
|
|
| MULTI/ | REC | A.DUB |
|
|
|
|
| + | |||
| SEARCH | DIGITAL ZOOM | SEARCH |
|
|
| – VOL |
| C/REW | PLAY | FF/ B |
| |||
|
|
|
|
| |||
| REC | BARS | PHOTO SHOT | STILL ADV | PAUSE | STILL ADV |
|
|
|
|
|
| |||
|
|
|
| INDEX | STOP | INDEX |
|
COUNTER RESET | MODE CHK | ZEBRA | OIS |
|
|
|
|
| AUTO | MANUAL |
|
|
|
| |
O If you do this during
To resume recording from the rec pause status, press the ; button.
ENGLISH
4 Press the $ button to stop the recording in the recorder.
|
|
|
| MULTI/ | REC | A.DUB |
|
| RESET |
|
| + | |||
|
|
|
|
|
| VOL | |
|
|
|
|
|
|
| – |
|
|
|
| C/REW | PLAY | FF/ B |
|
| SEARCH | DIGITAL ZOOM | SEARCH |
|
|
|
|
|
|
|
| STILL ADV | PAUSE | STILL ADV |
|
| REC | BARS | PHOTO SHOT | INDEX | STOP | INDEX |
|
|
|
|
| SELECT | VAR. |
| PB. |
COUNTER RESET | MODE CHK | ZEBRA | OIS |
|
| ||
| SEARCH |
| ZOOM | ||||
| AUTO | MANUAL |
|
|
|
| |
5 Press the $ button to stop playback in the player.
|
|
|
| MULTI/ | REC | A.DUB |
|
| RESET |
|
| + | |||
|
|
| VOL | ||||
|
|
|
|
|
| ||
|
|
|
|
|
|
| – |
|
|
|
| C/REW | PLAY | FF/ B |
|
| SEARCH | DIGITAL ZOOM | SEARCH |
|
|
|
|
|
|
|
| STILL ADV | PAUSE | STILL ADV |
|
| REC | BARS | PHOTO SHOT | INDEX | STOP | INDEX |
|
|
|
|
| SELECT | VAR. |
| PB. |
COUNTER RESET | MODE CHK | ZEBRA | OIS |
|
| ||
| SEARCH |
| ZOOM | ||||
| AUTO | MANUAL |
|
|
|
| |
O Digitally dubbed sound is recorded in the |
| |
| ||
same audio mode as the player’s tape | EDITING | |
regardless of the recorder’s menu setting. | ||
| ||
O When dubbing is performed with “ON” |
| |
selected as the 1394 TC REGEN and 1394 |
| |
UB REGEN item settings on the recorder’s |
| |
| ||
menu, the player’s time code and user’s bit |
| |
can be copied. (P75, P76) |
| |
In this case, check the recorder’s screen to |
| |
verify that the player’s images are being |
| |
received before starting to record. |
| |
If you start recording when there are no |
| |
images being received from the recorder, it |
| |
may not be possible to copy the time code |
| |
and user’s bit properly. |
|
61 (E)
