Illustration shows
DMC-LS75
Dear Customer
Information for Your Safety
Marking sign is located on bottom of the unit
Following Applies only in the U.S.A
FCC Note U.S. only
Only for Canada
Only for U.S.A
If you see this symbol
This camera is not waterproof
About Condensation When the lens is fogged up
When not using the camera for a long period of time
About the Lens
Humid places
Contents
Connecting to other equipment
QAdvanced-Viewing
Others
Format
Standard Accessories
Batteries
CD-ROM
Instructions
Names of the Components
Quick Guide
Insert the batteries. P15
Play back the pictures
Turn the camera on to take pictures
AWhen oxyride batteries are selected
BWhen alkaline/Ni-MH batteries are selected
About the Batteries
Usable batteries
Battery shapes that cannot be used
All or part Pole is flat Covering on Battery is peeled Off
Do not heat or expose to flame
Doctor
Battery life
When not using the batteries for a long period of time
Recording conditions by Cipa standard
Playback time
Inserting/Removing the Batteries/Card Optional
Card
Insert the batteries with the and poles aligned correctly
Remove the batteries after use
About the Built-in Memory/the Card
Card You can record or play back pictures on a card
Setting Date/Time Clock Set
Set the mode dial to Initial setting
MENU/SET button Cursor buttons Mode dial
Press MENU/SET
Advanced
About the Mode Dial
SCN
Changing the menu settings
Using the Menus
Press e/r to select the menu item
Press e/r to select the setting
Setting
Press r to select the setup menu
Press q
About the Setup Menu
Battery Type
Power Save
Clock SET P17
NO.RESET
Economy
Travel Date P55
Beep
Reset
Video OUT
TV Aspect
Dial Display P18
LCD monitor and changes to the display
Select normal picture mode
Using the flash
Taking Pictures
Press the shutter button fully to take the picture
Use AF/AE lock or macro mode w in these situations
There is backlight
Go to page 27
Go to
Focus indication lights when the subject is focused
Press the shutter button fully
Direction detection function
Preventing jitter camera shake
Taking Pictures in Simple Mode
Battery Type
Press MENU/SET to close the menu
Clock SET
Sensitivity P61
Aspect RATIO/PICT.SIZE/ Quality P62
AF Assist Lamp P66 on
Travel Date World Time
Taking Pictures with the Zoom
EZ is an abbreviation of Extended optical Zoom
Picture size
Press e/r to select D.ZOOM and then press q
Press r to select on and then
Press MENU/SET to close
Menu
Checking the Recorded Picture Review
Press r REV
Press w/q to choose a picture
Rotate the zoom lever towards 3 T
Press w/q to select the picture
Playing Back Pictures
Play back the previous picture Play back the next picture
Deleting Pictures
To delete a single picture
While deleting the picture, a appears on the screen
To delete Multi DELETE/ALL
Screen when selecting Multi Delete
Only when selecting Multi Delete
Press w/q to select the picture and then press r to set
Press the Display button to switch to the screen to be used
Recording mode Playback mode
About the LCD Monitor
LCD monitor LCD
About guide line display
Histogram
Example of histogram
Properly Exposed B Under Exposed C Over Exposed Histogram
Canceling High angle mode
Taking Pictures using the Built-in Flash
Press q Press e/r or q to switch the flash setting
Available flash settings by recording mode
Available flash range to take pictures
ISO
Available flash range
ISO Limit
Shutter speed for each flash mode Flash mode Sec
Night Scenery P49
Taking Pictures with the Self-timer
Press w Press e/r or w to switch Self-timer mode
Compensating the Exposure
Press MENU/SET to finish
Over exposed
Properly Exposed
Shooting with the Intelligent ISO mode
Press e/r to select ISO Limit
Then press q
Press e/r to select the menu
Taking Close-up pictures
Use a tripod and the self-timer P43 for best results
Focus range
Scene mode
Press q to enter the scene mode menu screen
Press e/r/w/q to select the scene mode
Scene mode help Information
Technique for Night portrait mode Use the flash
Technique to make this mode more effective
You cannot change the white balance setting
Technique for Night scenery mode
Technique for Party mode
Technique for Candle light mode
Nightscape can be recorded vividly
Age display setting
Birthday setting
Select Birthday SET. and press
MENU/SET
Take clear pictures of the night sky or other dark subjects
Press e/r to select the shutter speed, then press MENU/SET
Shutter speed becomes slower so use a tripod
Technique for Fireworks mode
Allows you to take pictures through an airplane window
Motion picture mode
Press MENU/SET to close the menu
Setting the travel date
Press e/r/w/q to select
Departure date and then press
Press MENU/SET to exit the menu
Canceling the travel date
Take a picture
Press r to select Home and then press MENU/SET
Displaying the time at the travel destination
Press w/q to select your home area and then press MENU/SET
Finishing setting the home area
If you are setting the home area for
Using the REC mode menu
Using the REC mode menu
Using the quick setting
Items you can set
Adjusting the hue for a more natural picture
Balance
AWB
Auto White Balance AWB
Setting the white balance manually White set
Setting the light sensitivity
Sensitivity
ISO sensitivity 100 1250
Setting the aspect ratio of pictures
Aspect Ratio
PICT.SIZE/QUALITY
Number of pixels
Setting the focus method
AF Mode
Quality
About 1-area-focusing High speed
This feature detects jitter and corrects for it
Stabilizer
MODE1
Mode or Starry SKY in scene mode
Burst
Shooting in quick succession
Focus is fixed in the first picture
COL.MODE
AF Assist Lamp
Clock SET
Displaying Multiple Screens Multi Playback
Rotate the zoom lever towards W to display multiple Screens
Press e/r/w/q to select a picture
Example of 25 screens
Press e/r/w/q to select a picture and then press MENU/SET
Press e/r/w/q to select the date to be played back
Select the month Select the date
To return to the 1 screen playback screen
Using the Playback Zoom
To stop using the playback zoom
Rotate the zoom lever towards 3 T to enlarge the picture
Rotate the zoom lever towards W or press MENU/SET
Playing Back Motion pictures
Press w/q to select a picture with a
Then press r to play back
To pause
Favorite P73
Using the Play mode menu
Date Stamp P75
Slide Show
Press e/r to select ALL or
Press e to select Start and then press MENU/SET
By pressing the r, the Slide Show stops
Setting your favorite pictures
Canceling all favorites
Favorite
Press r to select on and then press MENU/SET
Press w/q to select the picture and then press r
Press MENU/SET twice to close the menu
Rotate DISP./ROTATE b To display the picture rotated
Rotate Picture is rotated manually
Date Stamp
Press e/r to select Single or Multi and press MENU/SET
Press w / q to choose a picture, then press r
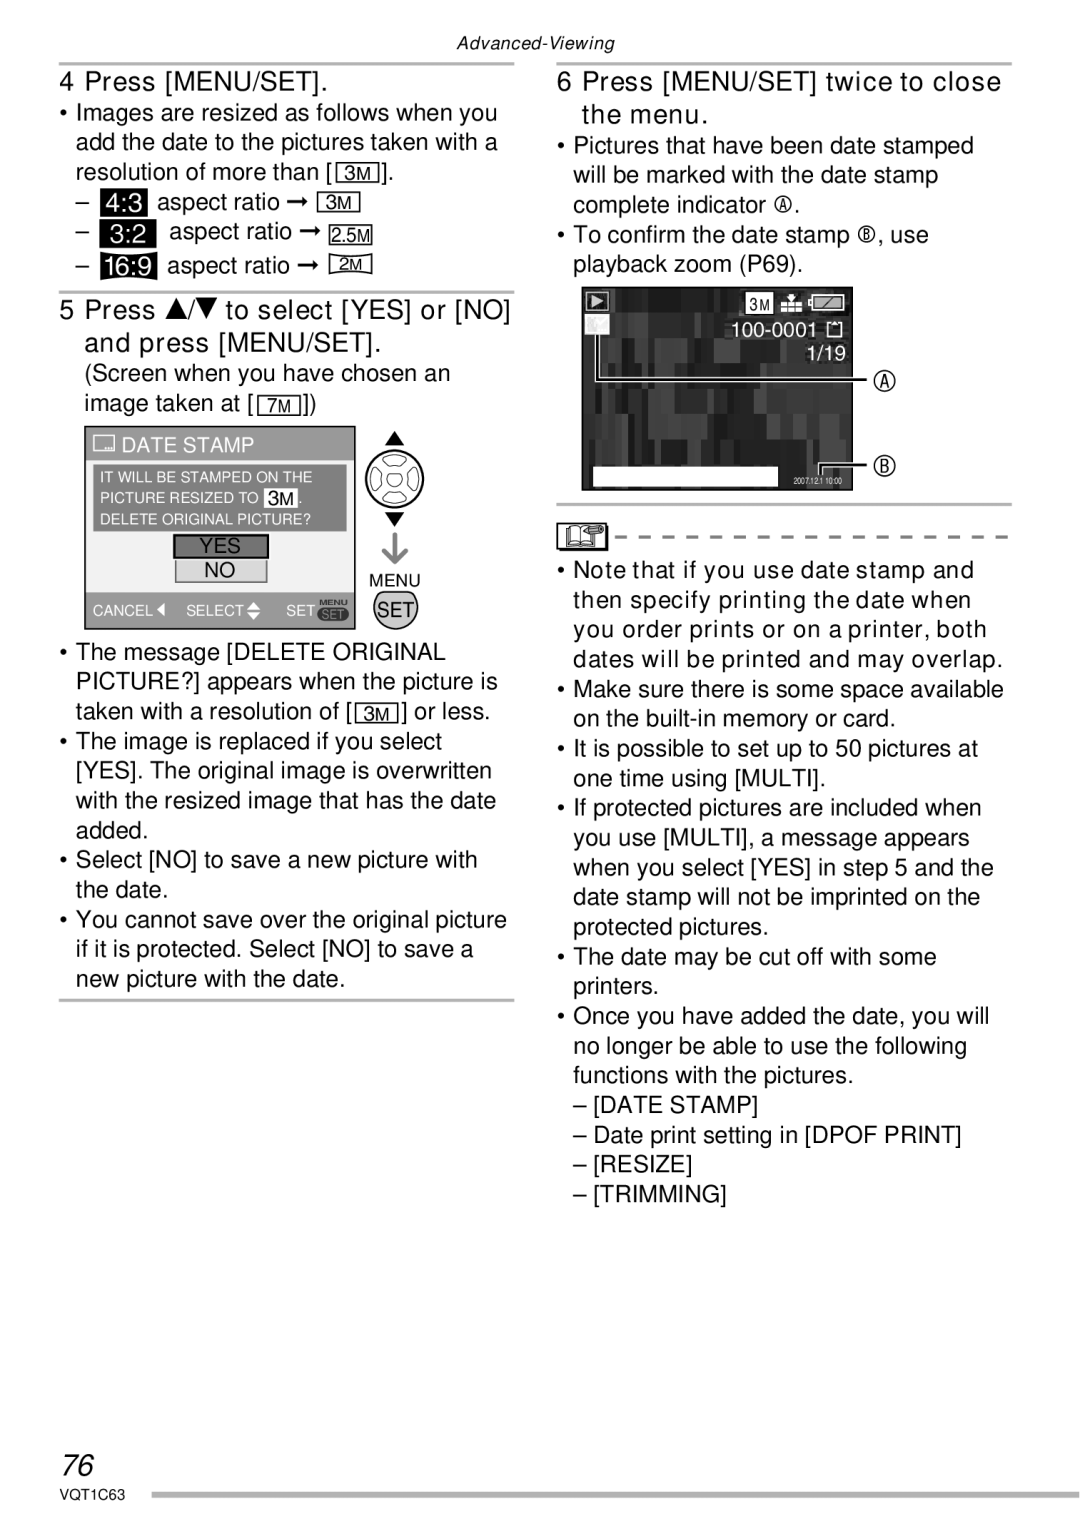
Stamping the date on your pictures
Screen when you have chosen an image taken at 7M
Date print setting in Dpof Print
Press e/r to select YES or no and press MENU/SET
Resize Trimming
Multi setting
Single setting
Dpof Print
To cancel all settings
To print the date
Multi setting/To cancel all settings
Protect
Preventing Accidental Erasure of the Picture
Rotate SET
Press e/r to select YES or no and then press MENU/SET
Press w/q to select the size and then press r
Making the picture smaller
Aspect ratio
Trimming
Copy
Press MENU/SET several times to close the menu
Copying the picture data
Are copied onto the card at one time
Format
Initializing the built-in memory or a card
Connecting to a PC
Set the camera’s mode dial to a mode other than Print mode
Windows
Macintosh
Card
Conditions under which a different folder number is used
Connecting to other equipment
Turn on the camera and the printer Set the mode dial to
Connecting to a PictBridge-compliant Printer
To connect
Press w/q to select the picture and then press MENU/SET
Press e to select Print Start and then press MENU/SET
Disconnect the USB connection cable after printing
Press e Press e/r to select an item and then press MENU/SET
NUM. of Prints
Print with Date
Paper Size
When printing different pictures on 1 sheet of paper
Layout
Playing Back Pictures with a TV Screen
Playing back pictures with the supplied cable
Set the TV ASPECT. P23 Turn the camera and the TV off
Playback pictures on TV with SD Memory Card slot
Screen Display
Normal picture mode
Recording
Playback
Simple mode P28
Enlarge
Knock the unit or put a lot of pressure on it
Dispose of unusable batteries
Bring charged spare batteries when going out
Batteries have a limited life
Message Display
Memory Card Error Format this CARD?
Memory Card Error
Memory Card Error Please Check the Card
Read Error
Troubleshooting
Conditions Causes Subject is not
Focused properly
Is blurred. The optical
Image stabilizer is not
100
LCD
101
102
103
Number of recordable pictures and available recording time
104
Number of recordable pictures
Aspect ratio
105
106
Available recording time In Motion picture mode
VGA Qvga
Specifications
107
108
109
DIGITAL/V.OUT
Digital Camera Accessory System
110
Digital Camera Accessory Order Form
Accessory # Description Price Each Quantity Total Price
111
For USA Customers
Request for Service Notice For USA Only
112
Limited Warranty Coverage
Limited Warranty For USA Only
113
Carry-In or Mail-In Service
114
Centralized Factory Service Center
Customer Services Directory For USA Only
115
116
Précautions à prendre pour les clients canadiens
117
Index
118
119
One Panasonic Way, Secaucus, NJ
Panasonic Puerto Rico, Inc
Panasonic Canada Inc
Ambler Drive, Mississauga, Ontario, L4W 2T3