Taking pictures according to the scene [Scene Mode]
•How to select a scene (→77)
•Using flash in Scene Modes (→66)
[Panorama
Shot]
(Continued)
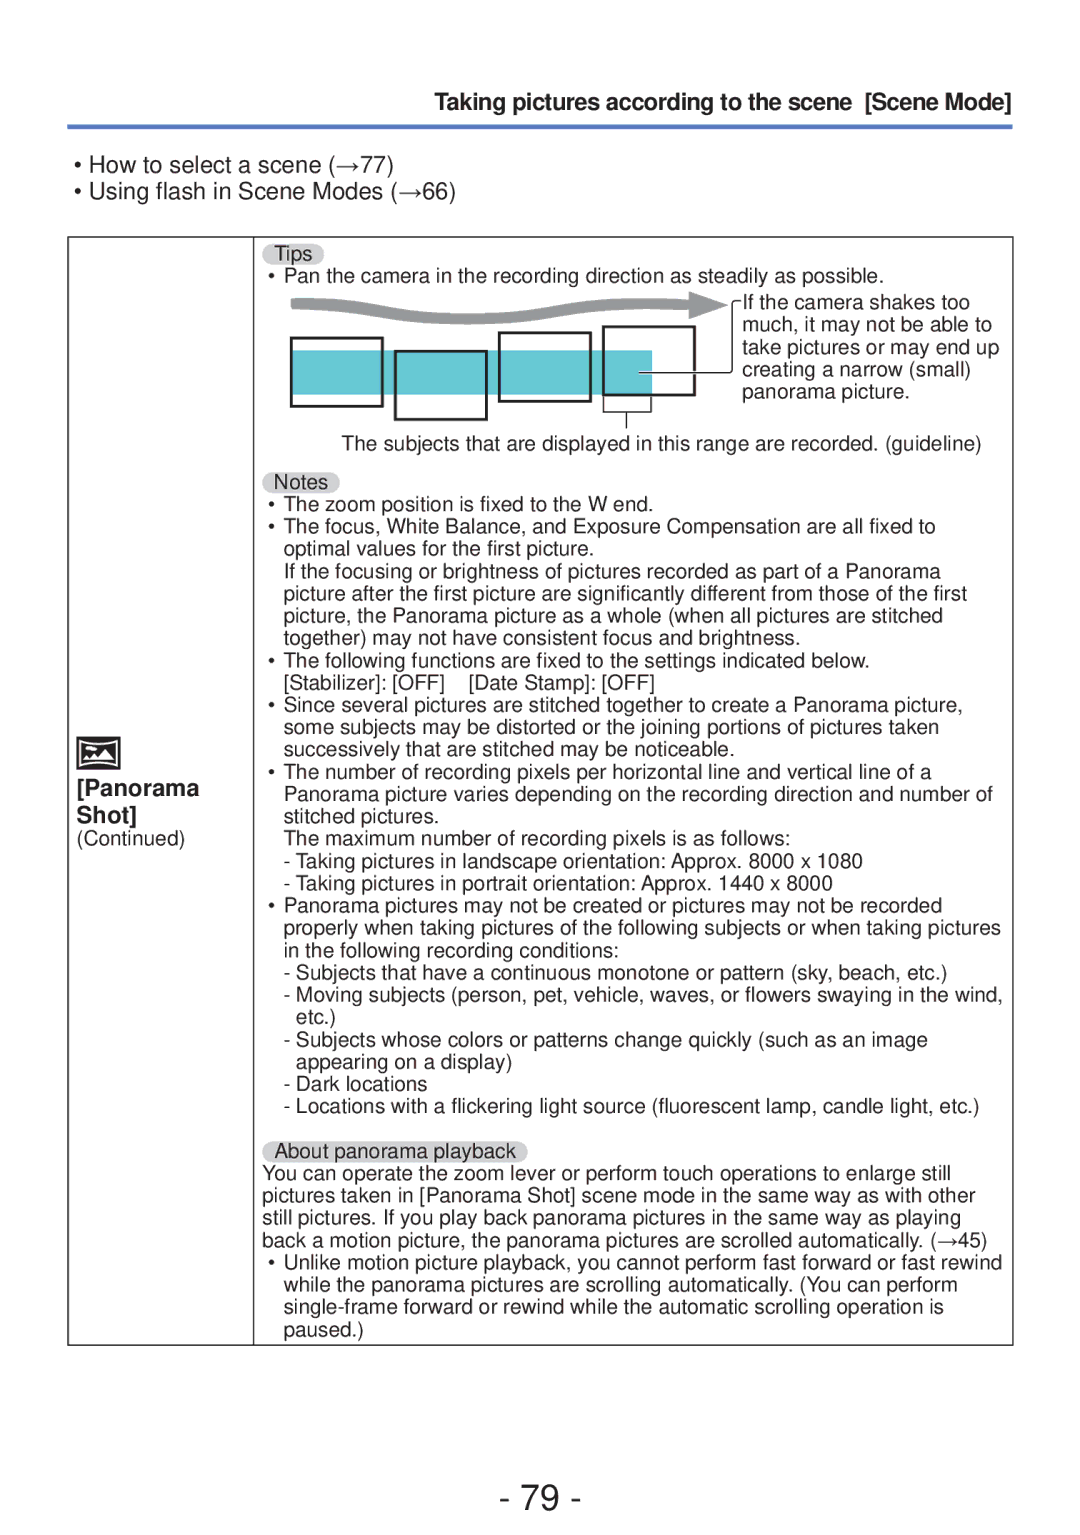
Tips
• Pan the camera in the recording direction as steadily as possible.
If the camera shakes too much, it may not be able to take pictures or may end up creating a narrow (small) panorama picture.
The subjects that are displayed in this range are recorded. (guideline)
Notes
•The zoom position is fixed to the W end.
•The focus, White Balance, and Exposure Compensation are all fixed to optimal values for the first picture.
If the focusing or brightness of pictures recorded as part of a Panorama picture after the first picture are significantly different from those of the first picture, the Panorama picture as a whole (when all pictures are stitched together) may not have consistent focus and brightness.
•The following functions are fixed to the settings indicated below.
[Stabilizer]: [OFF] [Date Stamp]: [OFF]
•Since several pictures are stitched together to create a Panorama picture, some subjects may be distorted or the joining portions of pictures taken successively that are stitched may be noticeable.
•The number of recording pixels per horizontal line and vertical line of a Panorama picture varies depending on the recording direction and number of stitched pictures.
The maximum number of recording pixels is as follows:
-Taking pictures in landscape orientation: Approx. 8000 x 1080
-Taking pictures in portrait orientation: Approx. 1440 x 8000
•Panorama pictures may not be created or pictures may not be recorded properly when taking pictures of the following subjects or when taking pictures in the following recording conditions:
-Subjects that have a continuous monotone or pattern (sky, beach, etc.)
-Moving subjects (person, pet, vehicle, waves, or flowers swaying in the wind, etc.)
-Subjects whose colors or patterns change quickly (such as an image appearing on a display)
-Dark locations
-Locations with a flickering light source (fluorescent lamp, candle light, etc.)
About panorama playback
You can operate the zoom lever or perform touch operations to enlarge still pictures taken in [Panorama Shot] scene mode in the same way as with other still pictures. If you play back panorama pictures in the same way as playing back a motion picture, the panorama pictures are scrolled automatically. (→45)
•Unlike motion picture playback, you cannot perform fast forward or fast rewind while the panorama pictures are scrolling automatically. (You can perform
- 79 -