Preparation
Controls and displays
Controls
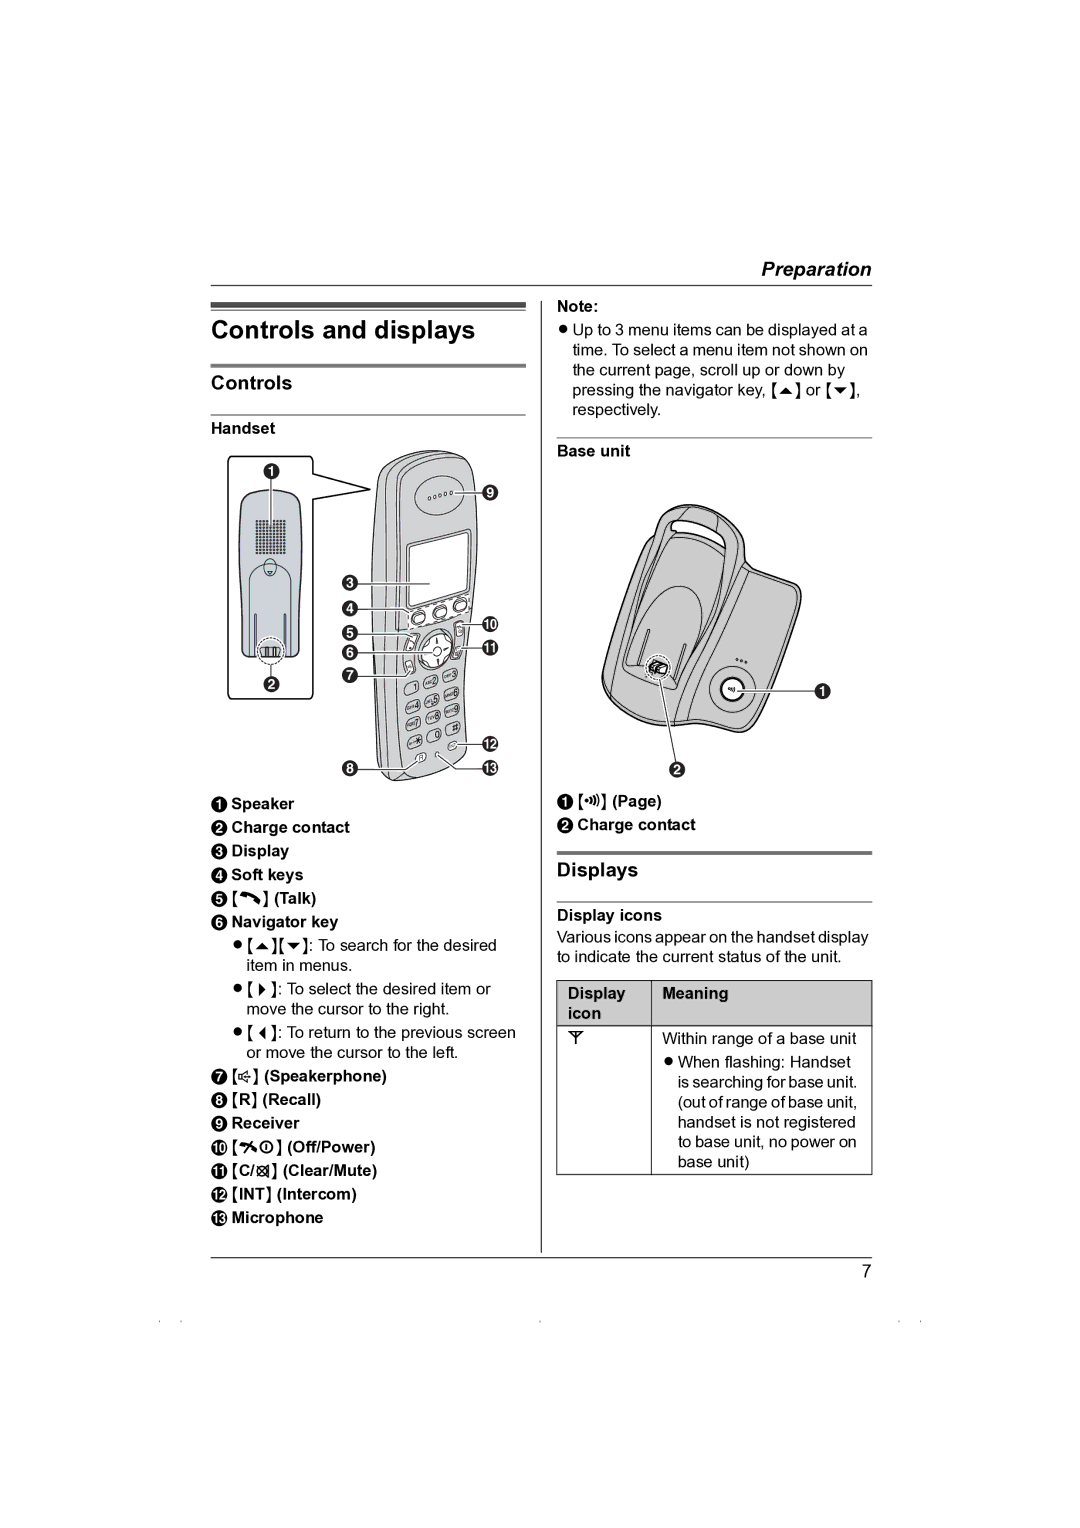
Handset
A
|
|
| I |
| C |
|
|
| D |
| J |
| E | h | |
|
| i | K |
|
| T | |
| F | C |
|
|
|
| |
| G | s |
|
B |
|
| |
|
|
| |
|
| a | L |
| H |
| M |
ASpeaker
BCharge contact
CDisplay
DSoft keys
E{C} (Talk)
FNavigator key
L{e}{v}: To search for the desired item in menus.
L{>}: To select the desired item or move the cursor to the right.
L{<}: To return to the previous screen or move the cursor to the left.
G{s} (Speakerphone)
H{R} (Recall)
IReceiver
J{ih} (Off/Power)
K{C/T} (Clear/Mute)
L{INT} (Intercom)
MMicrophone
Note:
LUp to 3 menu items can be displayed at a time. To select a menu item not shown on the current page, scroll up or down by pressing the navigator key, {e} or {v}, respectively.
Base unit
![]() A
A
B
A {x} (Page)
B Charge contact
Displays
Display icons
Various icons appear on the handset display to indicate the current status of the unit.
Display | Meaning |
icon |
|
wWithin range of a base unit
LWhen flashing: Handset is searching for base unit. (out of range of base unit, handset is not registered to base unit, no power on base unit)
7
