Getting started
Battery installation
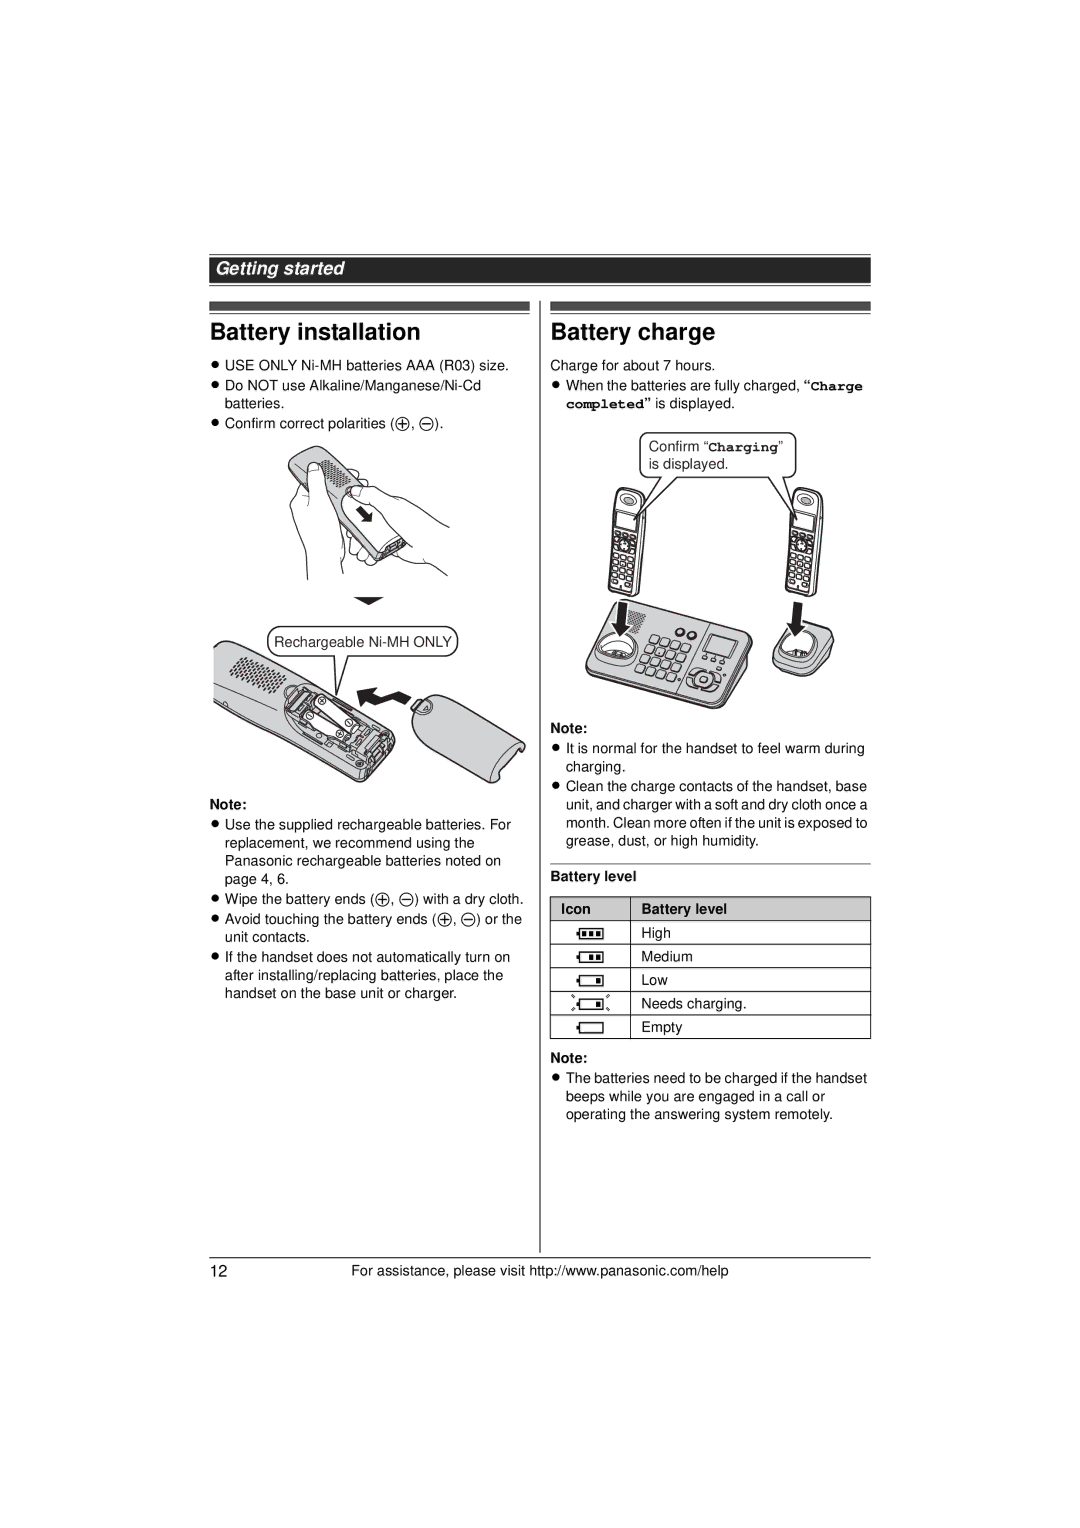
L USE ONLY
LDo NOT use
LConfirm correct polarities (S, T).
Rechargeable
Note:
L Use the supplied rechargeable batteries. For replacement, we recommend using the Panasonic rechargeable batteries noted on page 4, 6.
L Wipe the battery ends (S, T) with a dry cloth.
LAvoid touching the battery ends (S, T) or the unit contacts.
L If the handset does not automatically turn on after installing/replacing batteries, place the handset on the base unit or charger.
Battery charge
Charge for about 7 hours.
L When the batteries are fully charged, “Charge completed” is displayed.
Confirm “Charging” is displayed.
Note:
L It is normal for the handset to feel warm during charging.
L Clean the charge contacts of the handset, base unit, and charger with a soft and dry cloth once a month. Clean more often if the unit is exposed to grease, dust, or high humidity.
Battery level
Icon | Battery level |
1 | High |
2 | Medium |
3 | Low |
034 | Needs charging. |
4 | Empty |
Note:
L The batteries need to be charged if the handset beeps while you are engaged in a call or operating the answering system remotely.
12 | For assistance, please visit http://www.panasonic.com/help |