Useful Information
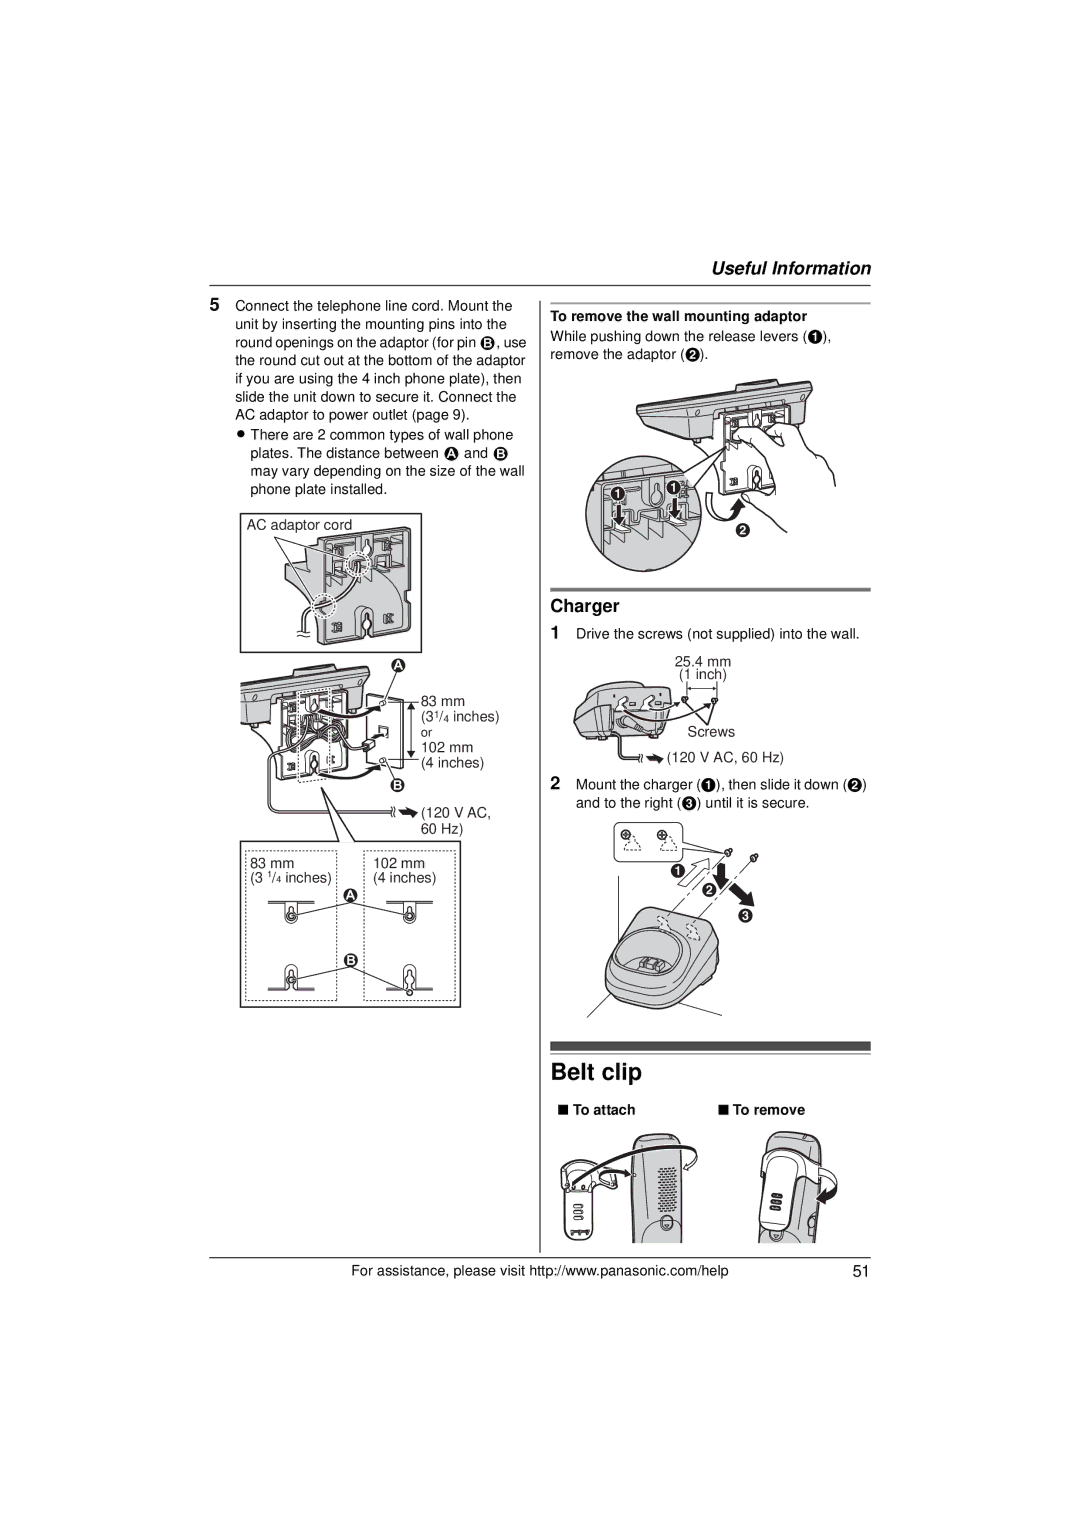
5 Connect the telephone line cord. Mount the | To remove the wall mounting adaptor | |
unit by inserting the mounting pins into the | ||
While pushing down the release levers (A), | ||
round openings on the adaptor (for pin 2, use | ||
remove the adaptor (B). | ||
the round cut out at the bottom of the adaptor | ||
| ||
if you are using the 4 inch phone plate), then |
| |
slide the unit down to secure it. Connect the |
| |
AC adaptor to power outlet (page 9). |
|
L There are 2 common types of wall phone |
|
| |
plates. The distance between 1 and 2 |
|
| |
may vary depending on the size of the wall |
|
| |
phone plate installed. | A | A | |
AC adaptor cord |
|
| B |
|
|
| |
|
| Charger |
|
|
| 1 Drive the screws (not supplied) into the wall. | |
| 1 |
| 25.4 mm |
|
| (1 inch) | |
|
|
| |
| 83 mm |
|
|
| (31/4 inches) |
|
|
| or |
| Screws |
| 102 mm |
| (120 V AC, 60 Hz) |
| (4 inches) |
| |
|
|
| |
| 2 | 2 Mount the charger (A), then slide it down (B) | |
| (120 V AC, | and to the right (C) until it is secure. | |
|
|
| |
| 60 Hz) |
|
|
83 mm | 102 mm |
| A |
(3 1/4 inches) | (4 inches) |
| |
1 |
|
| B |
|
|
| |
|
|
| C |
2 |
|
|
|
Belt clip
■ To attach | ■ To remove |
For assistance, please visit http://www.panasonic.com/help | 51 |
