Editing Mode
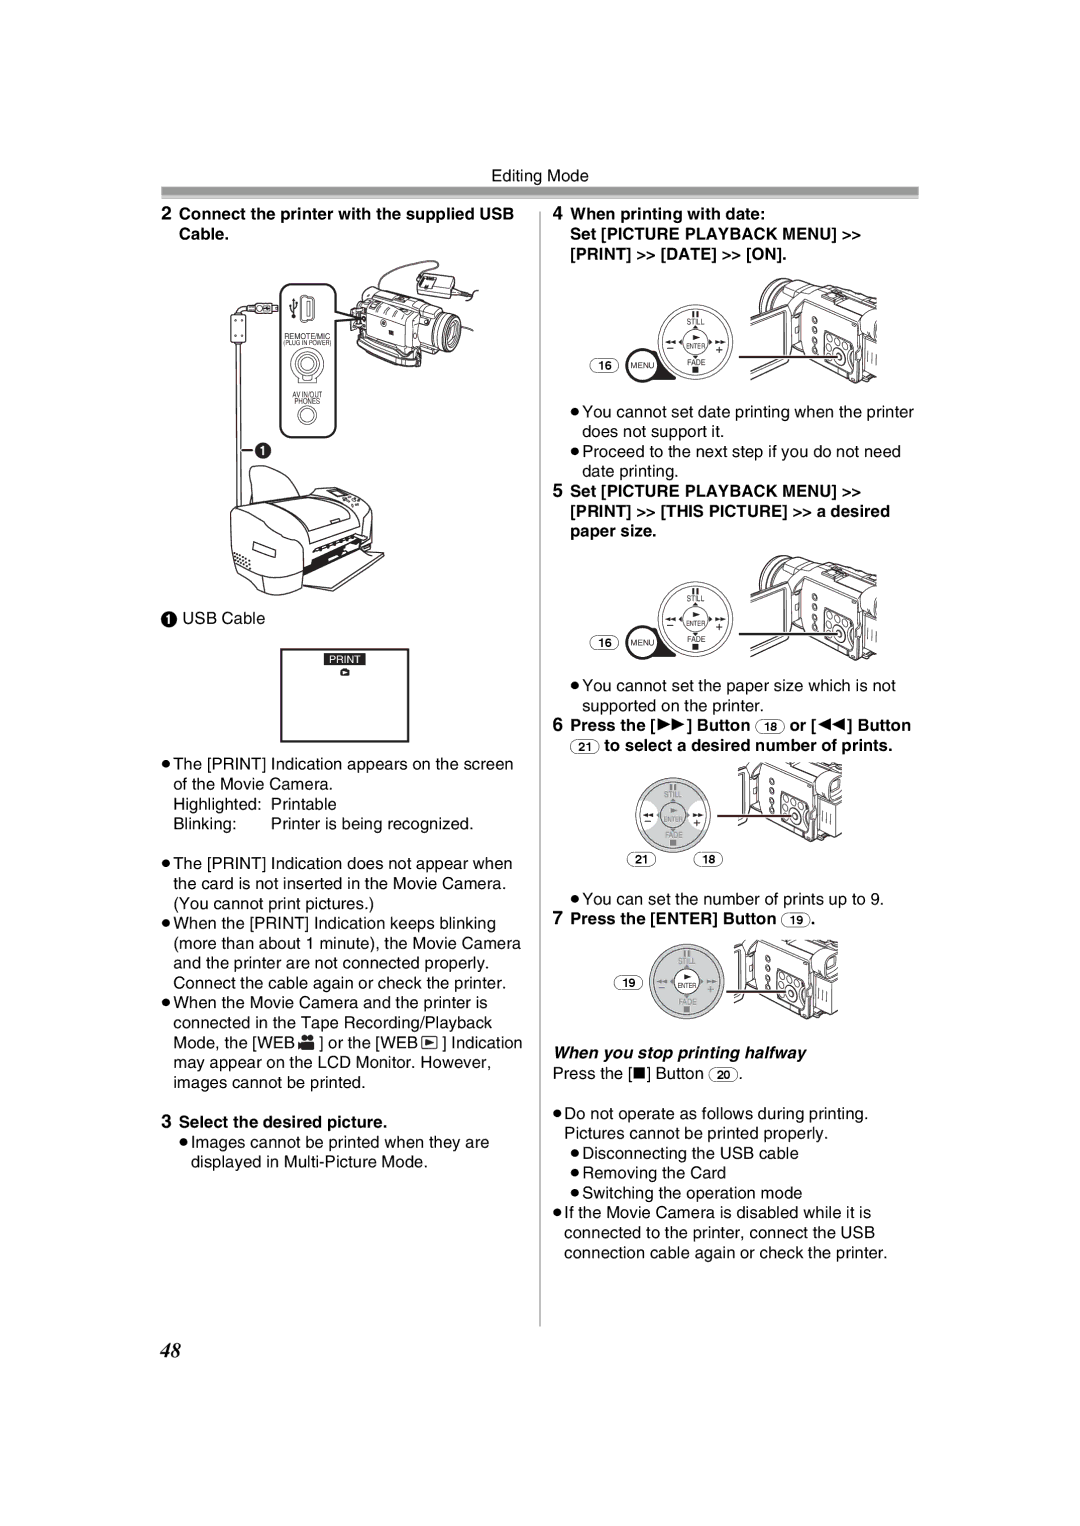
2Connect the printer with the supplied USB Cable.
REMOTE/MIC
(PLUG IN POWER)
AV IN/OUT
PHONES
![]() 1
1
1USB Cable
≥The [PRINT] Indication appears on the screen of the Movie Camera.
Highlighted: | Printable |
Blinking: | Printer is being recognized. |
≥The [PRINT] Indication does not appear when the card is not inserted in the Movie Camera.
(You cannot print pictures.)
≥When the [PRINT] Indication keeps blinking (more than about 1 minute), the Movie Camera and the printer are not connected properly. Connect the cable again or check the printer.
≥When the Movie Camera and the printer is connected in the Tape Recording/Playback Mode, the [WEB ![]() ] or the [WEB
] or the [WEB ![]() ] Indication may appear on the LCD Monitor. However, images cannot be printed.
] Indication may appear on the LCD Monitor. However, images cannot be printed.
3Select the desired picture.
≥Images cannot be printed when they are displayed in
4When printing with date:
Set [PICTURE PLAYBACK MENU] >> [PRINT] >> [DATE] >> [ON].
STILL
(16) |
| ENTER |
MENU | FADE |
≥You cannot set date printing when the printer does not support it.
≥Proceed to the next step if you do not need date printing.
5Set [PICTURE PLAYBACK MENU] >> [PRINT] >> [THIS PICTURE] >> a desired paper size.
STILL
(16) |
| ENTER |
MENU | FADE |
≥You cannot set the paper size which is not supported on the printer.
6Press the [5] Button (18) or [6] Button (21) to select a desired number of prints.
STILL
ENTER
FADE
(21)(18)
≥You can set the number of prints up to 9.
7Press the [ENTER] Button (19).
STILL
(19)![]()
![]() ENTER
ENTER ![]()
![]() FADE
FADE
When you stop printing halfway
Press the [∫] Button (20).
≥Do not operate as follows during printing. Pictures cannot be printed properly. ≥Disconnecting the USB cable ≥Removing the Card
≥Switching the operation mode
≥If the Movie Camera is disabled while it is connected to the printer, connect the USB connection cable again or check the printer.
48